Saltar al contenido principal

X-Street STR Viper

Sólo Prerrequisito
Esta guía solo debería usarse como prerrequisito para otras guías. Por tanto, estará incompleta.

Qué necesitas

  1. X-Street STR Viper, X-Street STR Viper: paso 1, imagen 1 de 1
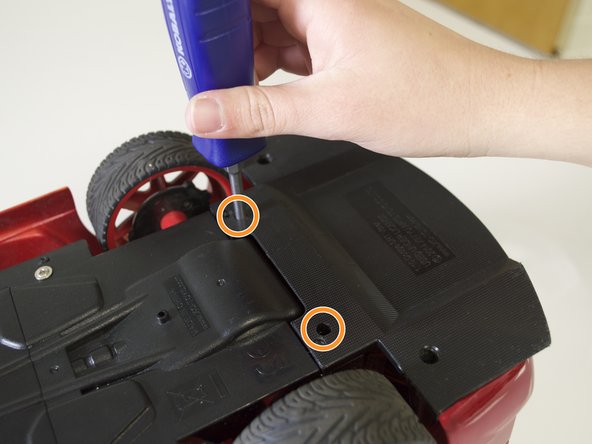
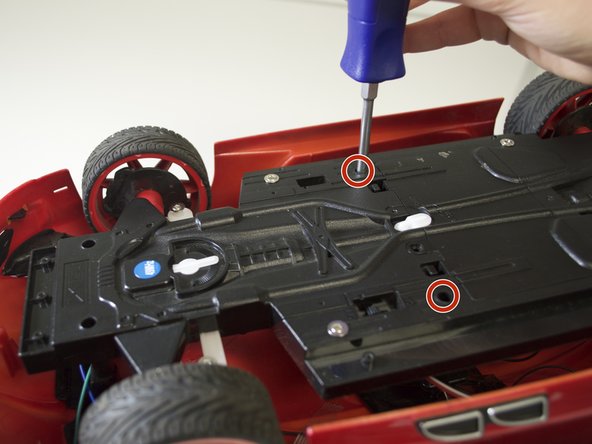
    • Remove the four 3 mm screws from the bottom panel using a 3 mm Philips #1 screwdriver.

  2. X-Street STR Viper: paso 2, imagen 1 de 1
    • Use the 3 mm Philips #1 screwdriver to remove the three 3 mm screws that connect the front panel with the main underside panel. Also remove the 6 mm front panel screw.

    • Remove the bottom panel by pulling the plastic tabs from either side of the car.

  3. X-Street STR Viper: paso 3, imagen 1 de 2 X-Street STR Viper: paso 3, imagen 2 de 2
    • Remove the two 6 mm screws and the two 3 mm screws that connect the back panel to the main underside panel.

    • Remove the two 6 mm screws that connect the rear panel to the body of the car.

  4. X-Street STR Viper: paso 4, imagen 1 de 3 X-Street STR Viper: paso 4, imagen 2 de 3 X-Street STR Viper: paso 4, imagen 3 de 3
    • Remove the two front 6 mm screws and the two middle 6 mm screws.

    • Remove the main underside panel carefully. Excessive force could damage or disconnect the fragile wires attached to this piece.

    • Remove the car shell and place it on the left side of the car.

Conclusión

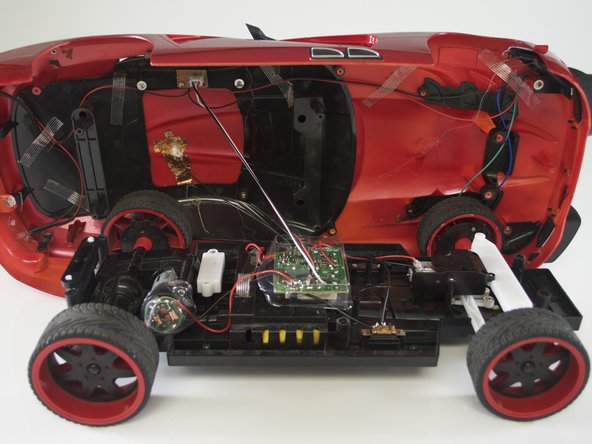
To reassemble your device, follow these instructions in reverse order.

Una persona más ha completado esta guía.

slcombs

Miembro Desde 04/01/15

223 Reputación

2 Guías creadas

Equipo

Cal Poly, Team 12-6, Lancaster Spring 2015 Miembro de Cal Poly, Team 12-6, Lancaster Spring 2015

CPSU-LANCASTER-S15S12G6

4 Miembros

6 Guías creadas

0 comentarios

Agregar Comentario

Ver Estadísticas:

Ultimas 24 horas: 0

Ultimos 7 días: 0

Ultimos 30 días: 0

Todo El Tiempo: 83