Esta versión puede contener ediciones incorrectas. Cambiar a la última instantánea verificada.
Qué necesitas
-
Este paso está sin traducir. Ayuda a traducirlo
-
Using a wedge, pry off the rubber pieces on the bottom of each foot of the toaster.
-
-
Este paso está sin traducir. Ayuda a traducirlo
-
Remove the eight 8mm screws on each toaster foot using a Tri-point Y1 screwdriver.
-
-
Este paso está sin traducir. Ayuda a traducirlo
-
Remove the crumb collector located on the bottom of the toaster.
-
-
Este paso está sin traducir. Ayuda a traducirlo
-
Remove the three 8mm screws using the Tri-point Y1 screwdriver.
-
-
-
Este paso está sin traducir. Ayuda a traducirlo
-
Remove the two 8mm screws on the bottom of the slide lever using a Tri-point Y1 screwdriver.
-
Once the screws are removed, detach the black plastic cover on the bottom of the slide lever.
-
-
Este paso está sin traducir. Ayuda a traducirlo
-
Remove the final 8mm screw in the slide lever.
-
The lever can now pull away from the entire unit.
-
-
Este paso está sin traducir. Ayuda a traducirlo
-
Remove toaster's outer shell by lifting straight up.
-
-
Este paso está sin traducir. Ayuda a traducirlo
-
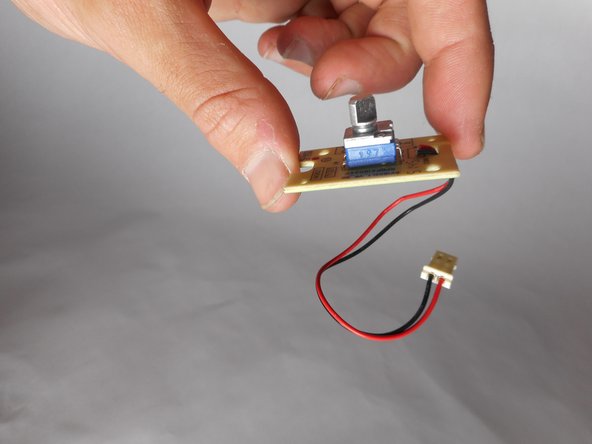
Disconnect the wire cluster that connects the lights and circuit board by pulling apart the two plastic connectors.
-
Remove the outer shell from the device.
-
-
Este paso está sin traducir. Ayuda a traducirlo
-
Remove the two 4mm screws found on each side of the circuit board using a Tri-point Y1 screwdriver.
-


Equipo

Cal Poly, Team S22-G5, Maness Spring 2018 Miembro de Cal Poly, Team S22-G5, Maness Spring 2018
CPSU-MANESS-S18S22G5
4 Miembros
5 Guías creadas