Introducción
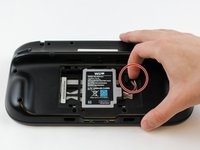
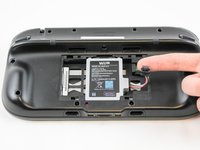
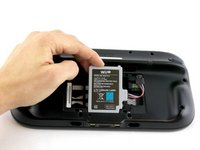
Para extraer la batería, necesitarás la herramienta PH0. (destornillador pequeño) Esta guía te ayudará a extraer la batería y poder quitar la carcasa de la Nintendo.
Qué necesitas
-
-
Coloca el Gamepad boca abajo y retira los dos tornillos de 4,7 mm con un destornillador Phillips de tamaño #00.
-
-
Para volver a montar el dispositivo, sigue estas instrucciones en orden inverso.
Para volver a montar el dispositivo, sigue estas instrucciones en orden inverso.
Cancelar: No complete esta guía.
26 personas más completaron esta guía.
Un agradecimiento especial a estos traductores:
100%
¡ Carlos López (España - Spain) nos está ayudando a reparar el mundo! ¿Quieres contribuir?
Empezar a traducir ›
3 Guide Comments
I'm trying to put in the new battery, but the connector won't snap in even with larger amounts of force. The original battery, on the other hand, snaps right in.
I have the same issue. The connector on the new battery does not snap in. Does anyone know how to fix this issue and ger the connector to snap into place?
It takes a significant amount of pressure (in my opinion) to get the ifixit wii u gamepad battery to snap into place. When I successfully installed this battery, I laid the wii u gamepad screen down with the top of the gamepad facing me. Then I took the flat end of my ifixit spudger, and while pressing down on the battery connector at a 45 degree angle, I pushed the battery connector into the port. You'll be able to tell when the battery is connected all the way. However, this battery does NOT make a snap or click sound to let you know it's connected all the way.
Link to the spudger I used: Spudger
RakmanII -


