Esta traducción podría no reflejar los cambios más recientes añadidos a la guía de referencia. Ayúdanos a actualizar la traducción o revisa la guía original.
Qué necesitas
-
-
Remove the two screws holding the battery in place.
-
Slip your finger into the finger hole provided at the top of the battery and lift to remove it.
-
-
-
Remove the five Phillips screws securing the bottom to the case.
-
Slide the cover up slightly to release the catches holding it in place. This is the view on the right. The mark on the cover should now line up with the second mark on the case of the computer.
-
-
-
-
This is the view on the left before and after sliding the cover. The mark on the cover should now line up with the second mark on the case of the computer.
-
Lift the bottom cover to remove it.
-
-
-
Remove the three Phillips screws securing the fan on the right.
-
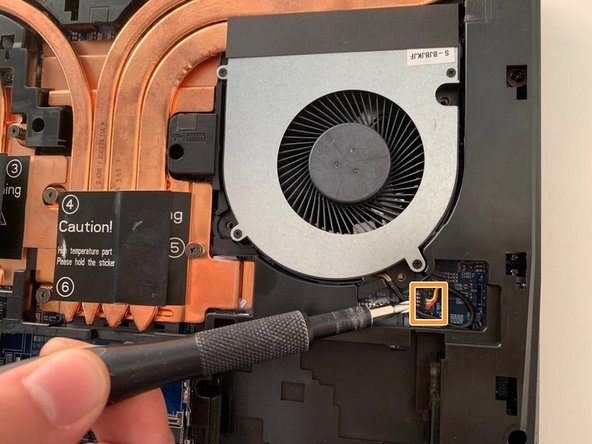
Carefully unplug the fan's power connector.
-
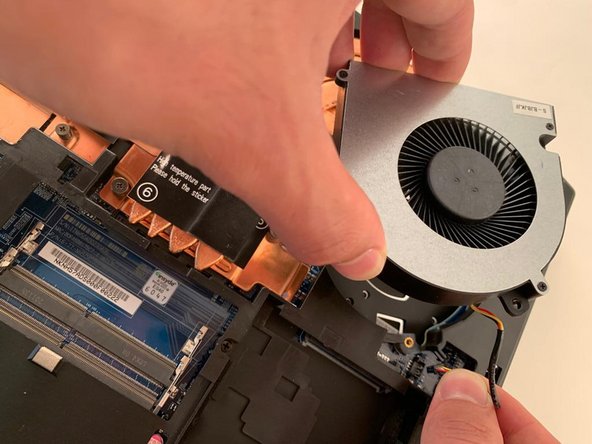
Remove the first fan.
-
-
-
Remove the two Phillips screws securing the left hand fan.
-
Remove the six Phillips heatsink retaining screws .
-
Carefully unplug the fan's power connector.
-
Using the two black tabs as handles, lift and remove the heatsink.
-
To reassemble your device, follow the instructions in reverse order.
To reassemble your device, follow the instructions in reverse order.
Un agradecimiento especial a estos traductores:
50%
¡ Jerry Wheeler nos está ayudando a reparar el mundo! ¿Quieres contribuir?
Empezar a traducir ›


