Introducción
En esta guía aprenderá cómo reemplazar el conjunto de chips en una recortadora Wahl Lithium Ion.
Qué necesitas
-
-
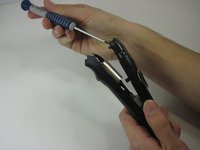
Comienza quitando la empuñadura de goma a lo largo del mango.
-
-


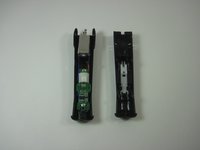


Casi Terminas!
Para volver a ensamblar tu dispositivo, sigue estas instrucciones en orden inverso.
Conclusión
Para volver a ensamblar tu dispositivo, sigue estas instrucciones en orden inverso.
Un agradecimiento especial a estos traductores:
en es
100%

¡ Francisco Javier Saiz Esteban nos está ayudando a reparar el mundo! ¿Quieres contribuir?
Empezar a traducir ›
Equipo

University of Maryland, Team 1-3, Shastany Fall 2013 Miembro de University of Maryland, Team 1-3, Shastany Fall 2013
UMD-SHASTANY-F13S1G3
Miembros de 3
12 Guías creadas