Saltar al contenido principal

Vtech InnoTab 3S Camera Replacement

Qué necesitas

  1. Vtech InnoTab 3S Camera Replacement, Rear Panel: paso 1, imagen 1 de 3 Vtech InnoTab 3S Camera Replacement, Rear Panel: paso 1, imagen 2 de 3 Vtech InnoTab 3S Camera Replacement, Rear Panel: paso 1, imagen 3 de 3
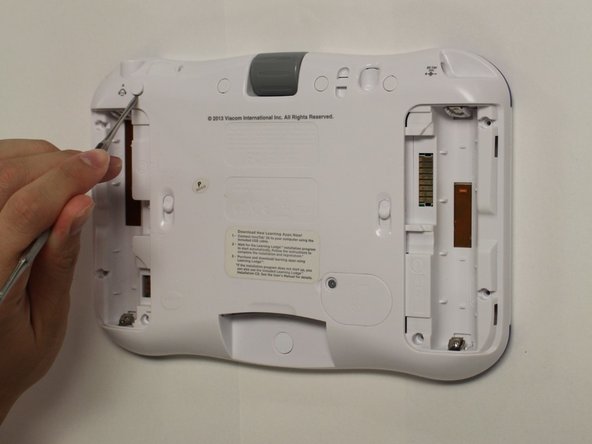
    • While holding the battery compartment locks down, slide the two battery doors outwards from the sides of the device.

    • Remove the batteries from the device.

  2. Vtech InnoTab 3S Camera Replacement: paso 2, imagen 1 de 2 Vtech InnoTab 3S Camera Replacement: paso 2, imagen 2 de 2
    • Remove six 7 mm screws from the interior of the battery compartment using a Phillips #1 screwdriver.

  3. Vtech InnoTab 3S Camera Replacement: paso 3, imagen 1 de 3 Vtech InnoTab 3S Camera Replacement: paso 3, imagen 2 de 3 Vtech InnoTab 3S Camera Replacement: paso 3, imagen 3 de 3
    • Using a nylon spudger, remove the five caps that hide the screws.

    • Potential for device damage: Be careful not to scrape the plastic from the device using the spudger.

    • When removing the caps, hold the spudger vertical to the board to make removal easier. Also try to push in with your spudger pointing towards the bottom of the device.

    • Remove the five 5 mm Phillips #1 screws from the rear panel of the device.

  4. Vtech InnoTab 3S Camera Replacement: paso 4, imagen 1 de 1
    • Carefully remove the rear panel from the front panel of the device.

    • Once the rear panel is removed, you'll be able to see the motherboard and other components within the Vtech InnoTab 3s.

  5. Vtech InnoTab 3S Camera Replacement, Camera: paso 5, imagen 1 de 2 Vtech InnoTab 3S Camera Replacement, Camera: paso 5, imagen 2 de 2
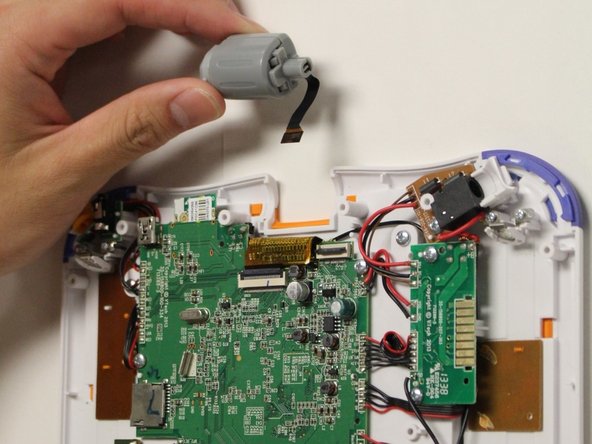
    • Using the tip of your finger, carefully pull the clip upwards to release the camera connection from the motherboard.

    • The connection between the motherboard and the camera is located at the near the top of the device.

    • Remove the camera and the connecting wire from the the clip and attach the replacement cameras connection to the latch on the motherboard.

    • Carefully lower the latch until you hear a click to secure the new camera to the device.

    • Pulling or tugging on the connection between the camera and the circuit board may cause damage to the connection.

Conclusión

To reassemble your device, follow these instructions in reverse order.

2 personas más completaron esta guía.

Karina Garcia

Miembro Desde 08/30/15

824 Reputación

6 Guías creadas

Equipo

USF Tampa, Team 8-2, Eyestone Fall 2015 Miembro de USF Tampa, Team 8-2, Eyestone Fall 2015

USFT-EYESTONE-F15S8G2

4 Miembros

9 Guías creadas

4 comentarios

Where do you get the replacement camera? I can't find them online.

rongennero - Contestar

I just did this whole thing...hoping it was a reset to the camera or something, but no, you need a replacement camera. Might be helpful to add that to the PARTS NEEDED part at the top, instead of saying "no parts required." UUGHHHH!

jpimash - Contestar

Where can i buy the camera?

Stephan Meyer - Contestar

kind of useless to post a replacement guide without suggesting a source for that replacement!!

Glen Fletcher - Contestar

Agregar Comentario

Ver Estadísticas:

Ultimas 24 horas: 0

Ultimos 7 días: 0

Ultimos 30 días: 2

Todo El Tiempo: 1,962