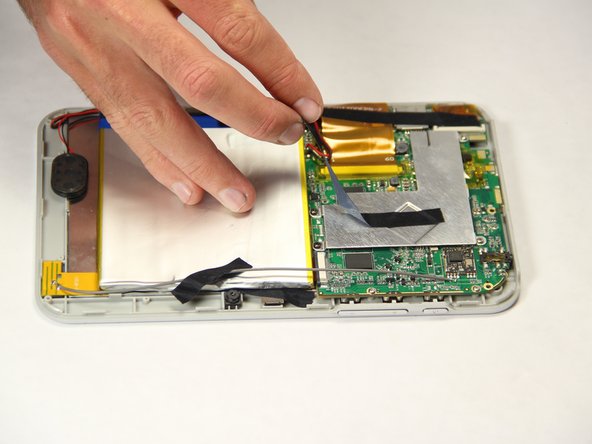
Saltar al contenido principal

Vivitar XO 7 Camera Replacement

Qué necesitas

  1. Vivitar XO 7 Camera Replacement, Back Cover: paso 1, imagen 1 de 1
    • Remove the two 3mm Phillips #00 screws on the bottom of the tablet.

  2. Vivitar XO 7 Camera Replacement: paso 2, imagen 1 de 1
    • With the plastic opening tools, pry open the back cover.

  3. Vivitar XO 7 Camera Replacement: paso 3, imagen 1 de 1
    • Remove the back cover from the tablet.

  4. Vivitar XO 7 Camera Replacement, Battery: paso 4, imagen 1 de 2 Vivitar XO 7 Camera Replacement, Battery: paso 4, imagen 2 de 2
    • Peel off the black pieces of tape from the internal components.

  5. Vivitar XO 7 Camera Replacement: paso 5, imagen 1 de 2 Vivitar XO 7 Camera Replacement: paso 5, imagen 2 de 2
    • Carefully remove the battery from the tablet.

  6. Vivitar XO 7 Camera Replacement: paso 6, imagen 1 de 2 Vivitar XO 7 Camera Replacement: paso 6, imagen 2 de 2
    • With the tweezers, firmly grab the wire at the base and pull to disconnect the battery from the motherboard.

  7. Vivitar XO 7 Camera Replacement, Camera: paso 7, imagen 1 de 1
    • Peel off black tape that is holding the camera in place.

  8. Vivitar XO 7 Camera Replacement: paso 8, imagen 1 de 1
    • Carefully disconnect the ribbon cables from the motherboard.

  9. Vivitar XO 7 Camera Replacement: paso 9, imagen 1 de 2 Vivitar XO 7 Camera Replacement: paso 9, imagen 2 de 2
    • Using the tweezers, firmly grab wires and pull to disconnect them from the motherboard.

Conclusión

To reassemble your device, follow these instructions in reverse order.

Braanah Craig

Miembro Desde 01/20/15

374 Reputación

2 Guías creadas

Equipo

USF Tampa, Team 11-1, Blackwell Winter 2015 Miembro de USF Tampa, Team 11-1, Blackwell Winter 2015

USFT-BLACKWELL-W15S11G1

4 Miembros

10 Guías creadas

0 comentarios

Agregar Comentario

Ver Estadísticas:

Ultimas 24 horas: 1

Ultimos 7 días: 2

Ultimos 30 días: 2

Todo El Tiempo: 223