Introducción
This guide provides instructions for removal of the internal battery from the 781HD DVR camcorder. Replacement of the battery requires soldering and removal of potting compound from the terminals. This guide should be followed only if the reader is comfortable with soldering on small electrical boards.
Qué necesitas
-
-
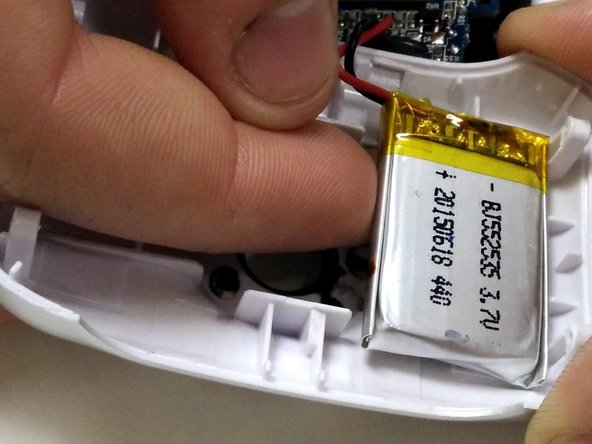
Begin with the camcorder lens up on a clear working surface.
-
Remove the two 4mm Phillips #1 screws holding the switch plate in place. Rotate the device 180 degrees and repeat for the screws on the opposite side.
-
-
-
-
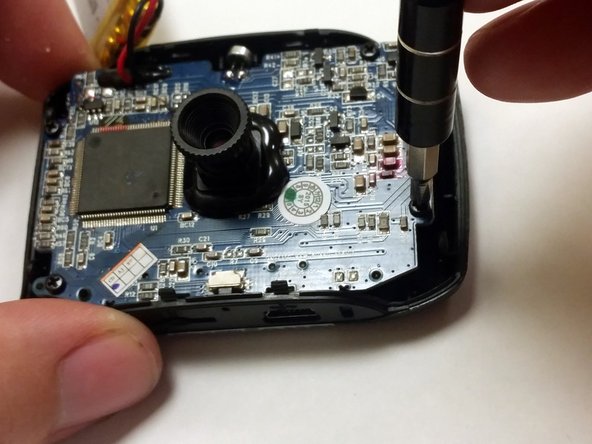
Using a P1 screwdriver, remove the 4mm screws holding the motherboard into the case.
-
-
-
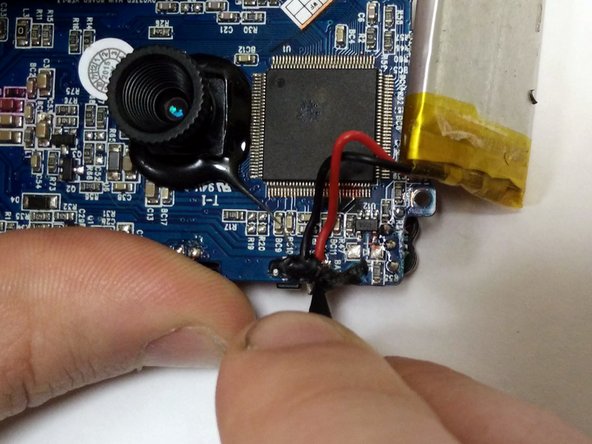
The battery connections are reinforced by black potting compound. Gently pry it away with a plastic spudger.
-


To reassemble your device, follow these instructions in reverse order.
To reassemble your device, follow these instructions in reverse order.
Cancelar: No complete esta guía.
4 personas más completaron esta guía.
Equipo

IUPUI, Team 54-6, Wilson Spring 2016 Miembro de IUPUI, Team 54-6, Wilson Spring 2016
IUPUI-WILSON-S16S54G6
3 Miembros
10 Guías creadas
2 comentarios
Where can I get a battery
Any 3.7v Lithium Ion cell will work, truth be told, but if you google the writing you find on the factory battery once you open it, you will likely find dozens of vendors on ebay, amazon, alibaba, wish, etc. personally, i removed the battery and ran leads from the factory battery wires to an external battery pack that holds an 18650 cell which significantly increased available maH