Saltar al contenido principal

Visual Land Prestige Elite 7Q LCD Screen Replacement

Qué necesitas

  1. Visual Land Prestige Elite 7Q LCD Screen Replacement, LCD Screen: paso 1, imagen 1 de 2 Visual Land Prestige Elite 7Q LCD Screen Replacement, LCD Screen: paso 1, imagen 2 de 2
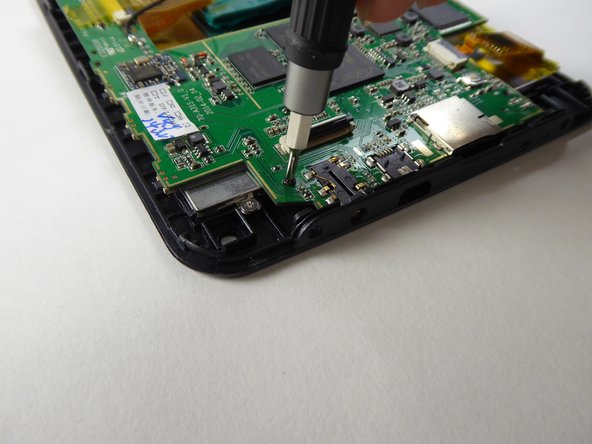
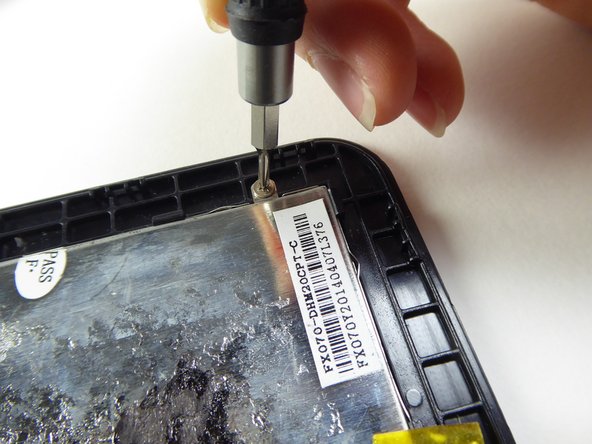
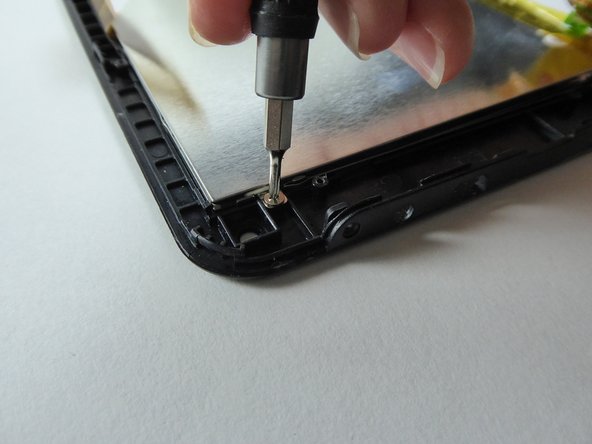
    • At the bottom of the tablet, remove the two 3.6mm screws with a Phillips #000 screwdriver.
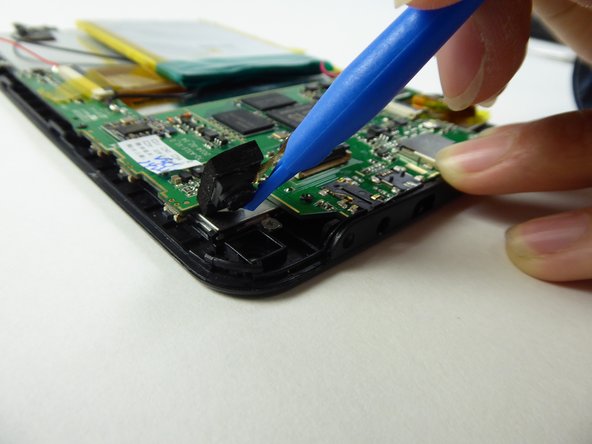
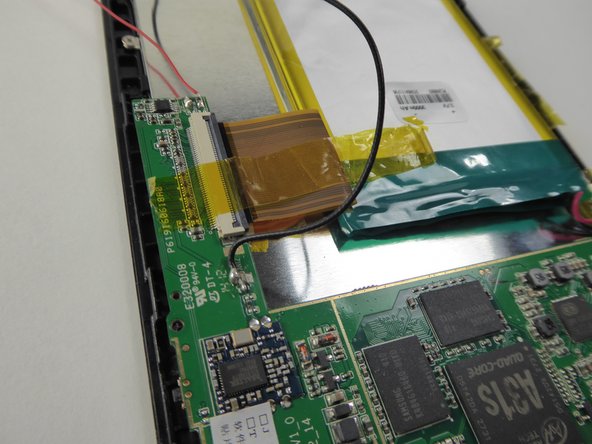
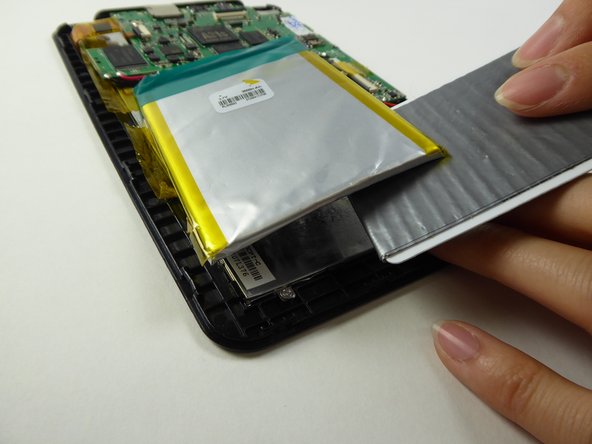
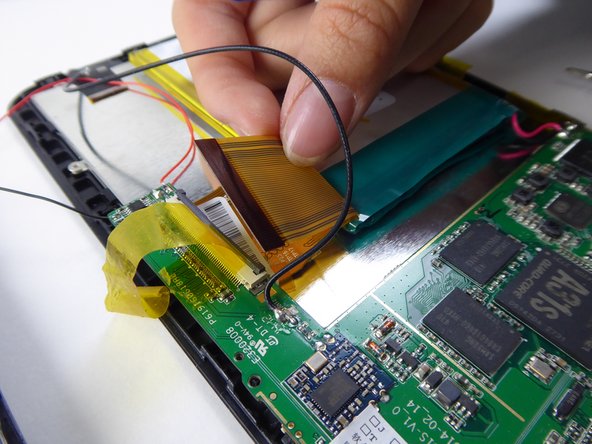
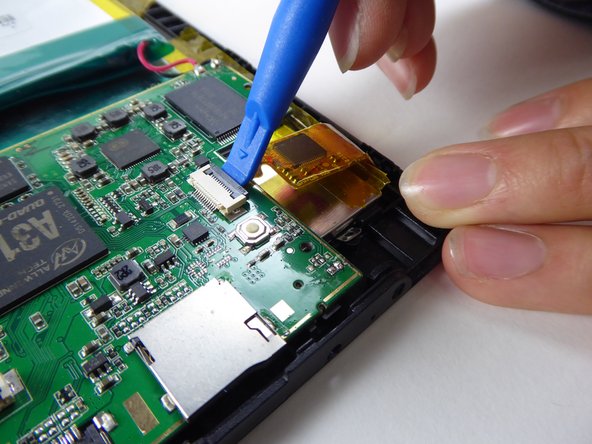
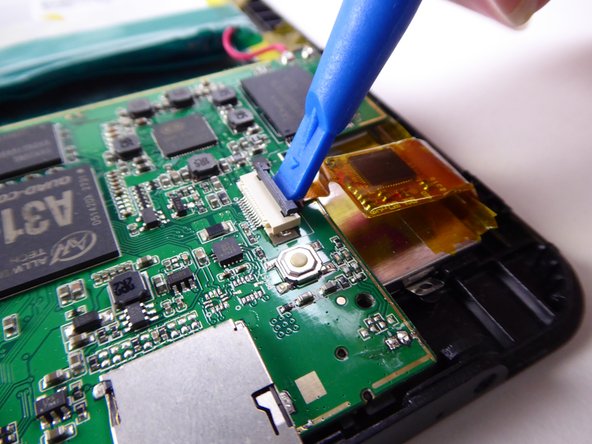
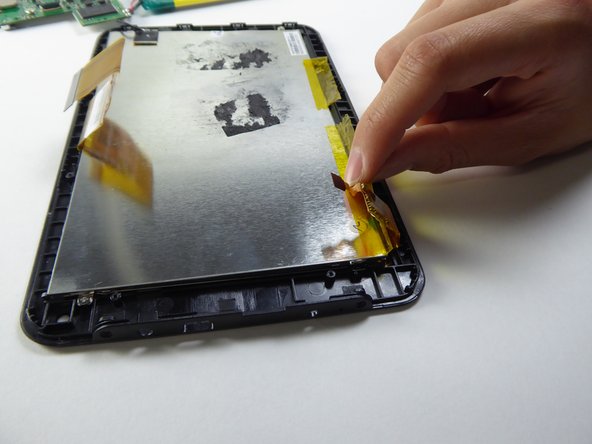
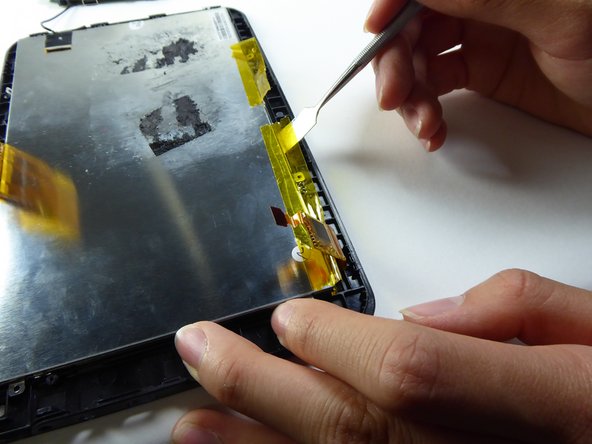
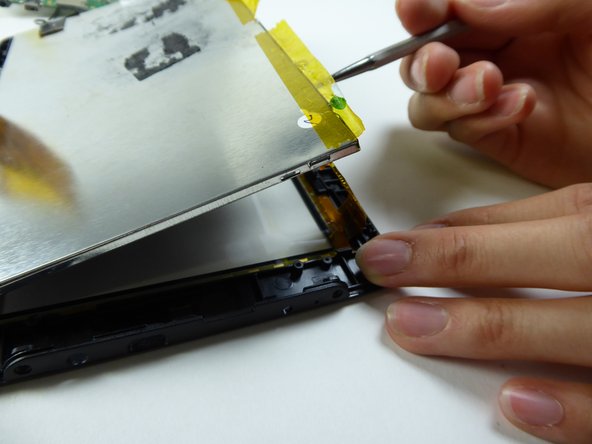
  2. Visual Land Prestige Elite 7Q LCD Screen Replacement: paso 2, imagen 1 de 2 Visual Land Prestige Elite 7Q LCD Screen Replacement: paso 2, imagen 2 de 2
    • Wedge a plastic opening tool into the edges of the tablet to pry it open.

  3. Visual Land Prestige Elite 7Q LCD Screen Replacement: paso 3, imagen 1 de 3 Visual Land Prestige Elite 7Q LCD Screen Replacement: paso 3, imagen 2 de 3 Visual Land Prestige Elite 7Q LCD Screen Replacement: paso 3, imagen 3 de 3
    • Wedge a curved metal spudger to remove the speaker.

  4. Visual Land Prestige Elite 7Q LCD Screen Replacement: paso 4, imagen 1 de 3 Visual Land Prestige Elite 7Q LCD Screen Replacement: paso 4, imagen 2 de 3 Visual Land Prestige Elite 7Q LCD Screen Replacement: paso 4, imagen 3 de 3
    • Use a Phillips #000 screwdriver to remove the two 3.6mm screws.

  5. Visual Land Prestige Elite 7Q LCD Screen Replacement: paso 5, imagen 1 de 3 Visual Land Prestige Elite 7Q LCD Screen Replacement: paso 5, imagen 2 de 3 Visual Land Prestige Elite 7Q LCD Screen Replacement: paso 5, imagen 3 de 3
    • Use a plastic opening tool to lift the black tab.

  6. Visual Land Prestige Elite 7Q LCD Screen Replacement: paso 6, imagen 1 de 2 Visual Land Prestige Elite 7Q LCD Screen Replacement: paso 6, imagen 2 de 2
    • Carefully remove the ribbon cable from the black tab.

  7. Visual Land Prestige Elite 7Q LCD Screen Replacement: paso 7, imagen 1 de 2 Visual Land Prestige Elite 7Q LCD Screen Replacement: paso 7, imagen 2 de 2
    • Use a plastic opening tool to remove the camera.

  8. Visual Land Prestige Elite 7Q LCD Screen Replacement: paso 8, imagen 1 de 2 Visual Land Prestige Elite 7Q LCD Screen Replacement: paso 8, imagen 2 de 2
    • Use a Phillips #000 screwdriver to remove the 3.6mm screw.

  9. Visual Land Prestige Elite 7Q LCD Screen Replacement: paso 9, imagen 1 de 3 Visual Land Prestige Elite 7Q LCD Screen Replacement: paso 9, imagen 2 de 3 Visual Land Prestige Elite 7Q LCD Screen Replacement: paso 9, imagen 3 de 3
    • Lift the tape holding down the battery.

  10. Visual Land Prestige Elite 7Q LCD Screen Replacement: paso 10, imagen 1 de 2 Visual Land Prestige Elite 7Q LCD Screen Replacement: paso 10, imagen 2 de 2
    Herramienta utilizada en este paso:
    Plastic Cards
    $2.99
    Comprar
  11. Visual Land Prestige Elite 7Q LCD Screen Replacement: paso 11, imagen 1 de 3 Visual Land Prestige Elite 7Q LCD Screen Replacement: paso 11, imagen 2 de 3 Visual Land Prestige Elite 7Q LCD Screen Replacement: paso 11, imagen 3 de 3
    • Use a plastic opening tool to lift the black tab.

  12. Visual Land Prestige Elite 7Q LCD Screen Replacement: paso 12, imagen 1 de 2 Visual Land Prestige Elite 7Q LCD Screen Replacement: paso 12, imagen 2 de 2
    • Carefully remove the ribbon cable from the black tab.

  13. Visual Land Prestige Elite 7Q LCD Screen Replacement: paso 13, imagen 1 de 3 Visual Land Prestige Elite 7Q LCD Screen Replacement: paso 13, imagen 2 de 3 Visual Land Prestige Elite 7Q LCD Screen Replacement: paso 13, imagen 3 de 3
    • Use a plastic opening tool to lift the black tab.

  14. Visual Land Prestige Elite 7Q LCD Screen Replacement: paso 14, imagen 1 de 1
    • Lift to remove the battery and motherboard from the tablet.

  15. Visual Land Prestige Elite 7Q LCD Screen Replacement: paso 15, imagen 1 de 3 Visual Land Prestige Elite 7Q LCD Screen Replacement: paso 15, imagen 2 de 3 Visual Land Prestige Elite 7Q LCD Screen Replacement: paso 15, imagen 3 de 3
    • Lift the tape on the sides.

  16. Visual Land Prestige Elite 7Q LCD Screen Replacement: paso 16, imagen 1 de 3 Visual Land Prestige Elite 7Q LCD Screen Replacement: paso 16, imagen 2 de 3 Visual Land Prestige Elite 7Q LCD Screen Replacement: paso 16, imagen 3 de 3
    • Use a Phillips #000 screwdriver to remove the three 2.5mm screws.

  17. Visual Land Prestige Elite 7Q LCD Screen Replacement: paso 17, imagen 1 de 3 Visual Land Prestige Elite 7Q LCD Screen Replacement: paso 17, imagen 2 de 3 Visual Land Prestige Elite 7Q LCD Screen Replacement: paso 17, imagen 3 de 3
    • Be careful on this step - the screen is fragile and can break easily.

    • Wedge a metal spudger underneath the LCD to remove it.

    • Replace the LCD.

Conclusión

To reassemble your device, follow these instructions in reverse order.

2 personas más completaron esta guía.

Equipo

UC Davis, Team 2-1, Oliver Fall 2016 Miembro de UC Davis, Team 2-1, Oliver Fall 2016

UCD-OLIVER-F16S2G1

5 Miembros

12 Guías creadas

0 comentarios

Agregar Comentario

Ver Estadísticas:

Ultimas 24 horas: 0

Ultimos 7 días: 0

Ultimos 30 días: 0

Todo El Tiempo: 352