Saltar al contenido principal

Visual Land Prestige 7L Screen Replacement

Qué necesitas

  1. Visual Land Prestige 7L Screen Replacement, Back Panel: paso 1, imagen 1 de 2 Visual Land Prestige 7L Screen Replacement, Back Panel: paso 1, imagen 2 de 2
    • Remove the two 8mm Phillips Head screws located at the bottom of your device.

  2. Visual Land Prestige 7L Screen Replacement: paso 2, imagen 1 de 3 Visual Land Prestige 7L Screen Replacement: paso 2, imagen 2 de 3 Visual Land Prestige 7L Screen Replacement: paso 2, imagen 3 de 3
    • Insert the spudger between the two pieces of the case around the media ports and pry them apart.

    • We found the best way to get the spudger inside the case was to insert in into the SD card slot. Be sure to only insert the spudger a shallow amount and be careful not to damage any of the inside of the device.

    • Finish unsnapping each plastic piece holding the device together along the bottom.

  3. Visual Land Prestige 7L Screen Replacement: paso 3, imagen 1 de 3 Visual Land Prestige 7L Screen Replacement: paso 3, imagen 2 de 3 Visual Land Prestige 7L Screen Replacement: paso 3, imagen 3 de 3
    • Move the spudger down the rest of the case, separating each side, and finally the top.

    • Pull the back off and place it to the side.

    • Without a back panel for protection, be sure place your device on the table screen-side down to avoid damaging the internal circuitry.

  4. Visual Land Prestige 7L Screen Replacement, Screen: paso 4, imagen 1 de 3 Visual Land Prestige 7L Screen Replacement, Screen: paso 4, imagen 2 de 3 Visual Land Prestige 7L Screen Replacement, Screen: paso 4, imagen 3 de 3
    • Remove the tape holding the motherboard, wires, and connecters in place.

  5. Visual Land Prestige 7L Screen Replacement: paso 5, imagen 1 de 3 Visual Land Prestige 7L Screen Replacement: paso 5, imagen 2 de 3 Visual Land Prestige 7L Screen Replacement: paso 5, imagen 3 de 3
    • Unclip the three connectors by gently pulling the rear panel up and away from the motherboard.

    • For more information on unclipping connectors see this How To Guide

    • Pull out each of the gold connections.

    • The gold connections will disconnect from the motherboard, but not entirely from the device. Let them sit loosely where they are attached and be careful not to tear them when working in their proximity on the device.

  6. Visual Land Prestige 7L Screen Replacement: paso 6, imagen 1 de 1
    • Remove the seven 4mm Phillips Head screws that hold the touchscreen panel and motherboard together.

  7. Visual Land Prestige 7L Screen Replacement: paso 7, imagen 1 de 3 Visual Land Prestige 7L Screen Replacement: paso 7, imagen 2 de 3 Visual Land Prestige 7L Screen Replacement: paso 7, imagen 3 de 3
    • Gently flip over the motherboard and begin to use the spudger to pry away the touchscreen panel from the front screen.

Conclusión

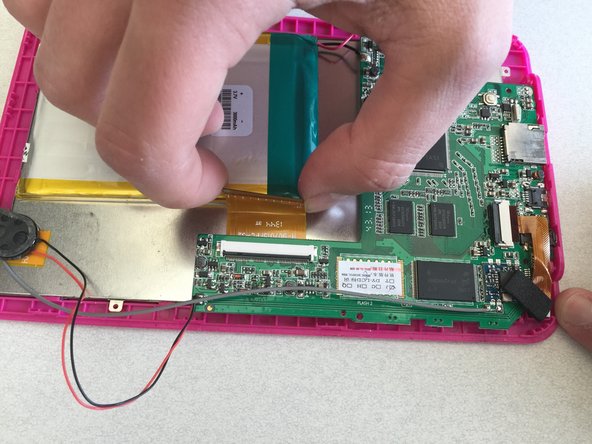
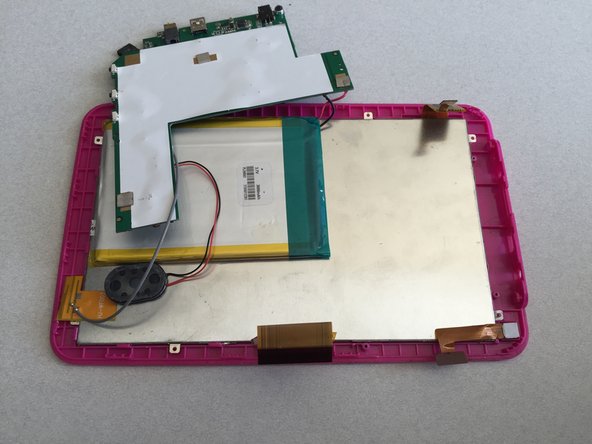
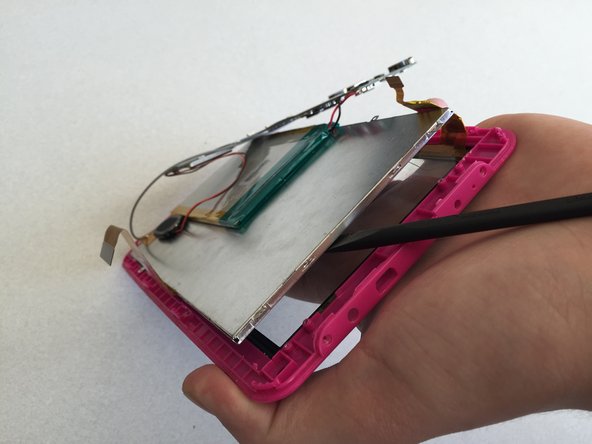
To reassemble your device, follow these instructions in reverse order.

3 personas más completaron esta guía.

Zach

Miembro Desde 01/28/15

486 Reputación

2 Guías creadas

Equipo

Penn State, Team 2-25, Kaschak Winter 2015 Miembro de Penn State, Team 2-25, Kaschak Winter 2015

PSU-KASCHAK-W15S2G25

4 Miembros

4 Guías creadas

Un comentario

Muchas gracias por tan importante aporte a la comunidad; desde Colombia  con respeto. Atte. GAZUTEC

GAZUTEC - Contestar

Agregar Comentario

Ver Estadísticas:

Ultimas 24 horas: 0

Ultimos 7 días: 1

Ultimos 30 días: 1

Todo El Tiempo: 653