Saltar al contenido principal

Sony MV1 CamCorder Disassembly

  1. Sony MV1 CamCorder Disassembly, Removing the back cover: paso 1, imagen 1 de 3 Sony MV1 CamCorder Disassembly, Removing the back cover: paso 1, imagen 2 de 3 Sony MV1 CamCorder Disassembly, Removing the back cover: paso 1, imagen 3 de 3
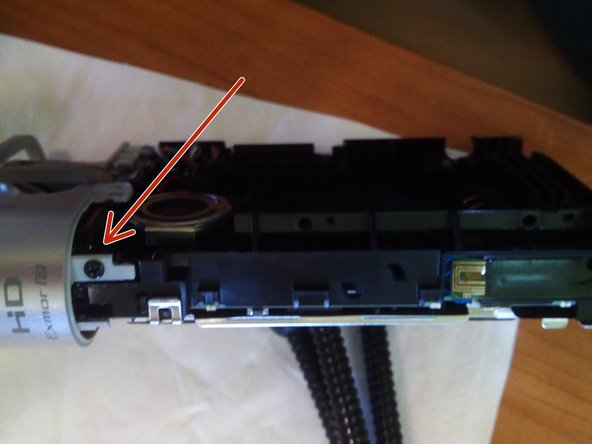
    • Unscrew the two screws next to the battery compartment.

    • Then the four on the bottom.

    • Now you can pull off the back cover.

  2. Sony MV1 CamCorder Disassembly, Removing the screen cover: paso 2, imagen 1 de 3 Sony MV1 CamCorder Disassembly, Removing the screen cover: paso 2, imagen 2 de 3 Sony MV1 CamCorder Disassembly, Removing the screen cover: paso 2, imagen 3 de 3
    • Remove the two Phillips head screws on the side of the camera.

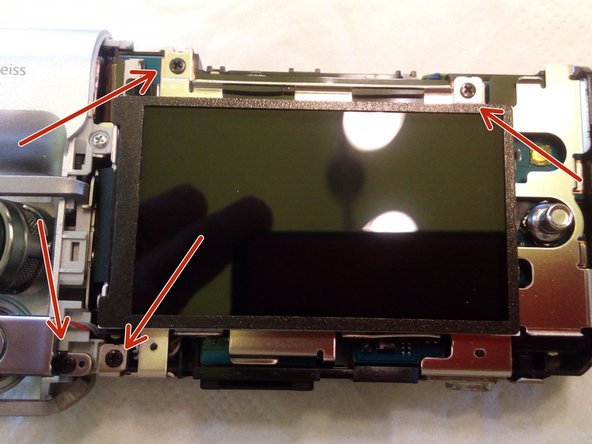
    • Now loosen the bracket holding the camera.

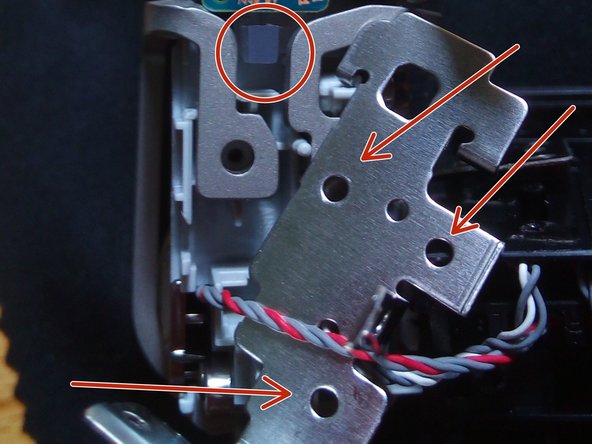
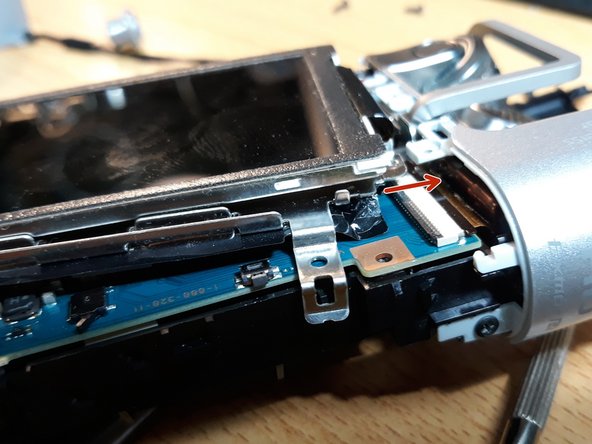
    • Now unscrew the two screws as seen in the third image.

  3. Sony MV1 CamCorder Disassembly, Removing the metal screen support: paso 3, imagen 1 de 3 Sony MV1 CamCorder Disassembly, Removing the metal screen support: paso 3, imagen 2 de 3 Sony MV1 CamCorder Disassembly, Removing the metal screen support: paso 3, imagen 3 de 3
    • Insert instructions here

  4. Sony MV1 CamCorder Disassembly, Removing the microphone/lens support: paso 4, imagen 1 de 3 Sony MV1 CamCorder Disassembly, Removing the microphone/lens support: paso 4, imagen 2 de 3 Sony MV1 CamCorder Disassembly, Removing the microphone/lens support: paso 4, imagen 3 de 3
    • Insert instructions here

  5. Sony MV1 CamCorder Disassembly, Removing the lens: paso 5, imagen 1 de 3 Sony MV1 CamCorder Disassembly, Removing the lens: paso 5, imagen 2 de 3 Sony MV1 CamCorder Disassembly, Removing the lens: paso 5, imagen 3 de 3
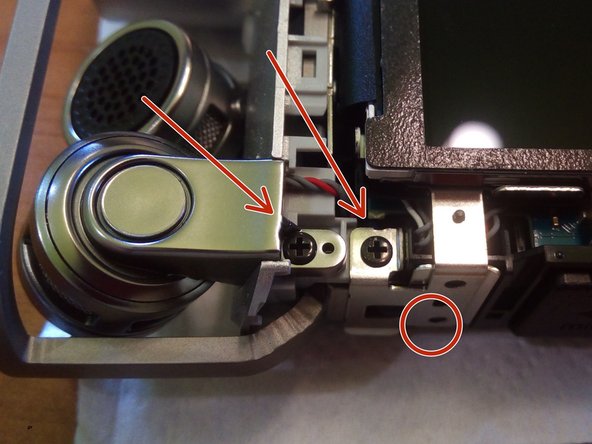
    • 1 - Remove 2 screws from the lens board.

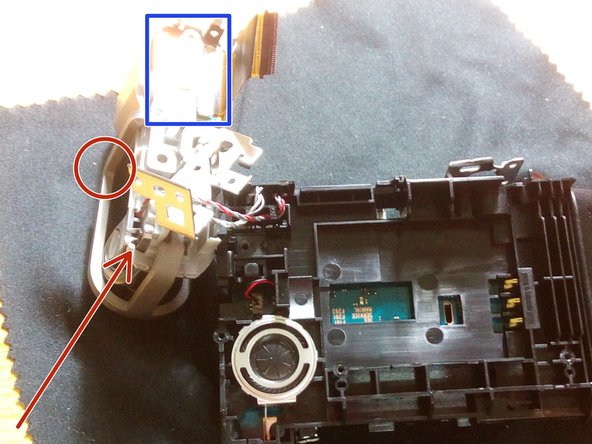
    • 2 - On the second photo one "can't see" the screws, but remove 3 of them, then remove gently in the circle the recording plastic light.

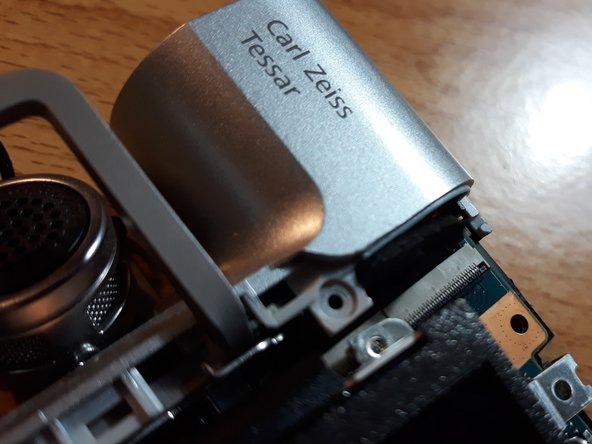
    • 3 - Remove the mic screw, so that you can remove the metal protection to free the lens board.

  6. Sony MV1 CamCorder Disassembly, Focussing manually the lens: paso 6, imagen 1 de 2 Sony MV1 CamCorder Disassembly, Focussing manually the lens: paso 6, imagen 2 de 2
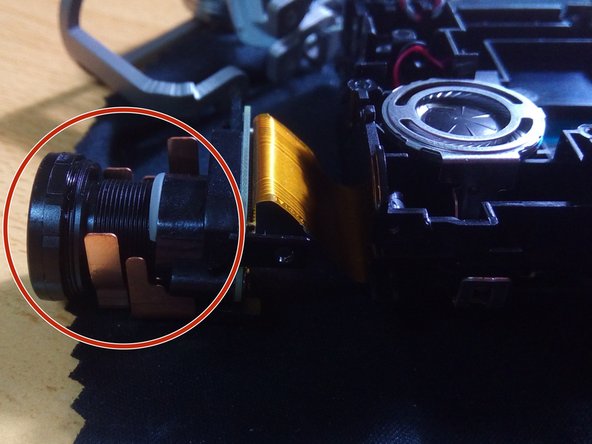
    • 1 - The lens can be rotated manually until you can see it.

    • 2 - With camera open insert battery, hold it by hand to make contact.

    • 3 - Click the power button and start the camera.

    • 4 - Look at the screen and with the other hand focus the lense.

    • Insert battery, hold power button. Check screen and focus lens manually. Enjoy!

  7. Sony MV1 CamCorder Disassembly, Applying hot glue to the lens of Sony MV1: paso 8, imagen 1 de 2 Sony MV1 CamCorder Disassembly, Applying hot glue to the lens of Sony MV1: paso 8, imagen 2 de 2
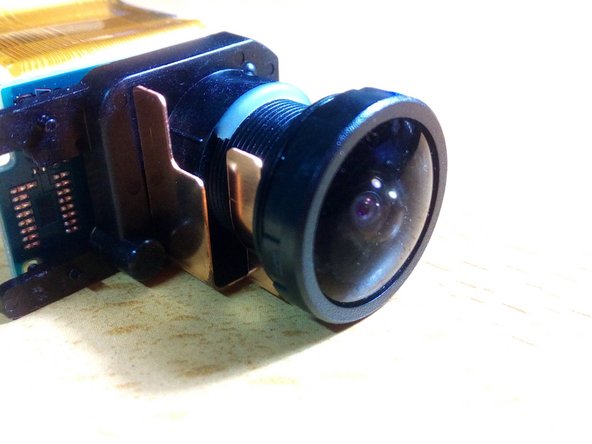
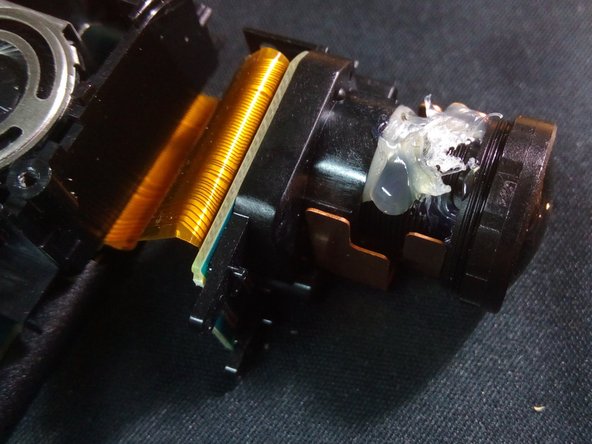
    • After you tuned the "lens" you should get some hot glue on the lens, cause with time it will get out of place. I had to open my camera two times for this reason.

  8. Sony MV1 CamCorder Disassembly, "Black Screen" on Sony MV-1: paso 9, imagen 1 de 3 Sony MV1 CamCorder Disassembly, "Black Screen" on Sony MV-1: paso 9, imagen 2 de 3 Sony MV1 CamCorder Disassembly, "Black Screen" on Sony MV-1: paso 9, imagen 3 de 3
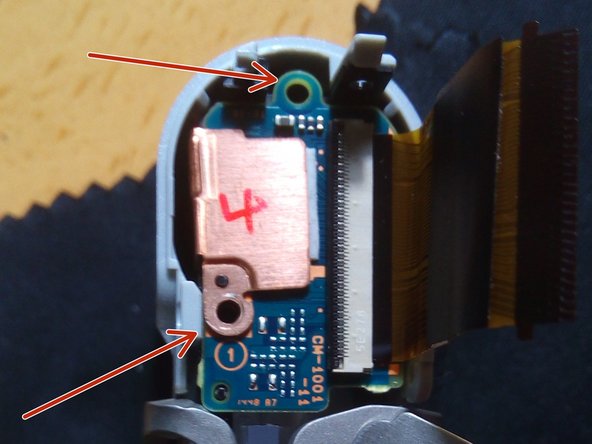
    • Over time, the lens recedes from its original position.

    • It will start having contact with the small metal base where the screw is.

    • With a metal file, remove the metal base of the screw a little.

    • Before assembling the camera, put the battery in and try to turn it on!

    • Check if the display is working.

Conclusión

To reassemble your device, follow these instructions in reverse order.

3 personas más completaron esta guía.

Un agradecimiento especial a estos traductores:

pt en

100%

Estos traductores nos están ayudando a reparar el mundo! ¿Quieres contribuir?
Empezar a traducir ›

Cafony

Miembro Desde 02/17/15

687 Reputación

4 Guías creadas

0 comentarios

Agregar Comentario

Ver Estadísticas:

Ultimas 24 horas: 1

Ultimos 7 días: 4

Ultimos 30 días: 23

Todo El Tiempo: 1,125