Saltar al contenido principal

Sony Vaio VGN-FS640 Disk Drive Replacement

Guía Archivada
Esta guía se mantiene únicamente para fines históricos. Utiliza la última versión de la guía para llevar a cabo tu reparación.

Qué necesitas

  1. Sony Vaio VGN-FS640 Disk Drive Replacement, Backplate: paso 1, imagen 1 de 1
    • Turn off the laptop and disconnect any charging cables.

    • Flip the laptop over so that the Service Tag is shown at the top left corner.

  2. Sony Vaio VGN-FS640 Disk Drive Replacement: paso 2, imagen 1 de 1
    • Remove the highlighted screws from the back of the laptop with a Phillips #0 Screwdriver.

  3. Sony Vaio VGN-FS640 Disk Drive Replacement: paso 3, imagen 1 de 1
    • Remove the highlighted screws from the panels in the bottom right-hand corner of the laptop using the Phillips #0 Screwdriver.

  4. Sony Vaio VGN-FS640 Disk Drive Replacement: paso 4, imagen 1 de 1
    • Remove the two panels in the bottom right-hand corner by sliding in the direction of the arrows imprinted on the panels.

  5. Sony Vaio VGN-FS640 Disk Drive Replacement: paso 5, imagen 1 de 1
    • Remove the highlighted screws underneath the removed panels using the Phillips #0 Screwdriver.

  6. Sony Vaio VGN-FS640 Disk Drive Replacement: paso 6, imagen 1 de 1
    • Carefully remove the hard drive from the panel in the bottom right-hand corner of the laptop.

  7. Sony Vaio VGN-FS640 Disk Drive Replacement: paso 7, imagen 1 de 1
    • Locate the battery, located on the top side of the laptop to the right of the Service Tag .

    • Remove the battery by pressing inwards on the tabs on either side of the battery.

  8. Sony Vaio VGN-FS640 Disk Drive Replacement: paso 8, imagen 1 de 1
    • Remove cover in the top left side of the laptop next to the battery by pulling it outwards.

  9. Sony Vaio VGN-FS640 Disk Drive Replacement: paso 9, imagen 1 de 1
    • Remove the backplate of the laptop by pulling it away from the laptop.

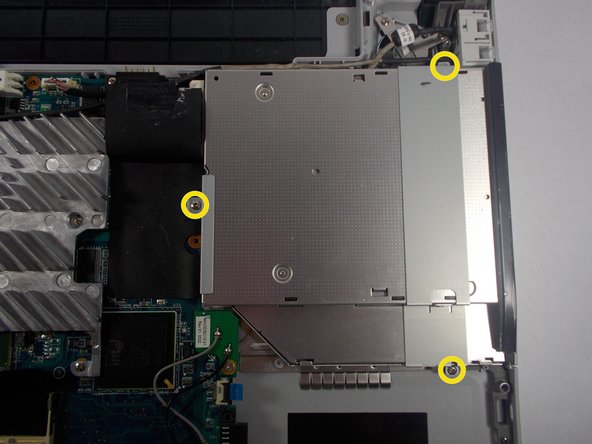
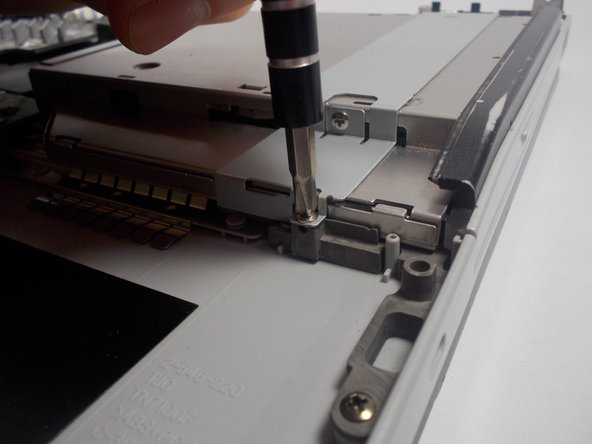
  10. Sony Vaio VGN-FS640 Disk Drive Replacement, Disk Drive: paso 10, imagen 1 de 2 Sony Vaio VGN-FS640 Disk Drive Replacement, Disk Drive: paso 10, imagen 2 de 2
    • Unscrew the screws holding in the CD/ DVD drive.

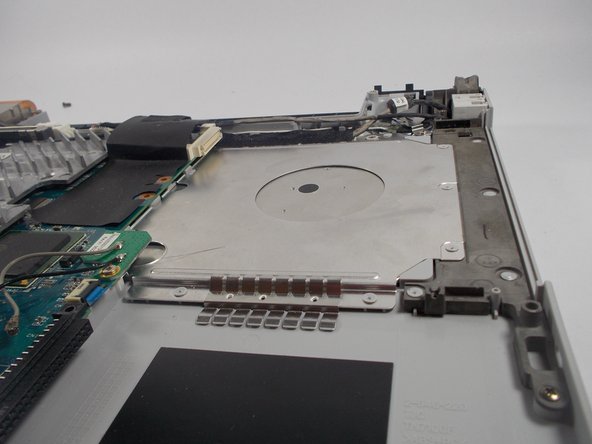
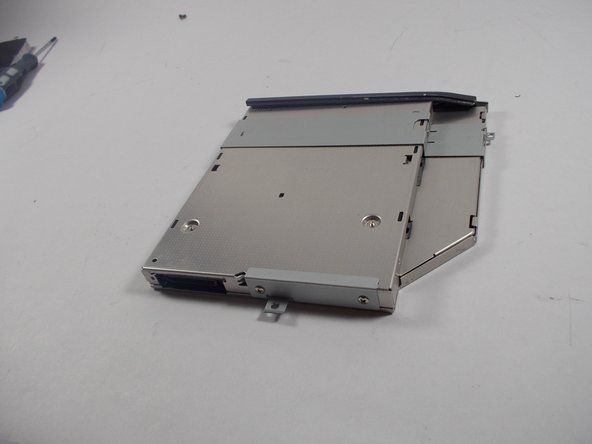
  11. Sony Vaio VGN-FS640 Disk Drive Replacement: paso 11, imagen 1 de 2 Sony Vaio VGN-FS640 Disk Drive Replacement: paso 11, imagen 2 de 2
    • Remove the CD/ DVD drive by gently lifting it up and out of the laptop.

  12. Sony Vaio VGN-FS640 Disk Drive Replacement: paso 12, imagen 1 de 2 Sony Vaio VGN-FS640 Disk Drive Replacement: paso 12, imagen 2 de 2
    • Get the new CD/ DVD drive.

    • Make sure that the new CD/ DVD drive is compatable with the Vaio VGRFS640

    • Sony no-longer has a list of compatable drivers, however the original driver can be found here under optical drive.

Conclusión

To reassemble your device, follow these instructions in reverse order.

Una persona más ha completado esta guía.

Geoffrey

Miembro Desde 03/28/14

252 Reputación

2 Guías creadas

Equipo

0 comentarios

Agregar Comentario

Ver Estadísticas:

Ultimas 24 horas: 0

Ultimos 7 días: 0

Ultimos 30 días: 0

Todo El Tiempo: 173