Esta versión puede contener ediciones incorrectas. Cambie a la última instantánea verificada.
Qué necesitas
-
Este paso está sin traducir. Ayuda a traducirlo
-
First you need to remove the glue from the edge of the iMac
-
Use a Guitar Pick around the screen to remove the glue
-
-
Este paso está sin traducir. Ayuda a traducirlo
-
Once you are sure the adhesive is removed, use two heavy suction cups to lift the screen
-
Unplug these cables:
-
DisplayPort Cable
-
Power Cable
-
Lift the screen from the iMac
-
-
Este paso está sin traducir. Ayuda a traducirlo
-
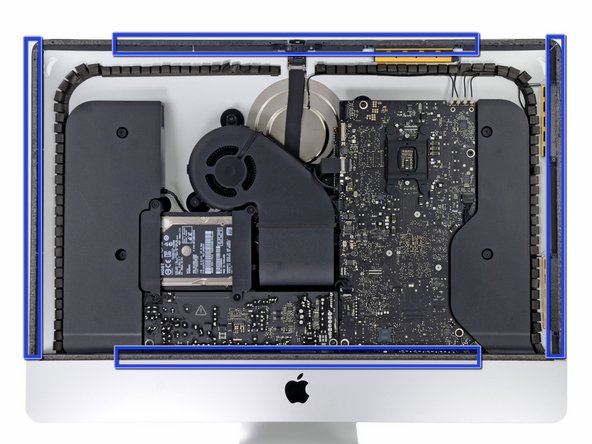
Remove the gray tape from the iMac and the screen itself
-
-
Este paso está sin traducir. Ayuda a traducirlo
-
Remove the four Torx T10 screws
-
Unplug the SATA cables and remove the hard drive
-
-
-
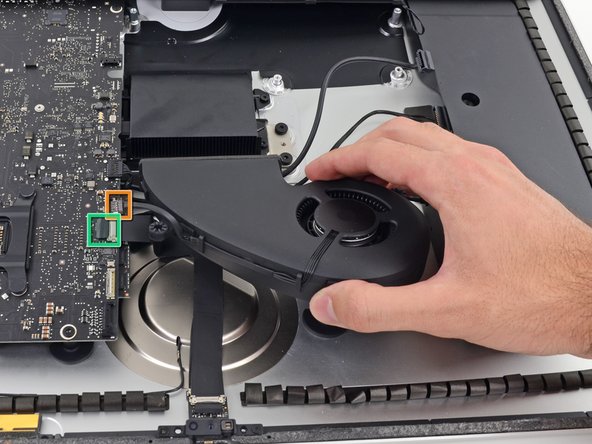
Este paso está sin traducir. Ayuda a traducirlo
-
Remove these 3 Torx T10 screws
-
After you remove the screws, remove these cables
-
Fan Cable
-
Unstick and unplug the camera cable
-
-
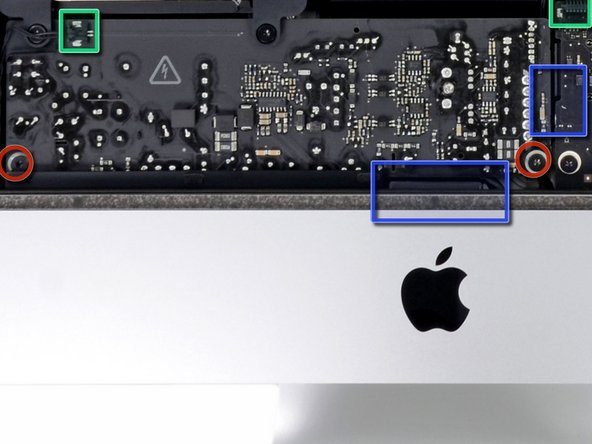
Este paso está sin traducir. Ayuda a traducirlo
-
Remove these 2 Torx T10 screws
-
Unplug these 2 cables
-
Unplug 2 more cable below the power board by pressing the clip
-
-
Este paso está sin traducir. Ayuda a traducirlo
-
Unplug these 4 antenna connectors
-
After that, remove these two Torx T10 screws
-
Move the speaker and unplug the cable from the logic board
-
Remove these other cables
-
For finish, remove these four Torx T10 screws
-
-
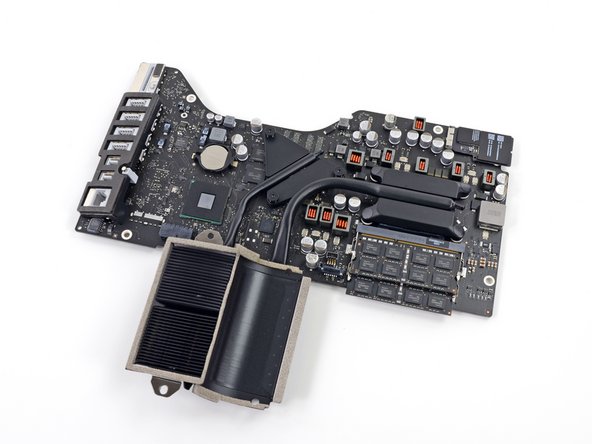
Este paso está sin traducir. Ayuda a traducirlo
-
Unscrew 3 Torx T8 screws from the heatsink, then remove the logic board from the iMac
-
-
Este paso está sin traducir. Ayuda a traducirlo
-
Flip the logic board over and release the tabs from each side of the RAM
-


Cancelar: No complete esta guía.
11 personas más completaron esta guía.
