Introducción
If your NEW Nintendo 3DS XL (Model: RED-001) is limiting your gaming experience due to the restricted factory storage, this guide will help you in upgrading the internal storage.
The original storage of the 3DS XL is a 4GB Micro SD card, and the ability to store games and photos causes the memory to fill rather quickly. This feature allows users to minimize the times they need to replace the game cartridges every time they wish to play a certain game.
Before using this guide, first verify that a Micro SDHC card is used as a replacement. If any other type of micro SD card is used, the 3DS XL will not recognize the upgrade. Also verify that your SDHC card does not exceed 32GB of storage.
The first crucial step is to power off the 3DS XL. Failure to do this could lead to damage to both you and the device.
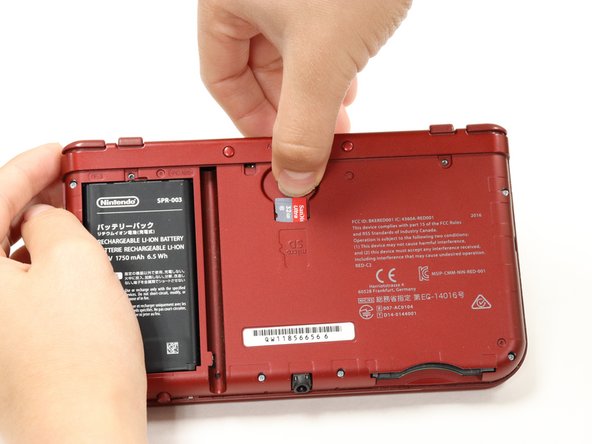
Take note that in Step 5, the screws cannot be fully removed. A clicking noise will be heard when the screw has been loosened enough for disassembly. Lastly, when inserting the new SDHC verify that the label is facing you. Caution: If any resistance is felt when inserting the new card, do not force the card into the slot.
The repair will be a success when the upgraded storage is seen in the settings of the device.
Qué necesitas
-
-
Power off the device by locating the circular power button and pressing Power Off on the screen.
-
-


To reassemble your device, follow these instructions in reverse order.
To reassemble your device, follow these instructions in reverse order.
Cancelar: No complete esta guía.
14 personas más completaron esta guía.

Equipo

CSU Fullerton, Team S1-G4, Bruce Fall 2019 Miembro de CSU Fullerton, Team S1-G4, Bruce Fall 2019
CSUF-BRUCE-F19S1G4
4 Miembros
2 Guías creadas
Un comentario
Note that a card larger than 32GB can work, but it needs to be formatted externally into FAT32, and it will slow down boot time of the console startup and game startup slightly too.