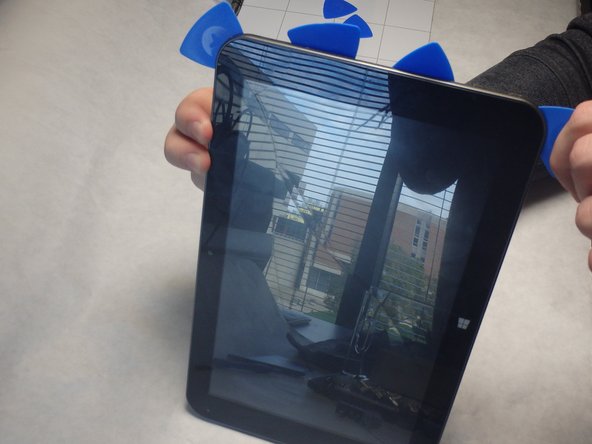
Saltar al contenido principal

UnBranded UB-15MS10 Back Panel Replacement

Guía Archivada
Esta guía se mantiene únicamente para fines históricos. Utiliza la última versión de la guía para llevar a cabo tu reparación.

Qué necesitas

  1. UnBranded UB-15MS10 Back Panel Replacement, Back Panel: paso 1, imagen 1 de 1
    • Remove the cover over the Micro SD outlet by using a plastic opening tool to pry open and push out the cover panel.

  2. UnBranded UB-15MS10 Back Panel Replacement: paso 2, imagen 1 de 1
    • Remove the two 4-mm #0 screws from the inside of the Micro SD compartment.

  3. UnBranded UB-15MS10 Back Panel Replacement: paso 3, imagen 1 de 2 UnBranded UB-15MS10 Back Panel Replacement: paso 3, imagen 2 de 2
    • Insert blue guitar picks in the crease between the top and bottom panels starting on the same end as the Micro SD slot.

    • Inserting the picks directly under the Micro SD compartment was the easiest place to get started. It still requires some force.

  4. UnBranded UB-15MS10 Back Panel Replacement: paso 4, imagen 1 de 1
    • Insert the black spudger between the guitar picks in order to pry open gaps between the blue guitar picks.

    • As the gaps open, slide the guitar picks along the sides to separate the panels.

  5. UnBranded UB-15MS10 Back Panel Replacement: paso 5, imagen 1 de 1
    • Pry all four sides apart using the blue guitar picks and the black spudger until they can easily be pried apart by hand.

Conclusión

To reassemble your device, follow these instructions in reverse order.

8 personas más completaron esta guía.

Equipo

IUPUI, Team 2-1, Baechle Fall 2015 Miembro de IUPUI, Team 2-1, Baechle Fall 2015

IUPUI-BAECHLE-F15S2G1

3 Miembros

3 Guías creadas

Un comentario

Thanks you, work good for me.

Cesar Alvarez - Contestar

Agregar Comentario

Ver Estadísticas:

Ultimas 24 horas: 0

Ultimos 7 días: 0

Ultimos 30 días: 1

Todo El Tiempo: 1,294