Saltar al contenido principal

Esta guía ha sufrido modificaciones. Revisa la última versión sin revisar.

Udi Discovery U818A FPV Camera Replacement

Qué necesitas

  1. Udi Discovery U818A FPV Camera Replacement, Camera: paso 1, imagen 1 de 1
    • Place the drone on its back, with the runners facing upward.

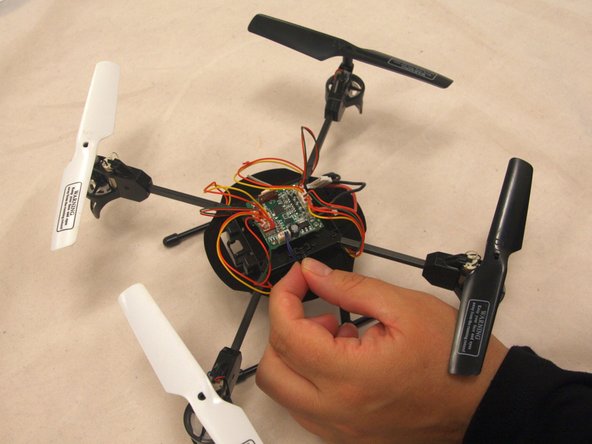
    • Using the Phillips #00 screwdriver, unscrew the single 2mm screw located on the drone body which connects the headlamp and wiring to the center of the drone frame.

  2. Udi Discovery U818A FPV Camera Replacement: paso 2, imagen 1 de 1
    • Grasp one of the propeller arms with the fingers of one hand while holding the drone frame with the other hand.

    • Firmly pull the propeller arm upward to separate it from the drone body.

    • Repeat this process to remove the three other propeller arms.

  3. Udi Discovery U818A FPV Camera Replacement: paso 3, imagen 1 de 1
    • Carefully remove the drone body from the frame.

  4. Udi Discovery U818A FPV Camera Replacement: paso 4, imagen 1 de 2 Udi Discovery U818A FPV Camera Replacement: paso 4, imagen 2 de 2
    • Flip the drone body onto the runners so the wires and motherboard are facing upward.

    • Disconnect the black and blue camera wires from the motherboard.

    • You may need to use a pointed metal pick to loosen the red putty that holds the connectors together.

  5. Udi Discovery U818A FPV Camera Replacement: paso 5, imagen 1 de 1
    • Be careful when separating the camera away from the runners and drone body—the plastic is brittle and may snap, causing injury to the hand.

    • Pry the camera away from the main drone body.

    • Use a spudger for extra leverage if the parts do not easily separate.

Conclusión

To reassemble your device, follow these instructions in reverse order.

0 comentarios

Agregar Comentario

Ver Estadísticas:

Ultimas 24 horas: 0

Ultimos 7 días: 1

Ultimos 30 días: 4

Todo El Tiempo: 259