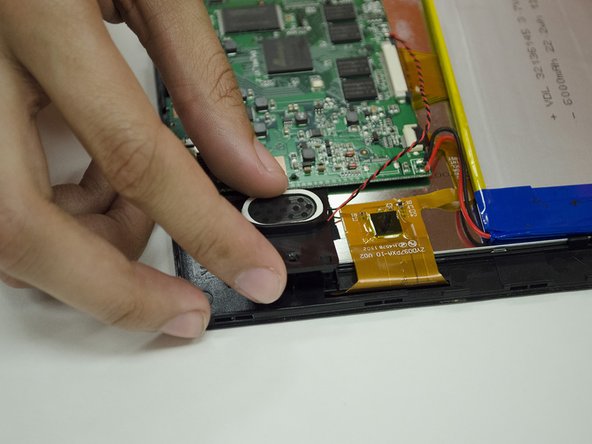
Saltar al contenido principal

Trio STEALTH-9 Speaker Replacement

Qué necesitas

  1. Trio STEALTH-9 Speaker Replacement, Back Cover: paso 1, imagen 1 de 1
    • Remove the two Phillips #00 screws on the side of the tablet.

  2. Trio STEALTH-9 Speaker Replacement: paso 2, imagen 1 de 1
    • Take one of the plastic opening tools and wedge it in the middle of the tablet, starting on the USB Port side.

    • Holding the tool in place, take one of the 6 plastic opening picks and slide it across the opening you made with the opening tool.

  3. Trio STEALTH-9 Speaker Replacement: paso 3, imagen 1 de 1
    • Continue going around the tablet sides with the plastic pick, being sure that you are maintaining the openings you made with either your hand or the opening tool.

    • You will notice some popping as you go around with the pick. Don't worry, this is completely normal.

  4. Trio STEALTH-9 Speaker Replacement: paso 4, imagen 1 de 1
    • Remove the back cover of the tablet to reveal the internals.

    • To replace, pinch each of the ends together until all four sides are closed.

  5. Trio STEALTH-9 Speaker Replacement, Speaker: paso 5, imagen 1 de 1
    • Slowly remove the electrical tape holding down the Speaker wires.

  6. Trio STEALTH-9 Speaker Replacement: paso 6, imagen 1 de 2 Trio STEALTH-9 Speaker Replacement: paso 6, imagen 2 de 2
    • Remove the #00 screw on the Speaker mount and remove the Speaker mount.

  7. Trio STEALTH-9 Speaker Replacement: paso 7, imagen 1 de 1
    • Prepare your Soldering tools. Desolder the Speaker leads from the Motherboard.

    • Remove any excess solder as necessary, and apply new solder when replacing a Speaker.

Conclusión

To reassemble your device, follow these instructions in reverse order, making sure to be careful with your wiring leads and soldering work.

[deleted]

Miembro Desde 01/29/15

415 Reputación

3 Guías creadas

0 comentarios

Agregar Comentario

Ver Estadísticas:

Ultimas 24 horas: 0

Ultimos 7 días: 0

Ultimos 30 días: 0

Todo El Tiempo: 140