Qué necesitas
-
-
First, take the battery pack off of the laptop for safety reasons.
-
Next, unscrew all screws labeled F8. These screws can be found throughout the device, specifically on the back.
-
After unscrewing all F8 screws, set them aside so they won't be lost. Lift up the panel, as shown in the third picture. You should see a rectangle with aluminum on it.
-
-
-
-
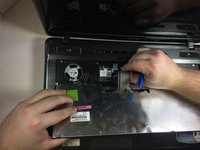
Once you remove the panel as shown in the previous step, it will bring you to what's shown in picture 1. Gently press the aluminum device up and down. This will make the aluminum device easier to remove.
-
Next, remove the two objects located above and at the top right of the aluminum device by firmly pressing on them and the hooks located on their sides keeping them in.
-
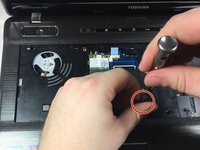
After you have removed all the objects, unscrew all screws located in this compartment using a Phillips head screwdriver. There is one screw labeled F3 measured around .1 inch. This will allow you to remove the front of the laptop.
-
-
-
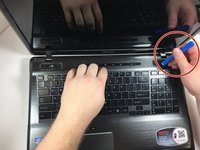
After everything on the back is unscrewed, flip the laptop over and open it. If all previous steps were done correctly, the keyboard should be easily preyed open by any flat, durable surface or the device as shown in picture 1.
-
Next, detach the laptop from the mainframe. Be careful not to break the the plastic that connects the keyboard to the laptop itself.
-
After that, unscrew all leftover screws inside of the keyboard area and around it. These are measured around .21 of a inch.
-


To reassemble your device, follow these instructions in reverse order.
To reassemble your device, follow these instructions in reverse order.
Cancelar: No complete esta guía.
3 personas más completaron esta guía.
Equipo

Texas Tech, Team 6-5, Bennett Fall 2016 Miembro de Texas Tech, Team 6-5, Bennett Fall 2016
TTU-BENNETT-F16S6G5
Miembros de 4
3 Guías creadas
Un comentario
If I'm replacing the keyboard. Why am I removing the screws under the keyboard after the keyboard is removed?