Saltar al contenido principal

Toshiba SD-K740 Inverter Board Replacement

Qué necesitas

  1. Toshiba SD-K740 Inverter Board Replacement, Top Panel: paso 1, imagen 1 de 1
    • Unplug the DVD player before beginning.

    • Remove the three 7.7 mm screws from the back panel using a Phillips #0 screwdriver.

  2. Toshiba SD-K740 Inverter Board Replacement: paso 2, imagen 1 de 2 Toshiba SD-K740 Inverter Board Replacement: paso 2, imagen 2 de 2
    • Turn the DVD player on its side.

    • Remove the 7.7 mm screw.

    • Flip the DVD player onto its other side.

    • Remove the 7.7 mm screw.

  3. Toshiba SD-K740 Inverter Board Replacement: paso 3, imagen 1 de 1
    • Flip the DVD player over onto its front face.

    • Remove the back panel by lifting up and pulling it towards yourself.

  4. Toshiba SD-K740 Inverter Board Replacement, Front Panel: paso 4, imagen 1 de 1
    • Flip the DVD player so its top is sitting on your working surface.

    • Lift and push away the two tabs located in the middle of the player.

    • The front panel will not detach during this step, so do not force it.

  5. Toshiba SD-K740 Inverter Board Replacement: paso 5, imagen 1 de 1
    • Flip the DVD player on its side.

    • Lift and slide forward the single tab on the side.

    • The front panel will not detach during this step, so do not force it.

  6. Toshiba SD-K740 Inverter Board Replacement: paso 6, imagen 1 de 2 Toshiba SD-K740 Inverter Board Replacement: paso 6, imagen 2 de 2
    • Grasp the front panel and pull forward to your right to remove it.

  7. Toshiba SD-K740 Inverter Board Replacement, Inverter Board: paso 7, imagen 1 de 1
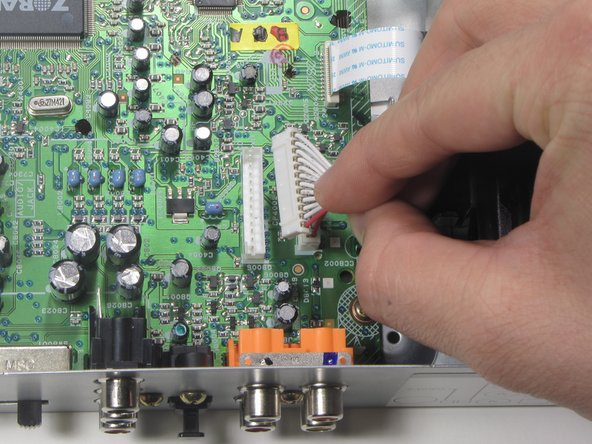
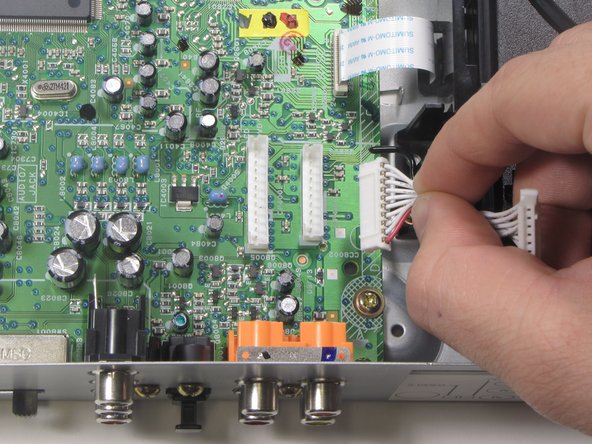
    • Remove the black tie holding the two rear ribbon cables together by untwisting it.

  8. Toshiba SD-K740 Inverter Board Replacement: paso 8, imagen 1 de 2 Toshiba SD-K740 Inverter Board Replacement: paso 8, imagen 2 de 2
    • Remove the first of two ribbon cables connected to the motherboard by pulling vertically.

  9. Toshiba SD-K740 Inverter Board Replacement: paso 9, imagen 1 de 2 Toshiba SD-K740 Inverter Board Replacement: paso 9, imagen 2 de 2
    • Remove the second of two ribbon cables connected to the motherboard by pulling vertically.

  10. Toshiba SD-K740 Inverter Board Replacement: paso 10, imagen 1 de 1
    • Pull the two cables to the right to disentangle from the disc drive.

    • Do not tug, pull, or force cable, it should slide out with minimal force.

  11. Toshiba SD-K740 Inverter Board Replacement: paso 11, imagen 1 de 1
    • Pull power cord vertically to detach from the casing.

  12. Toshiba SD-K740 Inverter Board Replacement: paso 12, imagen 1 de 1
    • Remove the three .303 inch screws attaching the inverter board to the casing using a #0 Phillips screwdriver.

  13. Toshiba SD-K740 Inverter Board Replacement: paso 13, imagen 1 de 1
    • Push the inverter board forward and to the left to remove from the holding ledges.

  14. Toshiba SD-K740 Inverter Board Replacement: paso 14, imagen 1 de 2 Toshiba SD-K740 Inverter Board Replacement: paso 14, imagen 2 de 2
    • Lift the inverter board from the back end and pull toward you to complete removal.

Conclusión

To reassemble your device, follow these instructions in reverse order.

Joe Murphy

Miembro Desde 01/20/11

542 Reputación

5 Guías creadas

Equipo

Cal Poly, Team 1-16, Amido Winter 2011 Miembro de Cal Poly, Team 1-16, Amido Winter 2011

CPSU-AMIDO-W11S1G16

4 Miembros

8 Guías creadas

0 comentarios

Agregar Comentario

Ver Estadísticas:

Ultimas 24 horas: 0

Ultimos 7 días: 1

Ultimos 30 días: 2

Todo El Tiempo: 2,098