Esta versión puede contener ediciones incorrectas. Cambie a la última instantánea verificada.
Qué necesitas
-
Este paso está sin traducir. Ayuda a traducirlo
-
Slip a small plastic opening tool underneath the screen bezel, gently sliding it around the inside edge.
-
Starting at the corners, carefully pry up the screen bezel.
-
-
Este paso está sin traducir. Ayuda a traducirlo
-
Remove the four Phillips #00 screws around the edge of the screen.
-
-
-
Este paso está sin traducir. Ayuda a traducirlo
-
Slide a small plastic opening tool under the top portion of the metal frame and gently lift it up.
-
Slide the plastic opening tool around the inner edge of the metal frame until it feels loose.
-
Remove the frame from the housing.
-
-
Este paso está sin traducir. Ayuda a traducirlo
-
Lifting from the upper edge of the screen, tilt the screen away from the device.
-
-
Este paso está sin traducir. Ayuda a traducirlo
-
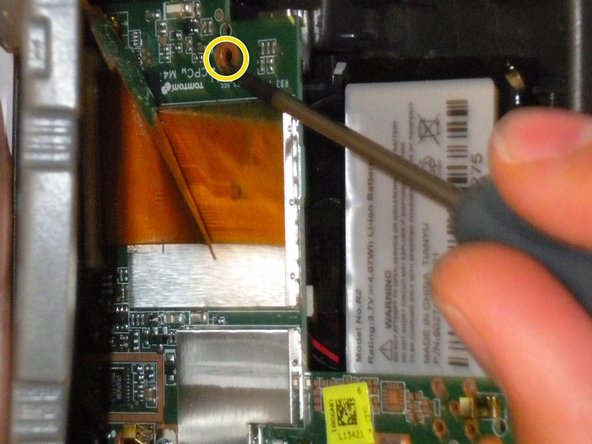
Remove the three Phillips #00 screws connecting the motherboard to the plastic housing:
-
Two Phillips #00 screws are located at the bottom of the first picture.
-
The third screw is hidden under the orange ribbon cable, near the screen.
-
-
Este paso está sin traducir. Ayuda a traducirlo
-
Flip the screen and motherboard over.
-
Gripping the plastic casing, disconnect the battery cable connector from the motherboard.
-
Disconnect the speaker cable connector from the motherboard.
-
Remove the motherboard and screen from the housing.
-
Cancelar: No complete esta guía.
Una persona más ha completado esta guía.


