Esta versión puede contener ediciones incorrectas. Cambie a la última instantánea verificada.
Qué necesitas
-
Este paso está sin traducir. Ayuda a traducirlo
-
Use a T-9 Torx screwdriver to unscrew the four screws on the back cover.
-
-
Este paso está sin traducir. Ayuda a traducirlo
-
Using the spudger, gently pry apart the back case from the front case. It is easier to start on a side and work your way around the device.
-
-
-
Este paso está sin traducir. Ayuda a traducirlo
-
Once the two covers are separated, use the tweezers, or even your fingers, to gently disconnect the two sets of wires that are connected to the motherboard from the back cover. You may have to wiggle the wires a little bit to get them to disconnect.
-
-
Este paso está sin traducir. Ayuda a traducirlo
-
Next, you must remove the motherboard from the front screen.
-
Use a Torx T-7 screwdriver to unscrew the two screws.
-
-
Este paso está sin traducir. Ayuda a traducirlo
-
Before you can seperate the motherboard from the front cover, you must disconnect the wire connecting the two.
-
To do so, you must use the back end of the spudger to push out the two white tabs connected to the wire, that holds the motherboard and front cover together.
-
-
Este paso está sin traducir. Ayuda a traducirlo
-
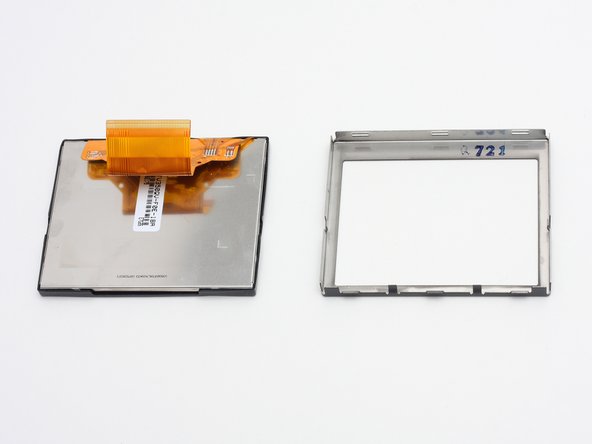
Once separated, use the spudger to pry around the edges of the outer casing.
-
-
Este paso está sin traducir. Ayuda a traducirlo
-
Apply pressure with thumbs to remove screen from inner casing.
-
The screen and front cover are now disconnected.
-


Cancelar: No complete esta guía.
2 personas más completaron esta guía.
Equipo

Cal Poly, Team 7-7, Maness Spring 2010 Miembro de Cal Poly, Team 7-7, Maness Spring 2010
CPSU-MANESS-S10S7G7
4 Miembros
6 Guías creadas