Esta versión puede contener ediciones incorrectas. Cambiar a la última instantánea verificada.
Qué necesitas
-
Este paso está sin traducir. Ayuda a traducirlo
-
Power down the TiVo Premiere XL4 by detaching the power cable from the unit and power source.
-
-
Este paso está sin traducir. Ayuda a traducirlo
-
Remove the four 80 mm T10 screws from the back of the TiVo box using theTorx screwdriver.
-
-
Este paso está sin traducir. Ayuda a traducirlo
-
Take the outer casing by sliding the top of the box off of the component carefully, making sure not to damage the surrounding components inside.
-
-
Este paso está sin traducir. Ayuda a traducirlo
-
Remove the single 140 mm T8 screw from the back panel using a Torx screwdriver.
-
-
Este paso está sin traducir. Ayuda a traducirlo
-
Unplug the wire of the fan by gently squeezing the connector and lifting up.
-
-
Este paso está sin traducir. Ayuda a traducirlo
-
Remove the power supply wire by pinching the plastic connection and gently pulling away from the motherboard.
-
-
-
Este paso está sin traducir. Ayuda a traducirlo
-
Remove the single 80 mm T10 screw above HDMI port using the Torx screwdriver.
-
-
Este paso está sin traducir. Ayuda a traducirlo
-
Remove wire connected to the front of of the box by pinching the connector and gently removing from the motherboard.
-
-
Este paso está sin traducir. Ayuda a traducirlo
-
Remove two 100 mm T10 screws connecting the front cover to the hardware of the box using a Torx screwdriver.
-
Unplug the connector from the front panel.
-
-
Este paso está sin traducir. Ayuda a traducirlo
-
Remove the front of the TiVo.
-
This step helps with the process of removing the motherboard due to the plastic prongs putting pressure on the board.
-
-
Este paso está sin traducir. Ayuda a traducirlo
-
Using pliers, be sure that the cable jack is centered with the back of the box for easy removal.
-
Remove the nut on the cable jack using pliers.
-
Remove the washer after removing the nut.
-
-
Este paso está sin traducir. Ayuda a traducirlo
-
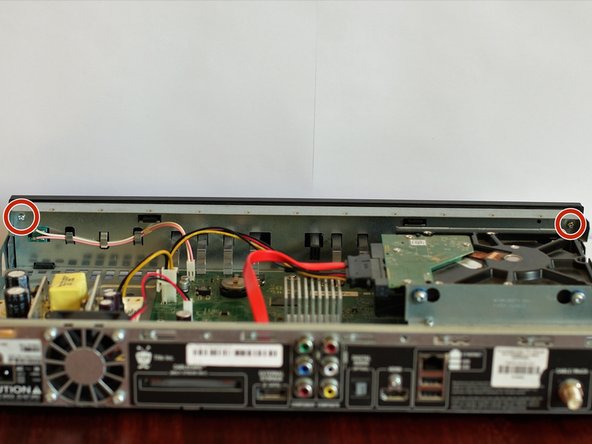
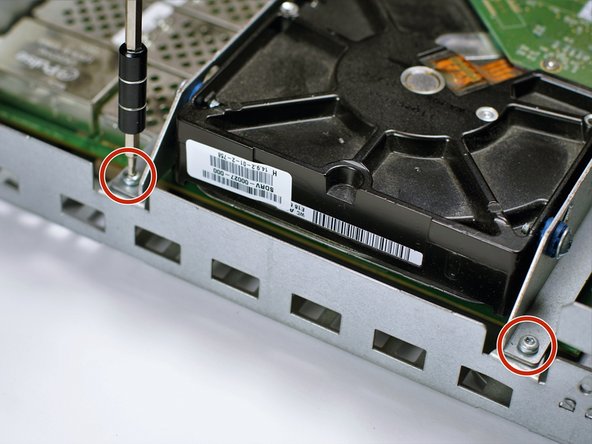
Remove the following (2) 80 mm T10 screws including the (2) 80 mm T10 screws located on the other side using the Torx Screwdriver.
-
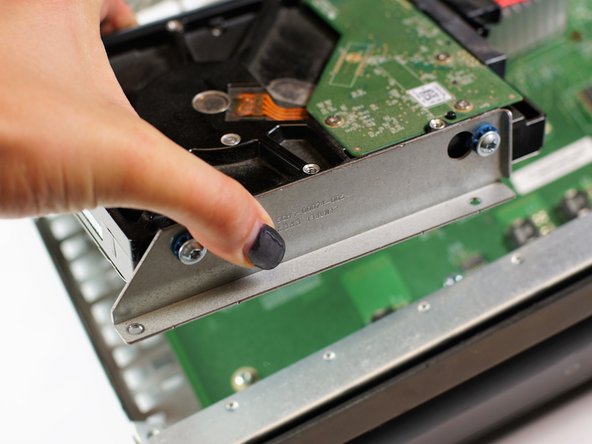
Remove hard drive from on top of the motherboard.
-
-
Este paso está sin traducir. Ayuda a traducirlo
-
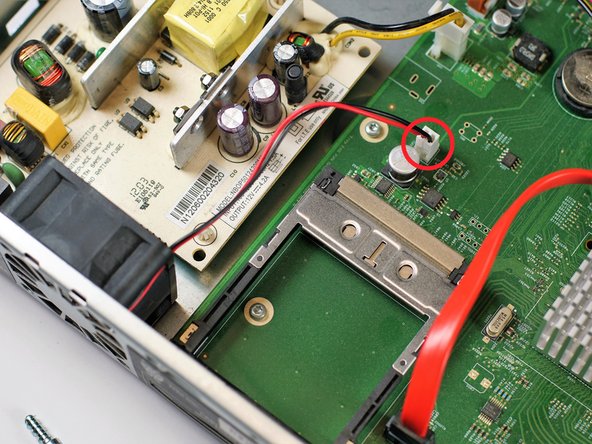
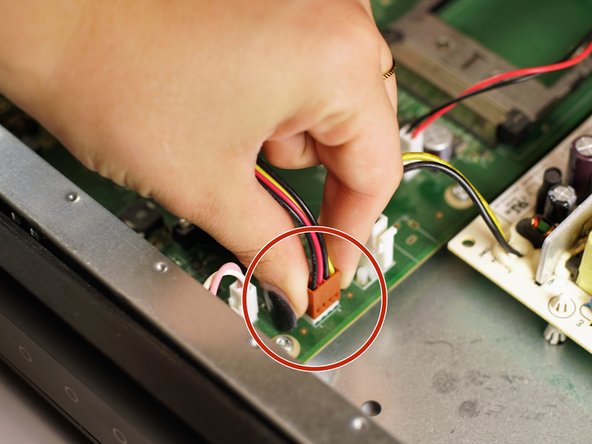
Pinch the connector of the bundle of wires (the bundle having black, red, black and yellow wires) and gently remove from the motherboard.
-
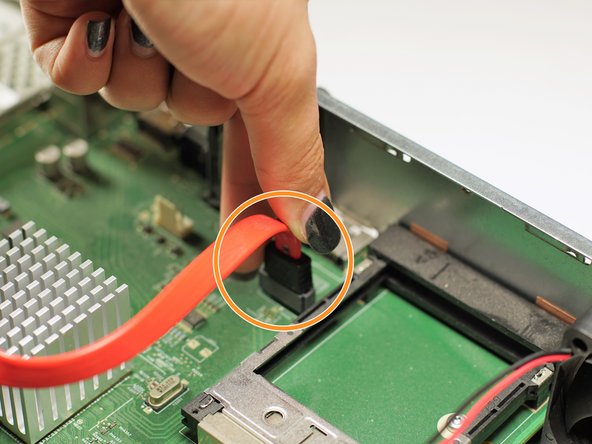
Pinch the connector of the single flat red wire and gently remove from motherboard.
-
-
Este paso está sin traducir. Ayuda a traducirlo
-
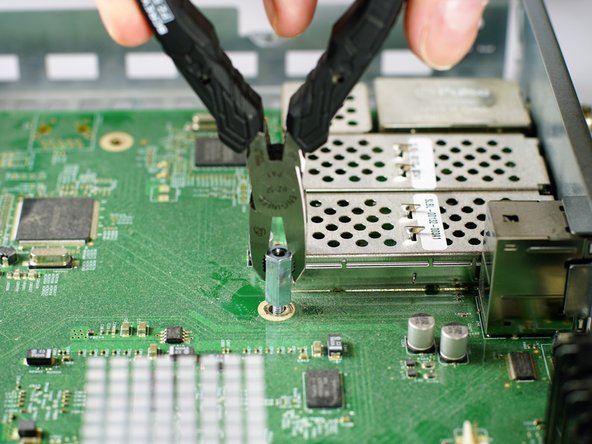
Remove the two 200 mm screws holding the motherboard in place to the bottom of the box using pliers.
-
-
Este paso está sin traducir. Ayuda a traducirlo
-
Remove the six 80 mm T10 screws using the Torx Screwdriver.
-


Equipo

Baylor, Team S1-G1, Williams Fall 2018 Miembro de Baylor, Team S1-G1, Williams Fall 2018
BU-WILLIAMS-F18S1G1
3 Miembros
6 Guías creadas