Saltar al contenido principal

Thrustmaster T Flight Hotas 4 R2 & L2 Buttons Replacement

Qué necesitas

  1. Thrustmaster T Flight Hotas 4 R2 & L2 Buttons Replacement, J1 Screws on Throttle: paso 1, imagen 1 de 1
    • Be sure to disconnect the controller from the power source before disassembling.

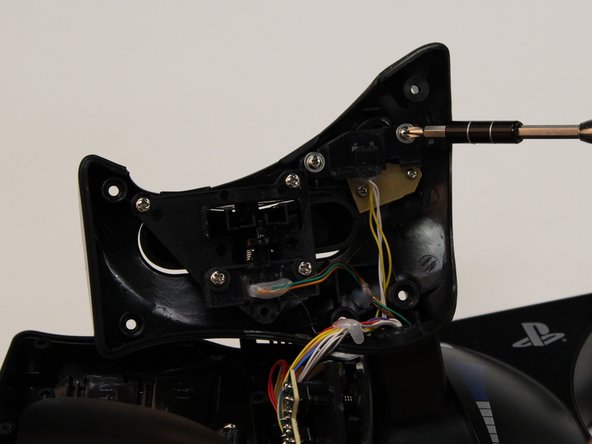
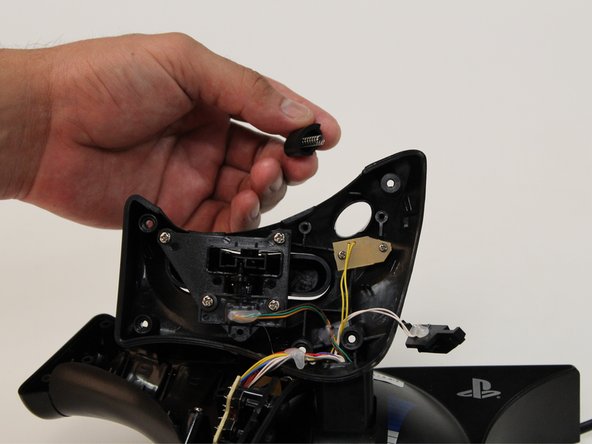
    • Remove the five 15 mm J1 JIS head screws from the front of the throttle.

  2. Thrustmaster T Flight Hotas 4 R2 & L2 Buttons Replacement, Throttle Panel: paso 2, imagen 1 de 2 Thrustmaster T Flight Hotas 4 R2 & L2 Buttons Replacement, Throttle Panel: paso 2, imagen 2 de 2
    • Be sure to disconnect the controller from the power source before disassembling.

    • Using your hands, pull away the panel from the throttle.

  3. Thrustmaster T Flight Hotas 4 R2 & L2 Buttons Replacement, R2 & L2 Buttons: paso 3, imagen 1 de 2 Thrustmaster T Flight Hotas 4 R2 & L2 Buttons Replacement, R2 & L2 Buttons: paso 3, imagen 2 de 2
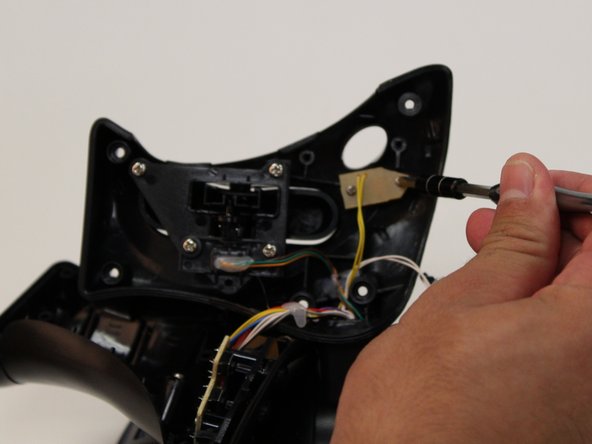
    • Remove the two 7 mm J1 JIS head screws from the panel covering the buttons.

  4. Thrustmaster T Flight Hotas 4 R2 & L2 Buttons Replacement: paso 4, imagen 1 de 2 Thrustmaster T Flight Hotas 4 R2 & L2 Buttons Replacement: paso 4, imagen 2 de 2
    • Pull the panel that is covering the R2 button away from the throttle.

  5. Thrustmaster T Flight Hotas 4 R2 & L2 Buttons Replacement: paso 5, imagen 1 de 2 Thrustmaster T Flight Hotas 4 R2 & L2 Buttons Replacement: paso 5, imagen 2 de 2
    • Carefully push the R2 button from the outside of the panel.

    • Be cautious of the spring attached to the button as it can be easily lost.

  6. Thrustmaster T Flight Hotas 4 R2 & L2 Buttons Replacement: paso 6, imagen 1 de 2 Thrustmaster T Flight Hotas 4 R2 & L2 Buttons Replacement: paso 6, imagen 2 de 2
    • Remove the two 4 mm J1 JIS head screws from the panel covering the L2 button.

  7. Thrustmaster T Flight Hotas 4 R2 & L2 Buttons Replacement: paso 7, imagen 1 de 2 Thrustmaster T Flight Hotas 4 R2 & L2 Buttons Replacement: paso 7, imagen 2 de 2
    • Carefully push the L2 button from the outside of the panel.

    • Be cautious of the spring attached to the button as it can be easily lost.

Conclusión

To reassemble your device, follow these instructions in reverse order.

2 personas más completaron esta guía.

Crystal Nguyen

Miembro Desde 09/11/17

624 Reputación

4 Guías creadas

Equipo

CSU Fullerton, Team S2-G1, Bruce Fall 2017 Miembro de CSU Fullerton, Team S2-G1, Bruce Fall 2017

CSUF-BRUCE-F17S2G1

3 Miembros

13 Guías creadas

Un comentario

Hello, m R2 button is broken. Do you know where i can print a new one ?

louis_tiquet - Contestar

Agregar Comentario

Ver Estadísticas:

Ultimas 24 horas: 0

Ultimos 7 días: 1

Ultimos 30 días: 9

Todo El Tiempo: 1,285