Esta guía ha sufrido modificaciones. Revisa la última versión sin revisar.
Qué necesitas
-
-
Remove the four H2 screws from the back of the phone. Do not lose the black rubber rings on the screws.
-
Remove the two H2 screws, on either side of the phone. Do not lose the red seal that are on the screws.
-
Using a prying tool work off the back of the case. Ensuring not to lose the port covers. Be careful to note the position of connector covers. Have the tabs at the end of the connectors in place before clipping the phone completely back together.
-
-
-
-
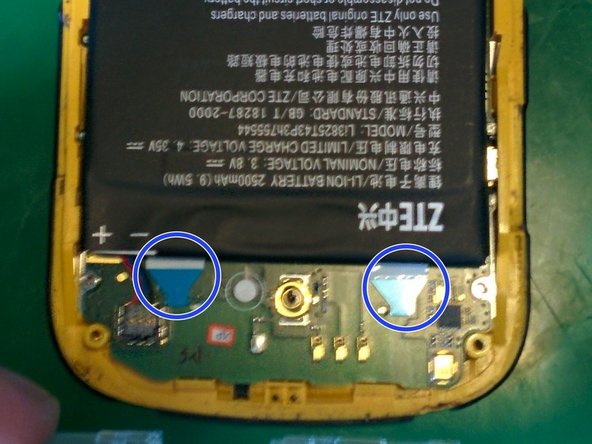
Remove the two black Philips head screws from the battery connector cover.
-
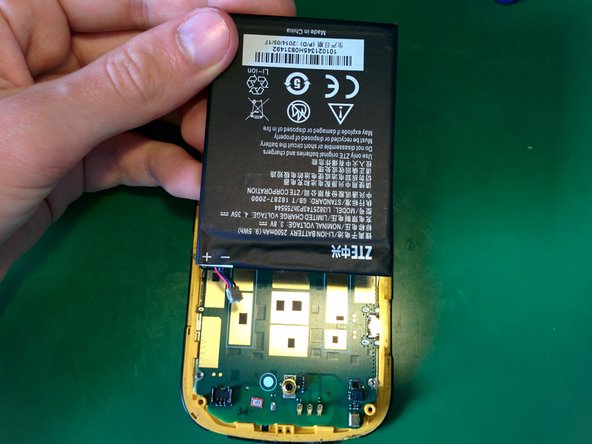
Lift the battery cover away from the logic board
Note: The black screws could be under a thin white plastic cover and are above the red circles shown here.
-
-
-
Disconnect the battery connector from the logic board. Do so by inserting a flat tool under the wires on the indicated side and wedging it up off the logic board.
-
Then remove the double sided tape using the blue tabs provided. Simply grab a tab and pull until it comes out tweezers are really good for beginning the process.
Pulling the tabs is optimistic! I carefully levered the battery up with a fine (but strong) screw driver. The glue strips used are very tacky and I managed to leave most of them in place and simply stuck the new battery back onto the existing strips. Note: The old battery bent a bit as it came out but still indicates that it is holding a bit of a charge.
-


To reassemble your device, follow these instructions in reverse order.
To reassemble your device, follow these instructions in reverse order.
It's a bit tricky getting the cover off as the glue around the speaker doesn't want to let go! Note: There are small clips around the edge - work from each of the ports and lever the yellow edge gently out and away from the thin black edge around the screen, starting from near the side screw holes.
normboreham9 - Contestar