Saltar al contenido principal

TRS-80 Color Computer Fuse Replacement

Qué necesitas

  1. TRS-80 Color Computer Fuse Replacement, Outside Casing: paso 1, imagen 1 de 1
    • Flip the computer over.

    • Remove the two 24.1mm Phillips screws near the front of the case.

    • Remove the five 33.0 mm Phillips screws towards the back of the case.

  2. TRS-80 Color Computer Fuse Replacement: paso 2, imagen 1 de 2 TRS-80 Color Computer Fuse Replacement: paso 2, imagen 2 de 2
    • Carefully flip the computer right side up.

    • Lift off the top half of the case.

  3. TRS-80 Color Computer Fuse Replacement, Keyboard: paso 3, imagen 1 de 2 TRS-80 Color Computer Fuse Replacement, Keyboard: paso 3, imagen 2 de 2
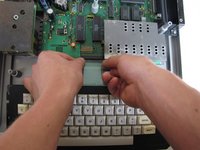
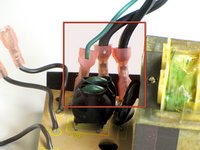
    • Near the motherboard, gently pull the keyboard ribbon cable until it becomes free.

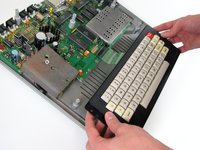
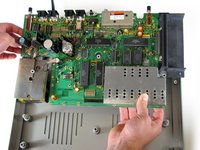
    • Lift the keyboard out of the case.

  4. TRS-80 Color Computer Fuse Replacement, Motherboard: paso 4, imagen 1 de 3 TRS-80 Color Computer Fuse Replacement, Motherboard: paso 4, imagen 2 de 3 TRS-80 Color Computer Fuse Replacement, Motherboard: paso 4, imagen 3 de 3
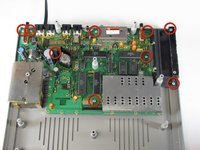
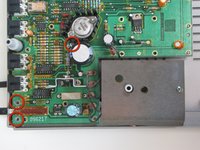
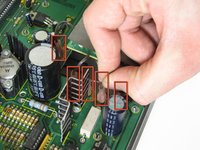
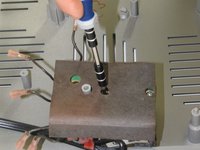
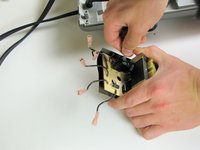
    • Remove the nine 15.24 mm Phillips screws securing the motherboard in place.

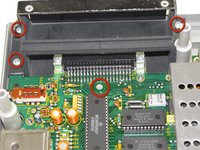
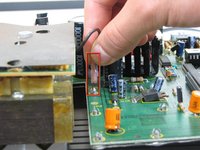
    • When removing the spring door, make sure to keep the door closed.

  5. TRS-80 Color Computer Fuse Replacement: paso 5, imagen 1 de 3 TRS-80 Color Computer Fuse Replacement: paso 5, imagen 2 de 3 TRS-80 Color Computer Fuse Replacement: paso 5, imagen 3 de 3
    • Remove the 5 jumper cables from the motherboard.

    • Once the jumper cables lift the motherboard up gently; it should lift out easily.

  6. TRS-80 Color Computer Fuse Replacement, Fuse: paso 6, imagen 1 de 2 TRS-80 Color Computer Fuse Replacement, Fuse: paso 6, imagen 2 de 2
    • Remove the two 40.6mm Philips screws securing the TRS-80 transformer.

  7. TRS-80 Color Computer Fuse Replacement: paso 7, imagen 1 de 3 TRS-80 Color Computer Fuse Replacement: paso 7, imagen 2 de 3 TRS-80 Color Computer Fuse Replacement: paso 7, imagen 3 de 3
    • Remove the power cable jumpers from the power supply.

  8. TRS-80 Color Computer Fuse Replacement: paso 8, imagen 1 de 1
    • Gently peel back the protective film on the top of the transformer.

  9. TRS-80 Color Computer Fuse Replacement: paso 9, imagen 1 de 3 TRS-80 Color Computer Fuse Replacement: paso 9, imagen 2 de 3 TRS-80 Color Computer Fuse Replacement: paso 9, imagen 3 de 3
    • Locate the two points the fuse is soldered into the circuit board.

    • Using a soldering iron and soldering wick, desolder and remove the fuse.

    • Place the new fuse into the location of the old one, and solder it in place.

Conclusión

To reassemble your device, follow these instructions in reverse order.

3 personas más completaron esta guía.

Equipo

Cal Poly, Team 11-24, Maness Winter 2011 Miembro de Cal Poly, Team 11-24, Maness Winter 2011

CPSU-MANESS-W11S11G24

4 Miembros

10 Guías creadas

0 comentarios

Agregar Comentario

Ver Estadísticas:

Ultimas 24 horas: 1

Ultimos 7 días: 4

Ultimos 30 días: 7

Todo El Tiempo: 2,769