Saltar al contenido principal

TC-WE825S Power Button Replacement

Qué necesitas

  1. TC-WE825S Power Button Replacement, TC-WE825S Power Button: paso 1, imagen 1 de 3 TC-WE825S Power Button Replacement, TC-WE825S Power Button: paso 1, imagen 2 de 3 TC-WE825S Power Button Replacement, TC-WE825S Power Button: paso 1, imagen 3 de 3
    • Unscrew the 8mm Phillips head screws from the left and right sides of the cassette player.

  2. TC-WE825S Power Button Replacement: paso 2, imagen 1 de 3 TC-WE825S Power Button Replacement: paso 2, imagen 2 de 3 TC-WE825S Power Button Replacement: paso 2, imagen 3 de 3
    • Unscrew the 8mm Phillips head screw from the back of the cassette panel. Remove the cover.

  3. TC-WE825S Power Button Replacement: paso 3, imagen 1 de 3 TC-WE825S Power Button Replacement: paso 3, imagen 2 de 3 TC-WE825S Power Button Replacement: paso 3, imagen 3 de 3
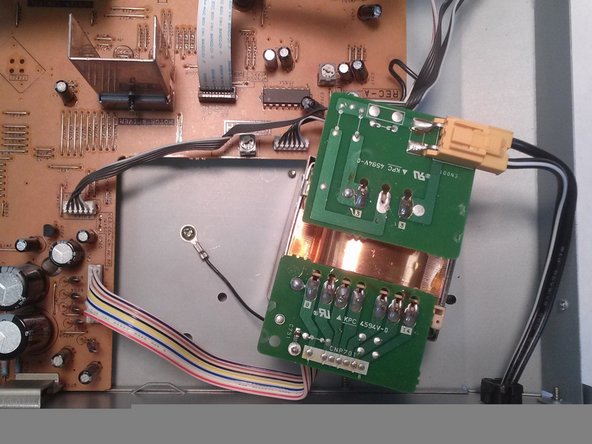
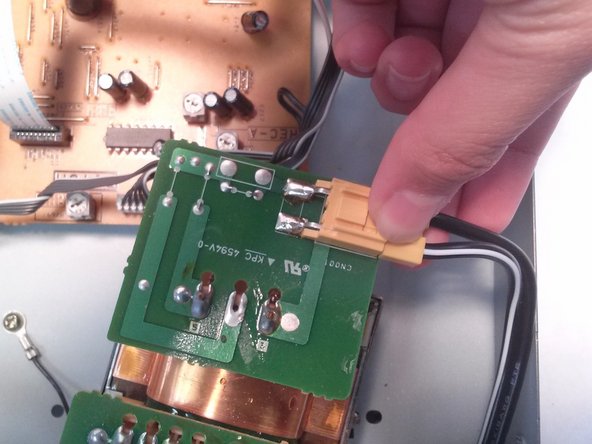
    • Locate the power cord connection and disconnect it. To remove it, press down on the plastic tab and slowly slide it out of the socket.

  4. TC-WE825S Power Button Replacement: paso 4, imagen 1 de 2 TC-WE825S Power Button Replacement: paso 4, imagen 2 de 2
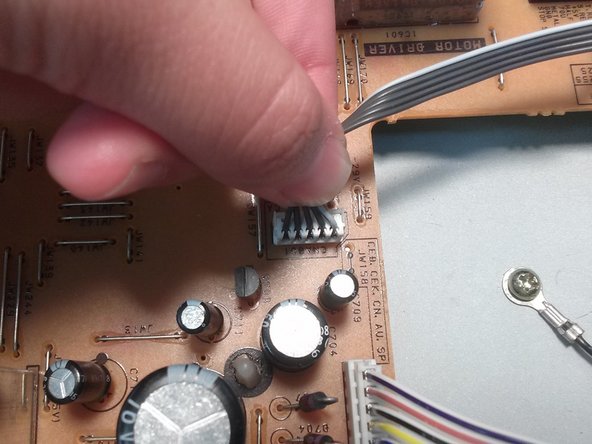
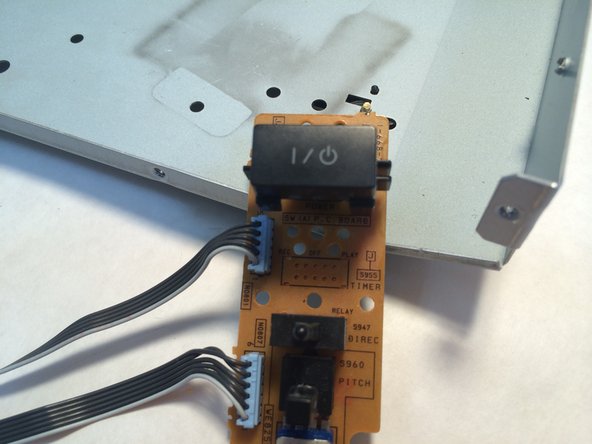
    • Locate the cords that are connected to the power button. Remove the connection by tugging on the cords gently, releasing them from the main PC board.

  5. TC-WE825S Power Button Replacement: paso 5, imagen 1 de 1
    • Unscrew all five 7.5mm Phillips head screws from the PCB (printed circuit board) behind the power switch.

  6. TC-WE825S Power Button Replacement: paso 6, imagen 1 de 1
    • Use forceps to gently pry the PCB from the frame of the cassette player.

  7. TC-WE825S Power Button Replacement: paso 7, imagen 1 de 3 TC-WE825S Power Button Replacement: paso 7, imagen 2 de 3 TC-WE825S Power Button Replacement: paso 7, imagen 3 de 3
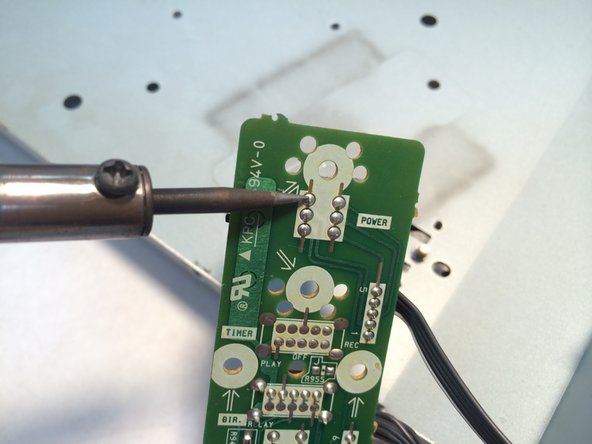
    • Use a soldering iron to desolder the power switch’s terminals and connections. Remove the power switch, replace it, and solder it back together. Repeat these steps in reverse order to put the cassette player back together.

Conclusión

To reassemble your device, follow these instructions in reverse order.

Cameron

Miembro Desde 06/01/16

108 Reputación

1 Guía escrita

0 comentarios

Agregar Comentario

Ver Estadísticas:

Ultimas 24 horas: 0

Ultimos 7 días: 0

Ultimos 30 días: 0

Todo El Tiempo: 593