Saltar al contenido principal

System76 Serval WS Cooling Fan Replacement

Qué necesitas

  1. System76 Serval WS Cooling Fan Replacement, Cooling Fan: paso 1, imagen 1 de 1
    • Unplug the power supply and remove the battery from the device before proceeding.

    • Unscrew and remove the 4 screws circled in red. Then remove the plastic bottom panel.

  2. System76 Serval WS Cooling Fan Replacement: paso 2, imagen 1 de 2 System76 Serval WS Cooling Fan Replacement: paso 2, imagen 2 de 2
    • Remove the numbered screws in order to safely remove the heatsink

    • Remove the heatsink to access the cooling fans.

    • During reassembly, make sure to tighten the heatsink screws in the order indicated by the labeled numbers.

  3. System76 Serval WS Cooling Fan Replacement: paso 3, imagen 1 de 1
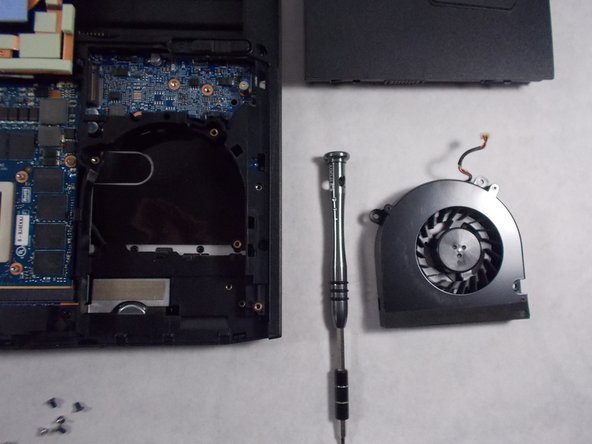
    • Unscrew and remove the screws circled in red, 3 screws per fan.

    • Next unplug the 4-pin power connectors, marked in orange squares.

    • Remove the cooling fans by lifting them up and out of the casing.

  4. System76 Serval WS Cooling Fan Replacement: paso 4, imagen 1 de 2 System76 Serval WS Cooling Fan Replacement: paso 4, imagen 2 de 2
    • Plug in the 4-pin power connectors of the new fans.

    • Insert and tighten 3 screws per fan.

    • If needed, clean off the old thermal paste from the CPU, GPU, and heatsink using isopropyl alcohol and a microfiber cloth. Apply new thermal paste before reassembly.

    • Clean the dust from the heatsink fins.

Conclusión

To reassemble your device, follow these instructions in reverse order.

Oliver Anderson

Miembro Desde 03/26/19

289 Reputación

3 Guías creadas

Equipo

Un comentario

What model of fan would one buy to replace this?

CrustyTrombone - Contestar

Agregar Comentario

Ver Estadísticas:

Ultimas 24 horas: 1

Ultimos 7 días: 3

Ultimos 30 días: 6

Todo El Tiempo: 618