Saltar al contenido principal

Swann Doorphone Video Intercom Camera Replacement

Qué necesitas

  1. Swann Doorphone Video Intercom Camera Replacement, Camera: paso 1, imagen 1 de 3 Swann Doorphone Video Intercom Camera Replacement, Camera: paso 1, imagen 2 de 3 Swann Doorphone Video Intercom Camera Replacement, Camera: paso 1, imagen 3 de 3
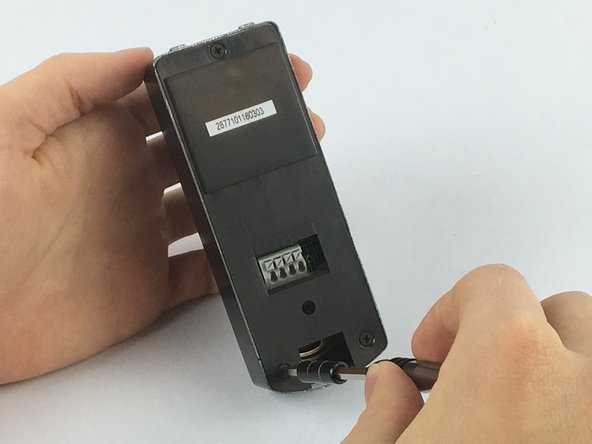
    • Flip the outdoor camera over so that the underside is facing up.

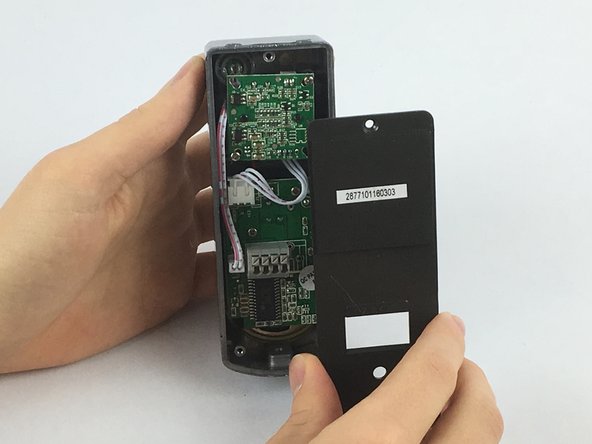
    • Remove the back cover by grabbing the sides of the camera and pulling towards your body.

  2. Swann Doorphone Video Intercom Camera Replacement: paso 2, imagen 1 de 2 Swann Doorphone Video Intercom Camera Replacement: paso 2, imagen 2 de 2
    • With the back cover of the outdoor camera off, press the first gray button, with blue wire underneath, down as shown in the picture.

    • While pressing the gray square button, remove the blue wire from the first opening under the button.

    • Be sure to remove the same color wire for the outdoor camera as was used for the indoor video intercom.

  3. Swann Doorphone Video Intercom Camera Replacement: paso 3, imagen 1 de 3 Swann Doorphone Video Intercom Camera Replacement: paso 3, imagen 2 de 3 Swann Doorphone Video Intercom Camera Replacement: paso 3, imagen 3 de 3
    • Remove the other wires using the same steps as the blue wire.

    • Using the JIS #0 screwdriver, remove the 2mm screws from the back plate.

    • Remove the back plate by pulling the plate away from the device.

  4. Swann Doorphone Video Intercom Camera Replacement: paso 4, imagen 1 de 2 Swann Doorphone Video Intercom Camera Replacement: paso 4, imagen 2 de 2
    • Using the JIS #0 screwdriver, remove the 1mm screws from behind the camera.

  5. Swann Doorphone Video Intercom Camera Replacement: paso 5, imagen 1 de 2 Swann Doorphone Video Intercom Camera Replacement: paso 5, imagen 2 de 2
    Herramienta utilizada en este paso:
    Tweezers
    $4.99
    Comprar
    • Using one of the tweezers from the Precision Tweezers Set, gently place them around the wire connector attached to the camera.

    • Pull slowly in the direction of the cables until the connector is no longer attached.

  6. Swann Doorphone Video Intercom Camera Replacement: paso 6, imagen 1 de 2 Swann Doorphone Video Intercom Camera Replacement: paso 6, imagen 2 de 2
    • Remove the camera from the device.

Conclusión

To reassemble your device, follow these instructions in reverse order.

Emily Stenke

Miembro Desde 02/14/18

555 Reputación

4 Guías creadas

Equipo

USF Tampa, Team S2-G4, Eyestone Spring 2018 Miembro de USF Tampa, Team S2-G4, Eyestone Spring 2018

USFT-EYESTONE-S18S2G4

4 Miembros

5 Guías creadas

Ver Estadísticas:

Ultimas 24 horas: 1

Ultimos 7 días: 3

Ultimos 30 días: 14

Todo El Tiempo: 663