Esta traducción la ha hecho un programa y todavía no la ha revisado nadie. ¿Hablas este idioma? Échale un vistazo.

Sustitución de la bomba de agua superior de la Keurig K40

Andrew Bornemann y 2 otros contribuidores
Última actualización: 15 de ago. de 2026
Vistas: 11 k
Ver estadísticas:
- Últimas 24 horas:
- 1
- Últimos 7 días:
- 22
- Últimos 30 días:
- 131
- Todo El Tiempo:
- 11,234
Comentarios: 15
10 comments on steps, 5 guide comments.
Go to guide commentsCompletado: 5 6
5 personas han marcado esta guía como "completada". ¿Serás tú la próxima persona en hacerlo?
6 persona acaba de marcar esta guía como "completada". ¡Incluyéndote, excelente trabajo!
Favoritos: 0 1
Nadie ha marcado como "Favorita" ni se ha suscrito a esta guía. ¿Quieres hacerlo tú?
1 persona marcó (y se suscribió) a esta guía como favorita, ¡y ese eres tú!
Introducción
Ir al paso 1 ↓Esta guía te mostrará cómo abrir la unidad superior de la Keurig K40. También te mostrará cómo retirar y sustituir la bomba de agua superior de un dispositivo Keurig K40.
Qué necesitas
Herramientas

-
-
-
Empieza por quitar la cubierta superior del dispositivo.
 Pregunta a FixBot
-
-
-
Desatornilla los dos tornillos de 1.5 mm situados en la bomba de agua.
-
-
-
Manteniendo una mano firmemente apoyada sobre el dispositivo, tira hacia arriba de la bomba de agua hasta que se separe del dispositivo.
-
La bomba de agua y el tubo deberían estar ahora sueltos y fáciles de mover, tal como se muestra.
-
-
-
-
Tira del punto donde la tubería se une a la bomba de agua.
-
La tubería se soltará y el filtro de agua quedará libre y listo para ser sustituido.
-
-


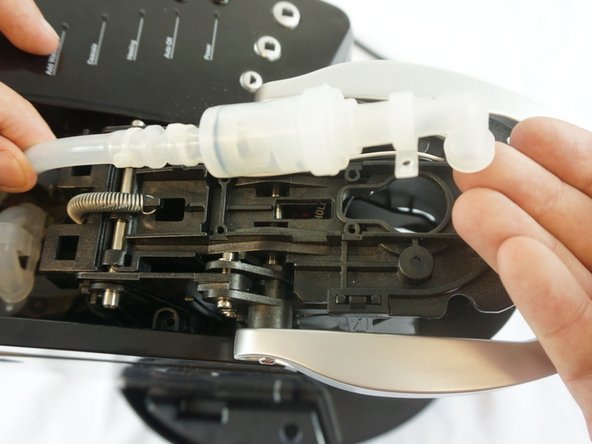

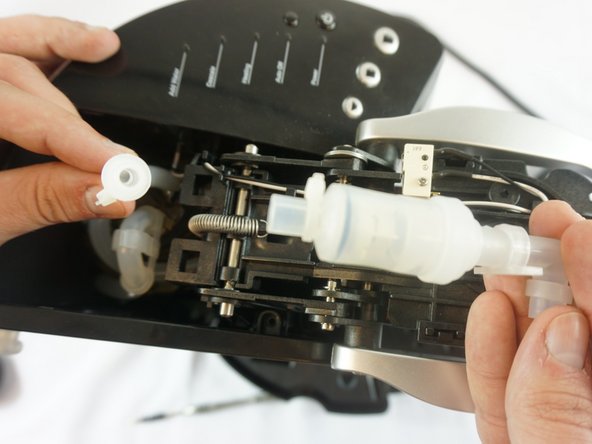
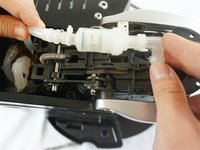
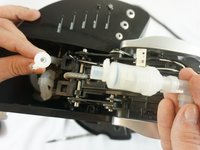
Para volver a montar tu dispositivo, sigue estas instrucciones en orden inverso.
Cancelar: No complete esta guía.
5 personas más completaron esta guía.

Equipo

USF Tampa, Team 6-1, Eyestone Spring 2016 Miembro de USF Tampa, Team 6-1, Eyestone Spring 2016
USFT-EYESTONE-S16S6G1
Miembros de 3
60 Guías creadas
5Guía Comentarios
I viewed this to replace the pump. But after the checkvalve was replaced through these instructions my K40 works like new. Thank you.
After 4 months of storage, my Keurig didn't operate correctly when I tried using it again. The "add water" blue light, the "heat" red light and the middle "coffee cup" blue light, all x3 lights, blinked together... and the unit was seized up it seamed when I would try using it. After pulling the bottom apart and checking all those tubes, I found this web page, and then put the bottom back together again, and removed the top part to get to the "water pump" [check valve actually], and blew into it; it was completely seized. I blew a short spurt really hard un-siezing it. That's all it took. It was stuck from being in storage, dried out and sealed as it dried out. I put everything back together and I had to run the unit a few times until everything worked as it should. I really enjoyed this thread and everyone's collaboration, as it solved the root of my problem, which I couldn't find resolution anywhere else. Thanks a bunch! Don't forget to click on and read the detailed comments people wrote for each step...
