Qué necesitas
-
-
-
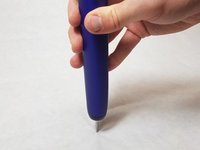
Retira las cubiertas de goma de la parte superior de la placa base y la parte posterior de la batería.
-


Para volver a armar tu dispositivo, sigue estas instrucciones en orden inverso.
Para volver a armar tu dispositivo, sigue estas instrucciones en orden inverso.
Cancelar: No complete esta guía.
8 personas más completaron esta guía.
Un agradecimiento especial a estos traductores:
100%


Estos traductores nos están ayudando a reparar el mundo! ¿Quieres contribuir?
Empezar a traducir ›
Equipo

IUPUI, Team S22-G1, Bayer Fall 2017 Miembro de IUPUI, Team S22-G1, Bayer Fall 2017
IUPUI-BAYER-F17S22G1
4 Miembros
9 Guías creadas
3 comentarios
I recommend to soak the bottom of the brush in a cup of warm water to make it easier to remove the bottom cap. The plastic is very easy to crack when cold.
This is a decent guide. Thank you to the author! Problem is that they don't make these devices user serviceable, so we basically have to pry and force the cap off. ARGH! RIGHT TO REPAIR NOW!!
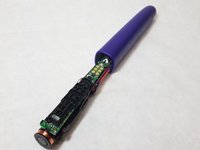
Die Anleitung ist bei Schrit 6 etwas irreführend, es sind nur 2 Lötstellen, die Batterie hat ja auch nur 2 Lötfahnen wie man sieht. Eine bei F1, die andere bei R6 und JP1. Der unterste Pfeil im Bild der auf JP1 zeigt ist falsch. Ich empfehle das Lötzinn mit einer Entlötpumpe mit Silikonspitze komplett zu entfernen da die Batterie in einer Kunststofffassung fest eingeklemmt ist und nur durch erhitzen des Lötzinns schwer herauszubekommen ist und sich direkt neben der unteren Lötstelle auch ein IC befindet sollte man beim löten sehr vorsichtig sein.