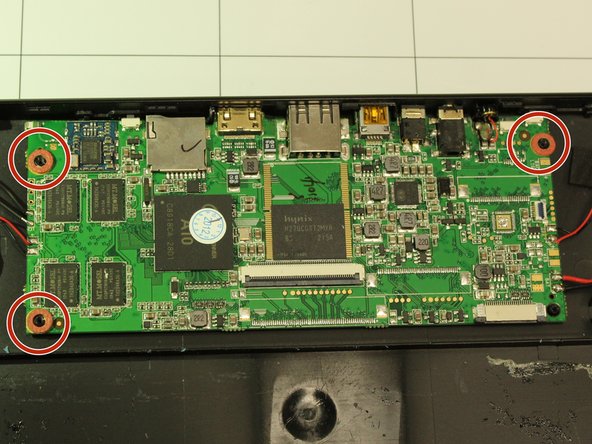
Saltar al contenido principal

Supersonic Matrix SC-91MID Motherboard Replacement

Qué necesitas

  1. Supersonic Matrix SC-91MID Motherboard Replacement, Motherboard: paso 1, imagen 1 de 1
    • Use the plastic opening tool to separate the screen from the back cover.

  2. Supersonic Matrix SC-91MID Motherboard Replacement: paso 2, imagen 1 de 1
    • Use the tweezers to lift the tab shown in the picture, and remove the orange ribbon from it gently. Repeat for all three ribbons on the device.

  3. Supersonic Matrix SC-91MID Motherboard Replacement: paso 3, imagen 1 de 2 Supersonic Matrix SC-91MID Motherboard Replacement: paso 3, imagen 2 de 2
    • Use the Phillips 1.5 mm screwdriver (Phillips #000) to unscrew the green motherboard from the body at the three points

    • Remove the washers (red)

  4. Supersonic Matrix SC-91MID Motherboard Replacement: paso 4, imagen 1 de 2 Supersonic Matrix SC-91MID Motherboard Replacement: paso 4, imagen 2 de 2
    • Use a hot soldering tool to desolder the wires connecting the motherboard to the speaker. Desolder the wires connecting the motherboard to the battery.

    • Red: Speakers

    • Orange: Battery

    • Yellow: LED

    • Check if your replacement motherboard comes with an LED. You may have to desolder the LED from your old motherboard and solder it to your replacement.

Conclusión

To reassemble your device, follow these instructions in reverse order.

Una persona más ha completado esta guía.

Sakshi Labhane

Miembro Desde 04/07/18

139 Reputación

1 Guía escrita

Equipo

IUPUI, Team S1-G1, Wilson Spring 2018 Miembro de IUPUI, Team S1-G1, Wilson Spring 2018

IUPUI-WILSON-S18S1G1

5 Miembros

6 Guías creadas

0 comentarios

Agregar Comentario

Ver Estadísticas:

Ultimas 24 horas: 1

Ultimos 7 días: 1

Ultimos 30 días: 2

Todo El Tiempo: 154