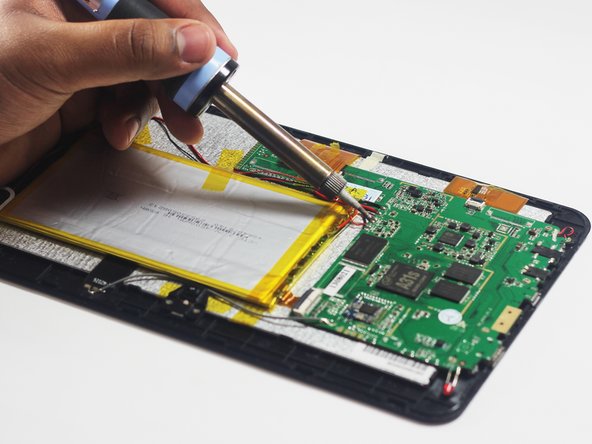
Saltar al contenido principal

SuperSonic Matrix Mid SC-999 Speaker Replacement

Qué necesitas

  1. SuperSonic Matrix Mid SC-999 Speaker Replacement, Back Cover: paso 1, imagen 1 de 1
    • Wedge the plastic opening tool between the back cover of the device and the front panel.

    • You will hear a snapping sound as the cover is separated from the body of the device.

  2. SuperSonic Matrix Mid SC-999 Speaker Replacement: paso 2, imagen 1 de 1
    • Slide the opening tool along the seam between the front panel and the back cover to un-clip the remaining connections around the device.

    • Again, you will hear a snapping sound as the cover is separated from the body of the device.

  3. SuperSonic Matrix Mid SC-999 Speaker Replacement: paso 3, imagen 1 de 2 SuperSonic Matrix Mid SC-999 Speaker Replacement: paso 3, imagen 2 de 2
    • Lift the back cover from the body of the device to expose the internal components.

  4. SuperSonic Matrix Mid SC-999 Speaker Replacement, Speaker: paso 4, imagen 1 de 1
    • Remove the Speakers

    • Use the tweezers to remove the speakers from their compartments.

  5. SuperSonic Matrix Mid SC-999 Speaker Replacement: paso 5, imagen 1 de 2 SuperSonic Matrix Mid SC-999 Speaker Replacement: paso 5, imagen 2 de 2
    • Desolder the 4 Speaker Wires

    • These wires connect the speakers to the motherboard. They are the thinnest wires.

    • If you're unfamiliar with soldering or desoldering check out this guide.

    • Be sure to wear protective eye wear. Also, keep in mind that the soldering iron will become extremely hot.

Conclusión

To reassemble your device, follow these instructions in reverse order.

Johncy George

Miembro Desde 03/26/15

101 Reputación

1 Guía escrita

Equipo

Baylor, Team 6-1, Shaver Spring 2015 Miembro de Baylor, Team 6-1, Shaver Spring 2015

BU-SHAVER-S15S6G1

4 Miembros

18 Guías creadas

0 comentarios

Agregar Comentario

Ver Estadísticas:

Ultimas 24 horas: 1

Ultimos 7 días: 1

Ultimos 30 días: 1

Todo El Tiempo: 299