Saltar al contenido principal

Spy Net Ultra Vision Goggles MicroSD Card Reader Replacement

Qué necesitas

  1. Spy Net Ultra Vision Goggles MicroSD Card Reader Replacement, Opening the Device: paso 1, imagen 1 de 2 Spy Net Ultra Vision Goggles MicroSD Card Reader Replacement, Opening the Device: paso 1, imagen 2 de 2
    • Remove the six silver 11.4 mm Phillips #0 screws

    • Pry open the device using a plastic opening tool if necessary. To do this, locate the groves running along the side of the entire device and wedge it open.

  2. Spy Net Ultra Vision Goggles MicroSD Card Reader Replacement, Removing the Styrofoam Pad: paso 2, imagen 1 de 1
    • Now that your device is open, remove the Styrofoam pad that covers the main circuit board. The adhesive should allow you to remove and replace it with ease.

    • Do this carefully to avoid tearing the pad.

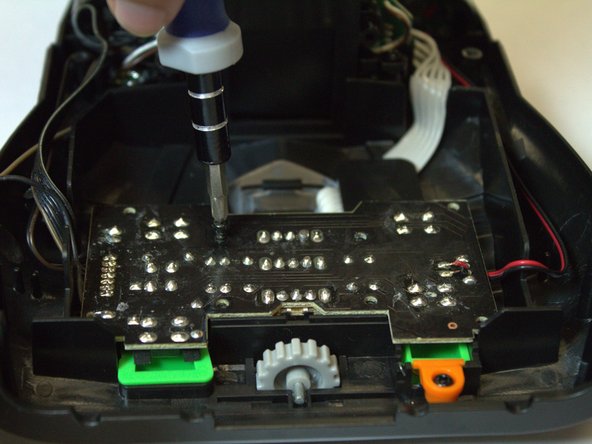
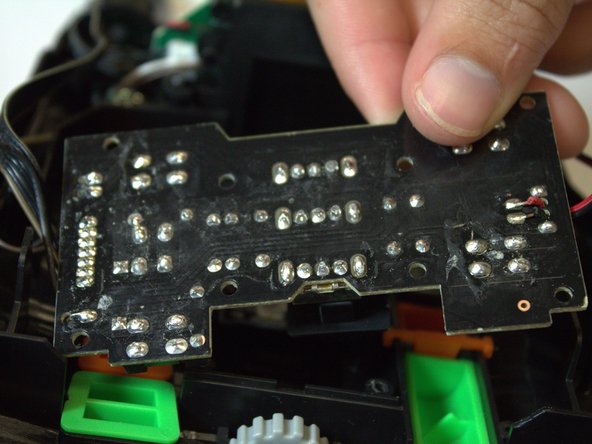
  3. Spy Net Ultra Vision Goggles MicroSD Card Reader Replacement, Removing the Circuit Board: paso 3, imagen 1 de 3 Spy Net Ultra Vision Goggles MicroSD Card Reader Replacement, Removing the Circuit Board: paso 3, imagen 2 de 3 Spy Net Ultra Vision Goggles MicroSD Card Reader Replacement, Removing the Circuit Board: paso 3, imagen 3 de 3
    • Remove the eight black 7.2 mm Phillips #0 screws from the top of the circuit board and remove the circuit board.

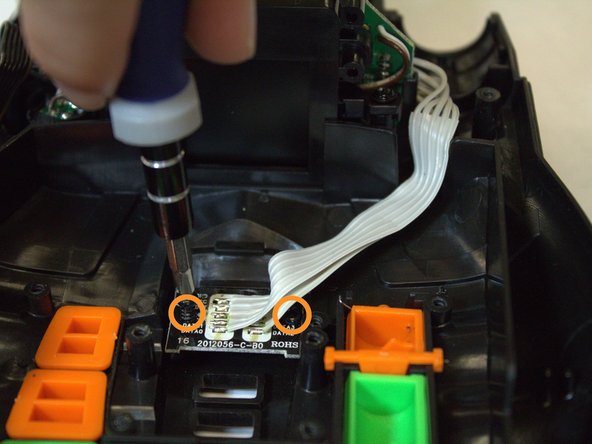
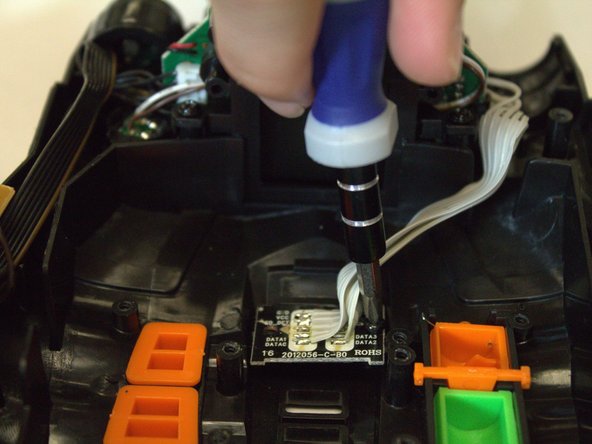
  4. Spy Net Ultra Vision Goggles MicroSD Card Reader Replacement, Removing The Micro SD Reader: paso 4, imagen 1 de 3 Spy Net Ultra Vision Goggles MicroSD Card Reader Replacement, Removing The Micro SD Reader: paso 4, imagen 2 de 3 Spy Net Ultra Vision Goggles MicroSD Card Reader Replacement, Removing The Micro SD Reader: paso 4, imagen 3 de 3
    • Unscrew the one 7.2 mm Phillips #0 screw from the plastic piece covering the microSD reader.

    • Then, unscrew the two 7.2 mm Phillips #0 screws from the microSD reader and remove it from its fastening.

  5. Spy Net Ultra Vision Goggles MicroSD Card Reader Replacement, Un-Soldering the Wires: paso 5, imagen 1 de 1
    • On the back side of the reader there are nine wires. Un-solder these wires, remove the micro SD card reader, and solder on the replacement.

    • Need Help Soldering? Check out Cómo soldar y desoldar conexiones for tips.

Conclusión

To reassemble your device, follow these instructions in reverse order.

Andrew Gittens

Miembro Desde 09/22/14

143 Reputación

4 Guías creadas

Equipo

USF Tampa, Team 4-5, Brown Fall 2014 Miembro de USF Tampa, Team 4-5, Brown Fall 2014

USFT-BROWN-F14S4G5

3 Miembros

6 Guías creadas

Un comentario

Where do you get the replacement parts?

clsutliff - Contestar

Agregar Comentario

Ver Estadísticas:

Ultimas 24 horas: 0

Ultimos 7 días: 0

Ultimos 30 días: 0

Todo El Tiempo: 432