Saltar al contenido principal

Zenbre SoundBank Z3 Speaker Replacement

Qué necesitas

  1. Zenbre SoundBank Z3 Speaker Replacement, Bottom Cover: paso 1, imagen 1 de 2 Zenbre SoundBank Z3 Speaker Replacement, Bottom Cover: paso 1, imagen 2 de 2
    • Power off the SoundBank Z3.

    • Turn over the device.

    • Peel the silicone feet up to remove.

    • No extra adhesive is needed to reapply the feet as long as the sticky side is not touched.

  2. Zenbre SoundBank Z3 Speaker Replacement: paso 2, imagen 1 de 1
    • Remove all eight of the 11 mm Phillips screws from the bottom of the device.

  3. Zenbre SoundBank Z3 Speaker Replacement: paso 3, imagen 1 de 2 Zenbre SoundBank Z3 Speaker Replacement: paso 3, imagen 2 de 2
    • Remove the bottom panel speaker using an iFixit opening tool.

  4. Zenbre SoundBank Z3 Speaker Replacement, Motherboard Cover: paso 4, imagen 1 de 3 Zenbre SoundBank Z3 Speaker Replacement, Motherboard Cover: paso 4, imagen 2 de 3 Zenbre SoundBank Z3 Speaker Replacement, Motherboard Cover: paso 4, imagen 3 de 3
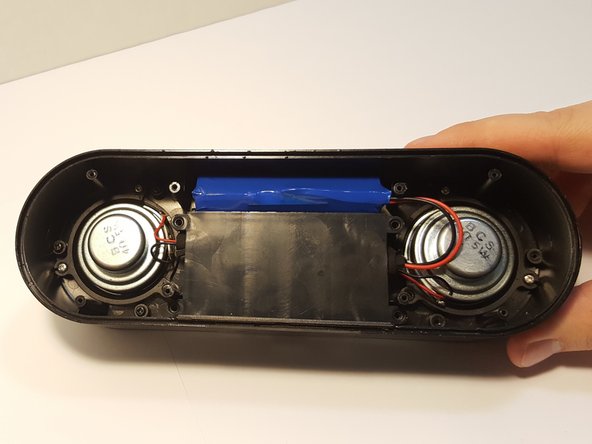
    • Remove the four 4.5 mm silver Phillips screws that secure the plastic panel covering the motherboard.

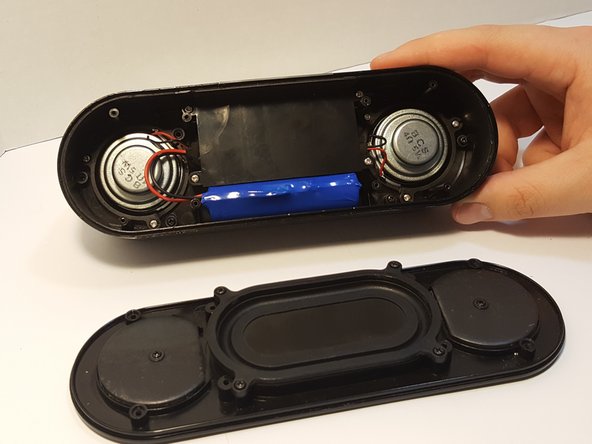
    • Remove the plastic panel.

  5. Zenbre SoundBank Z3 Speaker Replacement, Speakers: paso 5, imagen 1 de 2 Zenbre SoundBank Z3 Speaker Replacement, Speakers: paso 5, imagen 2 de 2
    • Remove the three screws that are holding the speaker down.

    • Be careful not to rip out the speaker while taking out the screws.

  6. Zenbre SoundBank Z3 Speaker Replacement: paso 6, imagen 1 de 2 Zenbre SoundBank Z3 Speaker Replacement: paso 6, imagen 2 de 2
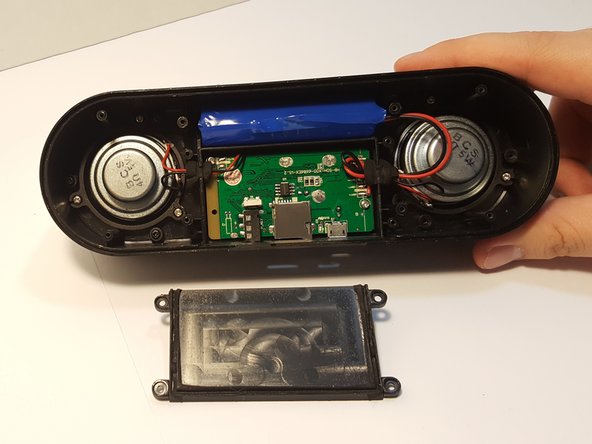
    • Desolder the speaker joints from the motherboard. Follow this How To Solder guide for help with desoldering.

  7. Zenbre SoundBank Z3 Speaker Replacement: paso 7, imagen 1 de 2 Zenbre SoundBank Z3 Speaker Replacement: paso 7, imagen 2 de 2
    • Remove the speaker from the motherboard.

    • Remove the speaker ring.

    • Be careful not to remove other components in the speaker.

    • Repeat Steps 5-7 with the other speaker.

Conclusión

To reassemble your device, follow these instructions in reverse order.

Una persona más ha completado esta guía.

Cherian Thomas

Miembro Desde 03/25/16

334 Reputación

5 Guías creadas

Equipo

0 comentarios

Agregar Comentario

Ver Estadísticas:

Ultimas 24 horas: 0

Ultimos 7 días: 0

Ultimos 30 días: 1

Todo El Tiempo: 459