Saltar al contenido principal

Sony Xperia Z5 Rear Camera Replacement

Qué necesitas

  1. Sony Xperia Z5 Rear Camera Replacement, Back Cover: paso 1, imagen 1 de 1
    • Before you begin, switch off your phone.

    • Apply a heated iOpener to the edges on the back of the phone to loosen the adhesive beneath the rear glass. Apply the iOpener for at least two minutes.

  2. Sony Xperia Z5 Rear Camera Replacement: paso 2, imagen 1 de 2 Sony Xperia Z5 Rear Camera Replacement: paso 2, imagen 2 de 2
    • Secure a suction handle to the bottom of the rear glass, as close to the edge as possible.

    • Pull up the suction handle to generate a gap.

    • Insert an opening pick into the gap to further separate the rear glass from the phone assembly.

    • The adhesive of the Xperia Z5 is fairly weak and it is possible to remove the rear glass without the use of an opening pick. In case you‘re having trouble you can have a peek at the opening procedure of the Xperia Z4.

  3. Sony Xperia Z5 Rear Camera Replacement: paso 3, imagen 1 de 2 Sony Xperia Z5 Rear Camera Replacement: paso 3, imagen 2 de 2
    • Carefully lift and remove the rear glass.

    • After installing the rear glass, apply strong, steady pressure to your phone for several minutes to help the adhesive form a good bond—a stack of heavy books works well.

  4. Sony Xperia Z5 Rear Camera Replacement, Battery Disconnect: paso 4, imagen 1 de 2 Sony Xperia Z5 Rear Camera Replacement, Battery Disconnect: paso 4, imagen 2 de 2
    • Use a spudger to pry up and disconnect the battery flex cable.

  5. Sony Xperia Z5 Rear Camera Replacement, Rear Camera: paso 5, imagen 1 de 2 Sony Xperia Z5 Rear Camera Replacement, Rear Camera: paso 5, imagen 2 de 2
    • Use a spudger to pry up and disconnect the rear camera flex cable.

  6. Sony Xperia Z5 Rear Camera Replacement: paso 6, imagen 1 de 3 Sony Xperia Z5 Rear Camera Replacement: paso 6, imagen 2 de 3 Sony Xperia Z5 Rear Camera Replacement: paso 6, imagen 3 de 3
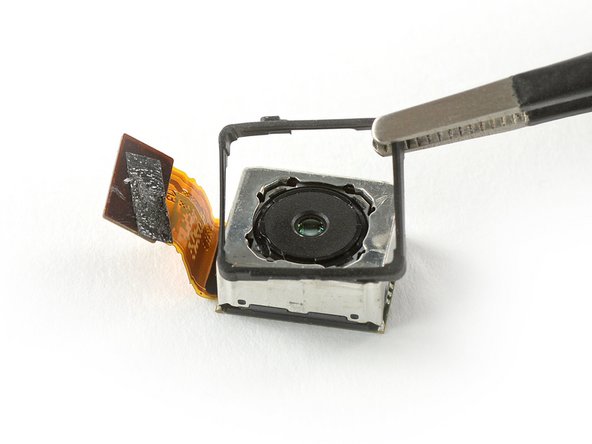
    • Remove the rear camera with a pair of tweezers.

    • Compare your new replacement part to the original part — you may need to transfer a rubber gasket to your new part before installing.

Conclusión

To reassemble your device, follow these instructions in reverse order.

Take your e-waste to an R2 or e-Stewards certified recycler.

Repair didn’t go as planned? Check out our Answers community for troubleshooting help.

Una persona más ha completado esta guía.

Dominik Schnabelrauch

Miembro Desde 11/23/16

203,299 Reputación

682 Guías creadas

Equipo

iFixit Miembro de iFixit

Staff

135 Miembros

16,817 Guías creadas

0 comentarios

Agregar Comentario

Ver Estadísticas:

Ultimas 24 horas: 0

Ultimos 7 días: 2

Ultimos 30 días: 3

Todo El Tiempo: 510