Esta versión puede contener ediciones incorrectas. Cambie a la última instantánea verificada.
Qué necesitas
-
Este paso está sin traducir. Ayuda a traducirlo
-
Use a heat gun to soften the back cover sticker around the edges.
-
Use a suction cup to pull open a gap and insert a guitar pick.
-
Carefully slide the guitar pick to cut the sticker. If you use too much force you can easily crack the glass!
-
-
Este paso está sin traducir. Ayuda a traducirlo
-
Remove the back cover and have a quick look around the inside.
-
-
Este paso está sin traducir. Ayuda a traducirlo
-
Release the battery connector and peel the sticky tape from the bottom corner of the battery.
-
Use the sticky tape to carefully pull up and remove the battery.
-
-
-
Este paso está sin traducir. Ayuda a traducirlo
-
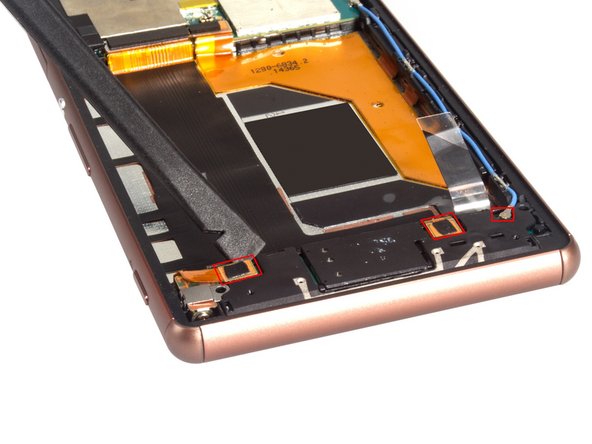
Remove the two screws with a Philips screwdriver.
-
Release the three connectors connected to the loudspeaker assembly.
-
Remove the vibrator securing bracket (this may be optional for some devices).
-
-
Este paso está sin traducir. Ayuda a traducirlo
-
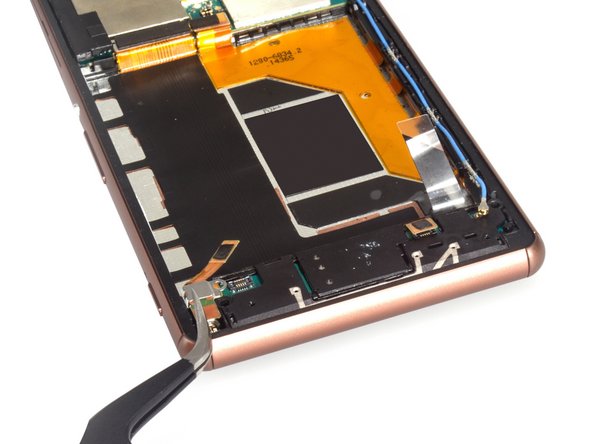
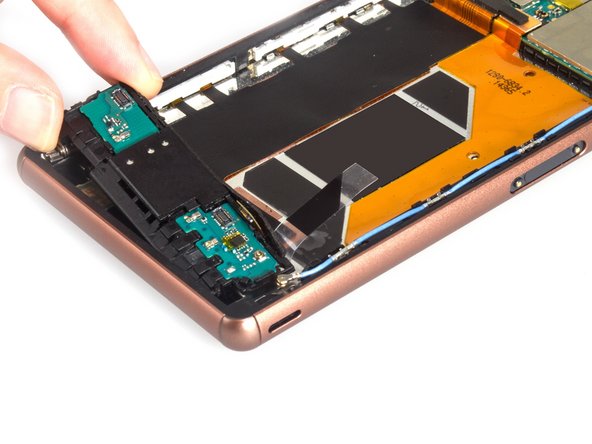
Remove the loudspeaker assembly cover. Tip: pull it toward the centre of the phone as you pull upwards.
-
Pry up and remove the loudspeaker assembly.
-
Carefully loosen the microphone here.
-
-
Este paso está sin traducir. Ayuda a traducirlo
-
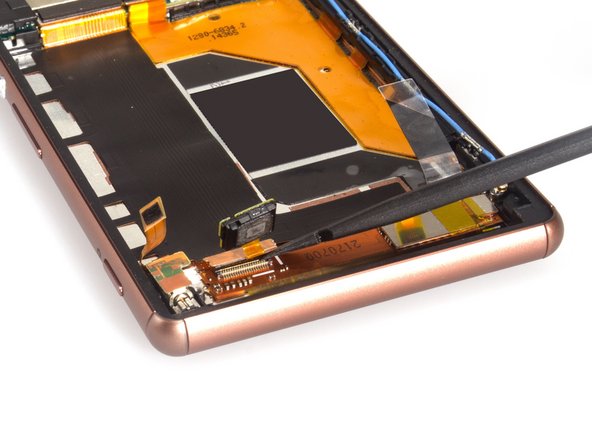
Carefully remove the metal LCD flex cover.
-
Release the LCD connector from the main flex cable.
-
Carefully pry the LCD connector from the sticker underneath.
-
-
Este paso está sin traducir. Ayuda a traducirlo
-
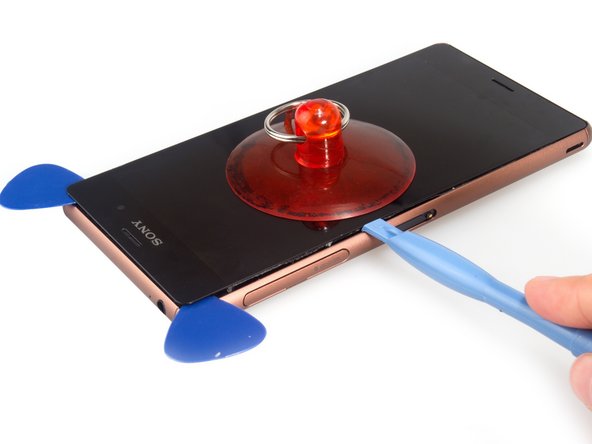
Removing the screen is the same as opening the back cover. Heat, open a gap, insert a guitar pick, slide and cut the sticker. Start from the top.
-
Tip: The glue here is stronger, you may need to insert something sharp in the corner to start.
-
-
Este paso está sin traducir. Ayuda a traducirlo
-
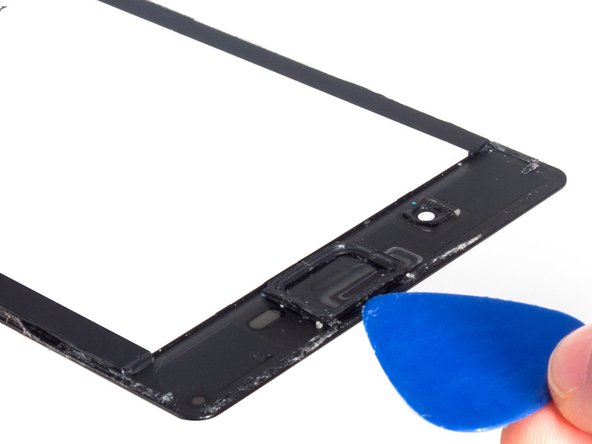
You can use a plastic opening tool to cut the sticker of left and right side.
-
Finally Pull the screen up and remove it. Be careful with the bottom LCD connector and sticker.
-
-
Este paso está sin traducir. Ayuda a traducirlo
-
It's a weird design that the earpiece speaker is stuck onto the Sony Xperia Z3 front glass and not the supporting frame. It means it is possible to remove the LCD screen with the earpiece speaker attached, or separate the speaker from its securing bracket.
-
The above steps depend on the length of the guitar pick that you use.
-


Cancelar: No complete esta guía.
64 personas más completaron esta guía.
9 comentarios
Same procedure with the Z3?
Am hasna,am live Tanzania.my phone broke touch screen and back cover screen .so what a get this tools
Please am in Ghana, how can i get a screen replacement and how much will it cost????
Z3 is slightly different at the bottom assembly marked row 4
I purchased Sony z3 dual in San Francisco and the screen got broke were can I get new screen fix in India