Saltar al contenido principal

Sony Xperia XZ2 Front Camera Replacement

Qué necesitas

  1. Sony Xperia XZ2 Front Camera Replacement, LCD Screen: paso 1, imagen 1 de 3 Sony Xperia XZ2 Front Camera Replacement, LCD Screen: paso 1, imagen 2 de 3 Sony Xperia XZ2 Front Camera Replacement, LCD Screen: paso 1, imagen 3 de 3
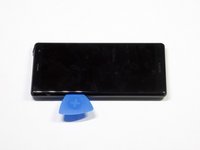
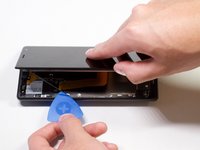
    • Weaken the glue that is keeping the screen in place by heating up the edges of the phone with a hair dryer or heat gun.

    • The phone gets very hot and can hurt the user handling it.

  2. Sony Xperia XZ2 Front Camera Replacement: paso 2, imagen 1 de 3 Sony Xperia XZ2 Front Camera Replacement: paso 2, imagen 2 de 3 Sony Xperia XZ2 Front Camera Replacement: paso 2, imagen 3 de 3
    • Scrape all the glue from the inside edges by inserting opening picks into the bottom edge of the phone and working your way around the edges.

    • If the glue hardens and becomes difficult to move the plastic around the edges, reheat the phone.

  3. Sony Xperia XZ2 Front Camera Replacement: paso 3, imagen 1 de 2 Sony Xperia XZ2 Front Camera Replacement: paso 3, imagen 2 de 2
    • Pry open the phone by inserting an opening pick under one of the edges and removing the screen.

    • The screen is still attached by a connector, so do not pull the pieces apart.

  4. Sony Xperia XZ2 Front Camera Replacement: paso 4, imagen 1 de 1
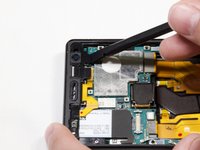
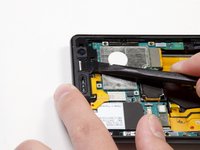
    • Remove the bracket covering the connector by grabbing one side of the bracket with angled tweezers and gently pulling it off.

  5. Sony Xperia XZ2 Front Camera Replacement: paso 5, imagen 1 de 1
    • Gently remove the connector by using a spudger to pop it off.

  6. Sony Xperia XZ2 Front Camera Replacement, Front Camera: paso 6, imagen 1 de 1
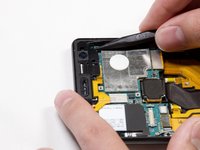
    • Take out the twelve 3.5mm screws using the Phillips #00 screwdriver.

    • Remove the one 3 mm Phillips #00 screws.

    • Remove the two 1mm Phillips #00 screws.

    • Fifteen screws should be removed in total in this step. (Not all the screws are visible in the picture.)

  7. Sony Xperia XZ2 Front Camera Replacement: paso 7, imagen 1 de 1
    • Lift the metal screen shield out of the phone.

  8. Sony Xperia XZ2 Front Camera Replacement: paso 8, imagen 1 de 3 Sony Xperia XZ2 Front Camera Replacement: paso 8, imagen 2 de 3 Sony Xperia XZ2 Front Camera Replacement: paso 8, imagen 3 de 3
    • Use the spudger to pop off the plastic protector.

  9. Sony Xperia XZ2 Front Camera Replacement: paso 9, imagen 1 de 1
    • Gently pry up the battery flex connector using the spudger.

Conclusión

To reassemble your device, follow these instructions in reverse order.

Chloe

Miembro Desde 01/24/19

214 Reputación

1 Guía escrita

Equipo

Cal Poly, Team S19-G5, White Winter 2019 Miembro de Cal Poly, Team S19-G5, White Winter 2019

CPSU-WHITE-W19S19G5

4 Miembros

10 Guías creadas

0 comentarios

Agregar Comentario

Ver Estadísticas:

Ultimas 24 horas: 0

Ultimos 7 días: 0

Ultimos 30 días: 14

Todo El Tiempo: 968