Introducción
How to disassemble / take apart Sony Xperia M2 and change the Touchscreen / Glass / Digitizer and/or the LCD Display.
Qué necesitas
-
-
Warm the Back Cover. You can use a hairdryer.
-
Use a small suction cup and plastic tools for separating the Rear panel.
-
Before installing the new cover, you must clean the phone from the old adhesive tape and install a new one if your spare part has come without double sided adhesive tape.
-
-
-
Disconnect the Battery Cable.
-
The battery is stuck to the phone fame. Use the white tape to remove it.
-
Li-Polymer Battery, 2230 mAh
-
Part number: LIS1551ERPC
если первая разборка, отклеивается очень сложно и я бы советовал нагреть модуль до 70-76, на сепараторе. тогда аккумулятор отклеится легче. =)
I see the regular M2 has a large identification sticker. On the M2 Aqua (or at least the one I have) the sticker is shorter, so it’s pretty easy to short out the battery flex contacts against the metal shield located just above the battery connector on the motherboard. Once shorted, the battery seems to go into some sort of “protection mode” and the phone wont boot unless you plug it into a charger first.
-
-
-
Remove the SIM and the memory cards.
-
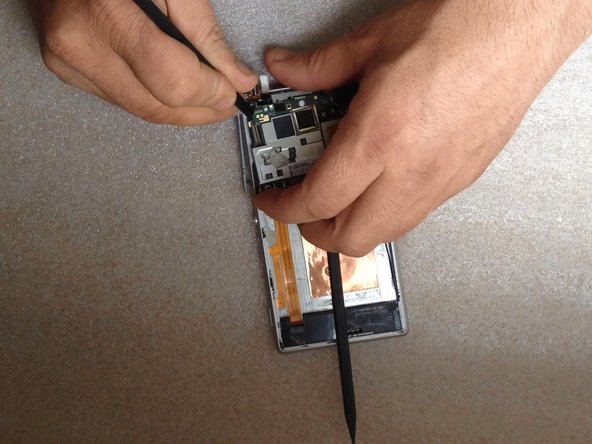
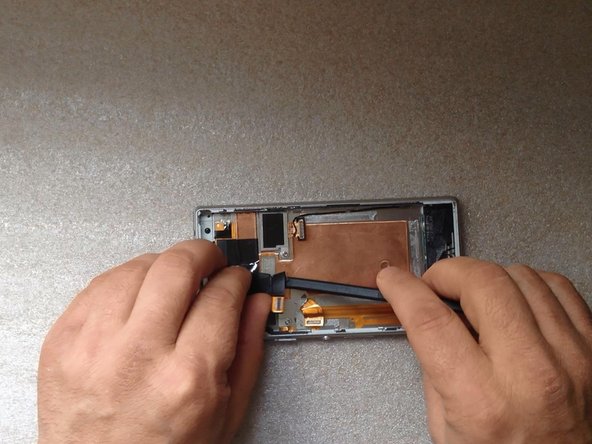
Remove x4 T5 Torx Corner screws & x2 T5 Torx Screws on the Board
-
-
-
-
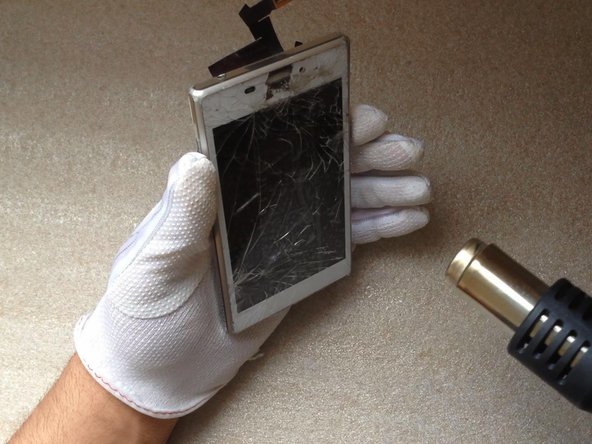
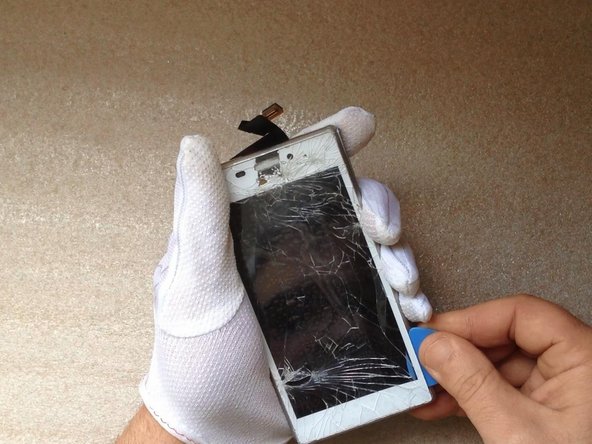
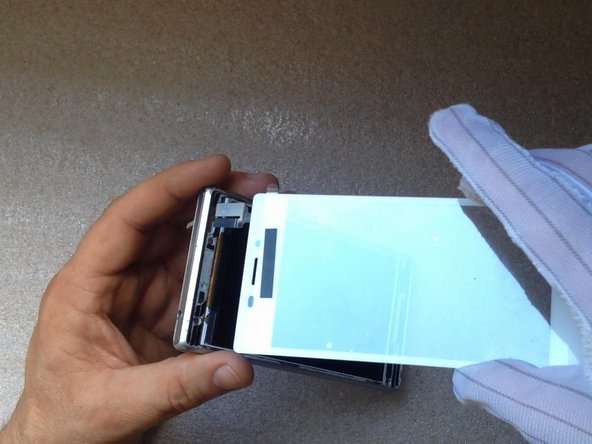
This is the Display Assembly.
-
The LCD Display and the Touchscreen are not firmly bonded, while some other other models.
-


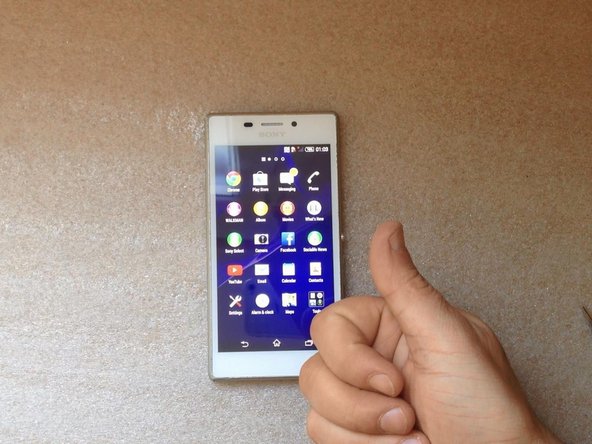
To reassemble your device, follow these instructions in reverse order.
To reassemble your device, follow these instructions in reverse order.
Cancelar: No complete esta guía.
40 personas más completaron esta guía.

Equipo

18 comentarios
Followed Guide & completed without any errors. Also Step 2 "remove x4 screws" There's also x2 Screws on the board that needs removing.
Also The touch screen isn't exactly glued to the screen so does come of pretty easy but be very careful when using spudger to remove the glass as you could easily prod the touch screen. Apart from that thanks for the Guide it went well.
Hi there. Thanks for the leaflet with the links that I got with my purchase. Things went really well, except for one thing. Not sure if you can help, but it would be great if you can.
Everything is connected and assembled, although not bonded yet. The problem I have is the touch screen buttons at the bottom of the screen (return/back, home, task navigation) are completely unresponsive. Is there anything you could advice to help please.
It might be worth knowing that with the phone in landscape (rather than portrait) the buttons seem to work, maybe suggesting that there is something at the bottom of the screen that's not quite right.
Thank you in advance of any response.
bro you change whole part touch digitizer + lcd ???
shehroz -
I changed the broken touchscreen today... with success, except that during the operation, I broke the LCD! (I did not read the comments first!!!) Indeed, the screen was broken in many parts and as I wanted to unpaste some of the rather small parts (1-2cm wide), they pressed on the screen and broke it. It is not visible when switched off, but I could check that some broken parts correspond to the shape of some shards of glass when I switched it on and realize that I broke it.
A comment that might be useful: when you assemble again the microphone part, extend maximally the door of the SIM and the microSD, otherwise you may have difficulties to place it back, and do not forget the connector of the proximity detector.
Good luck!
Just completed this repair. A couple of notes: The time estimate of 25mins is very bad. Since this guide is for people who haven't done these things a lot, I would change that to 1-2, maybe even up to 3, hours, just because I personally used almost 1,5 hours and I've changed well over 100 different screens...
Also..
-You don't need to touch the bottom module, as opposed to some of the comments below. The lcd cable is under the motherboard, as shown in the guide. So just 4 screws, leave the bottom alone.
-Battery removal will be difficult without heating the battery a little bit before removal.
-The instructions on removing the motherboard were vague imo.. Personally, I inserted a plastic tool under the motherboard (shown in guide), slid the motherboard towards the bottom, then to the left, then bottom again.. until left side of the board lifted up. (Ok, Also vague, its hard to explain.. ) Just do this carefully, and DO NOT let your spudger slip while prying or some of the SMD on the board might get damaged.
Another thing I though of:
The screen removal looked crude to me. If you do it like this, you should be VERY careful, or your lcd can break very easily.And imo, dont use a plastic tool for separating them, use a sharp blade, just dont scratch the lcd with the tip of the knife.
However, as you probably know, there are 3 layers to the screen (not counting the layers of the lcd, lcd here counting as just one layer). The first layer is the glass, second is the digitizer film, and then finally the lcd. The glass and digitizer films are firmly bonded, but there is just a little bit of double-sided tape between the lcd and the digitizer film. Now, the way I removed the digitizer and the glass, is that I first dug out shards at the top of the screen, until I could get a cutting wire between the digitizer film and the lcd. Then just warm up the screen and cutting wire separates the glass+dig, like going through butter. And you don't even have to unplug the lcd for this.
Hope someone finds this helpful and good luck.
I have replaced my screen and put back together but now I have no sound apart from when I plug in my earphones can you help please my number is 07776066074 thanks John
I have replaced my screen put back together again but now have no sound apart from when I inserted my earphones please help
I replaced my LCD and touchscreen. Now LCD and touchscreen are upside town - they are working, but i have to find right place to touch as from mirror - everything is turned 180 degrees. How to fix it? Can you help me please? Is the phone gyro fault or something else?
Tiina
M2 and M2 aqua use the same display and touch screen?
Same problem here, had to tape over the touch screen to keep it in one piece. I did wonder if its worth ordering a replacement LCD as there is some minor damage, a little tip I used is repairing surface scratches using a UV "security" marker. Worked on my 3 year old-damaged-$$$$-LCD-TV and have used it on lightly damaged laptop screens as well.
Thanks!
No sound = probably a broken speaker cable. Also check there isn't a bent pin on the earphone connector as this can be the cause here.
Essentially the phone thinks the headphones are plugged in all the time.
Also a useful tip, the old HP printer sensor strips make great LCD separators. Because they are plastic you get about 1-2 uses out of them but it does work at least on some LCD/OLED phones.
Maybe worth getting some molybdenum wire if you are doing a lot of these, it lasts ages.
Stainless steel 44 gauge wire isn't strong enough in my experience.
It's easy and very convenient
Can i use this technique in Xperia m2 dual??
Hi there,
Where could I buy a new screen ? Could you give an a supplyer’s e-mail adress ? Thanks Richard
I just got done replacing an LCD + Frame on an Xperia M2 Aqua. This phone is needlessly difficult to repair, more so than the regular M2 because there’s surprise adhesive foam everywhere, which led me to accidentally break the main microphone while removing the main speaker/vibrator/mic assembly. Because it’s such an unpopular model, there are not many repair guides on the internet (and the ones I found failed to address this specific part), not to mention how hard it is to find reasonably-priced spare parts. I really hope a mic from a donor phone and a bit of time with a microsoldering station can fix it because I’ve already spent more than the phone is worth in repairs and time haha.
One battery
One camra lance back
Prince Kushwah - Contestar