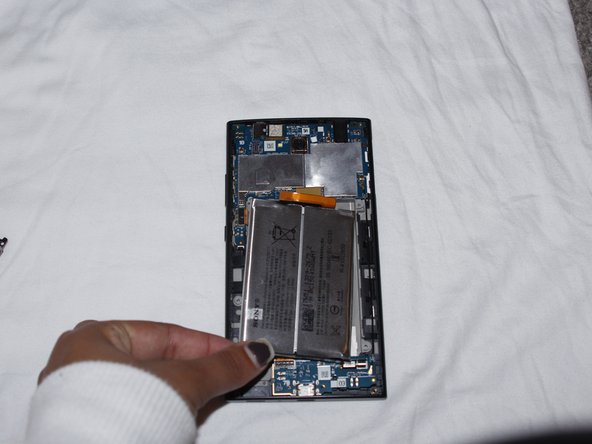
Saltar al contenido principal

Sony Xperia L2 LTE Rear Camera Replacement

Qué necesitas

  1. Sony Xperia L2 LTE Rear Camera  Replacement, Battery: paso 1, imagen 1 de 2 Sony Xperia L2 LTE Rear Camera  Replacement, Battery: paso 1, imagen 2 de 2
    • Before disassembling the battery, power off your Sony Xperia L2 LTE.

    • Remove SIM card tray.

  2. Sony Xperia L2 LTE Rear Camera  Replacement: paso 2, imagen 1 de 3 Sony Xperia L2 LTE Rear Camera  Replacement: paso 2, imagen 2 de 3 Sony Xperia L2 LTE Rear Camera  Replacement: paso 2, imagen 3 de 3
    • Use the plastic opening tool to pry the back case of the phone off.

    • The fingerprint sensor is connected to the motherboard.

    • Disconnect the fingerprint sensor.

  3. Sony Xperia L2 LTE Rear Camera  Replacement: paso 3, imagen 1 de 1
    • Unscrew all 10 screws from the top and bottom portion of the phone using a T4 Torx screwdriver.

    • Use the plastic opening tool to remove the unscrewed top and bottom portion of the phone.

  4. Sony Xperia L2 LTE Rear Camera  Replacement: paso 4, imagen 1 de 2 Sony Xperia L2 LTE Rear Camera  Replacement: paso 4, imagen 2 de 2
    • Disconnect the battery cable from the motherboard.

    • Pry up the battery and remove it from the device.

    • Battery may have adhesive that needs to be removed prior to removing the battery.

    • Be careful not to jab the battery with any sharp tools. A punctured battery may leak dangerous chemicals or catch fire.

  5. Sony Xperia L2 LTE Rear Camera  Replacement, Motherboard: paso 5, imagen 1 de 1
    • Unclip circuit connectors from phone to motherboard.

  6. Sony Xperia L2 LTE Rear Camera  Replacement: paso 6, imagen 1 de 3 Sony Xperia L2 LTE Rear Camera  Replacement: paso 6, imagen 2 de 3 Sony Xperia L2 LTE Rear Camera  Replacement: paso 6, imagen 3 de 3
    • Use blue plastic opening tool to pry off the motherboard.

  7. Sony Xperia L2 LTE Rear Camera  Replacement, Rear Camera: paso 7, imagen 1 de 2 Sony Xperia L2 LTE Rear Camera  Replacement, Rear Camera: paso 7, imagen 2 de 2
    • Detach the rear camera from motherboard and remove it from the device.

Conclusión

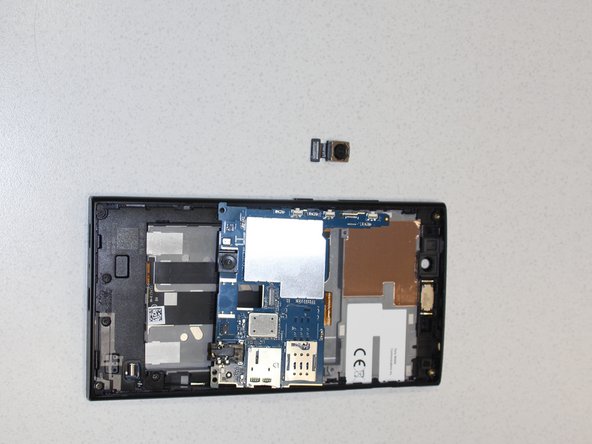
To reassemble your device, follow these instructions in reverse order.

0 comentarios

Agregar Comentario

Ver Estadísticas:

Ultimas 24 horas: 0

Ultimos 7 días: 1

Ultimos 30 días: 2

Todo El Tiempo: 149