Saltar al contenido principal

Sony Xperia E C1505 C1504 LCD Display Replacement

Qué necesitas

Resumen del Video

  1. Sony Xperia E C1505 C1504 LCD Display Replacement, LCD Display: paso 1, imagen 1 de 3 Sony Xperia E C1505 C1504 LCD Display Replacement, LCD Display: paso 1, imagen 2 de 3 Sony Xperia E C1505 C1504 LCD Display Replacement, LCD Display: paso 1, imagen 3 de 3
    • Switch-off the phone and remove the battery.

  2. Sony Xperia E C1505 C1504 LCD Display Replacement: paso 2, imagen 1 de 3 Sony Xperia E C1505 C1504 LCD Display Replacement: paso 2, imagen 2 de 3 Sony Xperia E C1505 C1504 LCD Display Replacement: paso 2, imagen 3 de 3
    • The small bottom bezel is held by 2x locking clips.

    • Preferably use plastic tools for disassembling.

  3. Sony Xperia E C1505 C1504 LCD Display Replacement: paso 3, imagen 1 de 3 Sony Xperia E C1505 C1504 LCD Display Replacement: paso 3, imagen 2 de 3 Sony Xperia E C1505 C1504 LCD Display Replacement: paso 3, imagen 3 de 3
    • There are 4x silver screws and 3x black screws.

    • The rear cover is held by 5x locking clips.

    • Two of them, at the bottom side are more hard for unlocking. You can use a screwdriver or other metal tool to unlock them.

  4. Sony Xperia E C1505 C1504 LCD Display Replacement: paso 4, imagen 1 de 3 Sony Xperia E C1505 C1504 LCD Display Replacement: paso 4, imagen 2 de 3 Sony Xperia E C1505 C1504 LCD Display Replacement: paso 4, imagen 3 de 3
    • Remove the back cover.

    • With a plastic tool disconnect one by one:

    • LCD Display flex cable

    • Touchscreen flex cable

    • Menu Buttons Board flex cable

    • Coaxial Wire Antenna cable

  5. Sony Xperia E C1505 C1504 LCD Display Replacement: paso 5, imagen 1 de 2 Sony Xperia E C1505 C1504 LCD Display Replacement: paso 5, imagen 2 de 2
    • Carefully remove the main board.

  6. Sony Xperia E C1505 C1504 LCD Display Replacement: paso 6, imagen 1 de 3 Sony Xperia E C1505 C1504 LCD Display Replacement: paso 6, imagen 2 de 3 Sony Xperia E C1505 C1504 LCD Display Replacement: paso 6, imagen 3 de 3
    • Disconnect the other side of the flex cable and remove the Home Buttons board.

    • Unstick the camera button.

  7. Sony Xperia E C1505 C1504 LCD Display Replacement: paso 7, imagen 1 de 3 Sony Xperia E C1505 C1504 LCD Display Replacement: paso 7, imagen 2 de 3 Sony Xperia E C1505 C1504 LCD Display Replacement: paso 7, imagen 3 de 3
    • The touch screen is stuck to the frame with double side adhesive tape.

    • By using plastic tools gently start separating.

    • At the bottom is glued on firmly because the bonded surface is larger.

    • Use a hot air to make separating more easy and safety.

  8. Sony Xperia E C1505 C1504 LCD Display Replacement: paso 8, imagen 1 de 3 Sony Xperia E C1505 C1504 LCD Display Replacement: paso 8, imagen 2 de 3 Sony Xperia E C1505 C1504 LCD Display Replacement: paso 8, imagen 3 de 3
    • With a plastic tool, carefully separate the LCD display from the touch screen.

    • Clear the LCD Display from the old adhesive tape.

  9. Sony Xperia E C1505 C1504 LCD Display Replacement: paso 9, imagen 1 de 3 Sony Xperia E C1505 C1504 LCD Display Replacement: paso 9, imagen 2 de 3 Sony Xperia E C1505 C1504 LCD Display Replacement: paso 9, imagen 3 de 3
    • Install the new LCD into the frame and put adhesive tape. Be careful not to cover the holes (for the speaker, menu buttons etc.).

    • Install the Touchscreen.

  10. Sony Xperia E C1505 C1504 LCD Display Replacement: paso 10, imagen 1 de 1
Conclusión

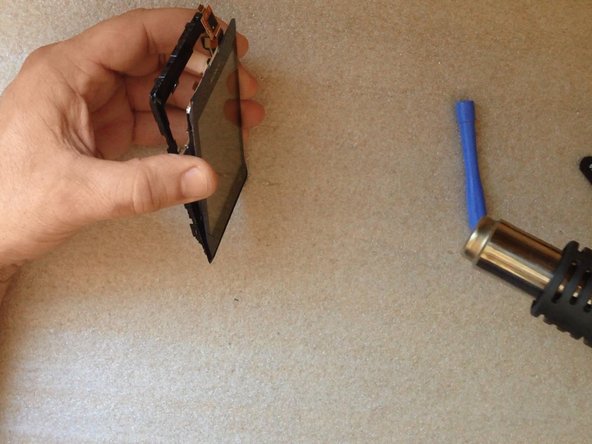
To reassemble your device, follow these instructions in reverse order.

2 personas más completaron esta guía.

ZFix

Miembro Desde 12/09/13

191,368 Reputación

330 Guías creadas

Equipo

Master Techs Miembro de Master Techs

Community

321 Miembros

1,464 Guías creadas

0 comentarios

Agregar Comentario

Ver Estadísticas:

Ultimas 24 horas: 1

Ultimos 7 días: 6

Ultimos 30 días: 19

Todo El Tiempo: 11,700