Saltar al contenido principal

Sony Vaio VPCW211AX Hard Drive Replacement

Qué necesitas

  1. Sony Vaio VPCW211AX Hard Drive Replacement, Flat: paso 1, imagen 1 de 1
    • Start with the laptop face up on a flat surface.

  2. Sony Vaio VPCW211AX Hard Drive Replacement, Flip: paso 2, imagen 1 de 1
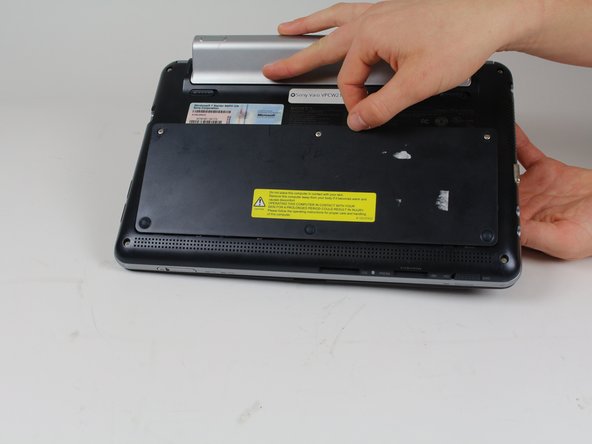
    • Flip the laptop so the bottom side up.

  3. Sony Vaio VPCW211AX Hard Drive Replacement: paso 3, imagen 1 de 2 Sony Vaio VPCW211AX Hard Drive Replacement: paso 3, imagen 2 de 2
    • Use a Phillips #0 screwdriver to unscrew the three screws from the HDD panel on the bottom of the laptop.

    • Remove the panel.

  4. Sony Vaio VPCW211AX Hard Drive Replacement, Remove Hard Drive: paso 4, imagen 1 de 1
    • In the red box, marked on the picture, is where the brand new hard drive would go, carefully slide the new part in and you are finished with this guide.

Conclusión

To reassemble your device, follow these instructions in reverse order.

2 personas más completaron esta guía.

Giselle Dougan

Miembro Desde 01/31/18

760 Reputación

5 Guías creadas

0 comentarios

Agregar Comentario

Ver Estadísticas:

Ultimas 24 horas: 0

Ultimos 7 días: 1

Ultimos 30 días: 17

Todo El Tiempo: 774