Saltar al contenido principal

Sony Vaio Tap 21 SVT212A11L Screen Replacement

Qué necesitas

  1. Sony Vaio Tap 21 SVT212A11L Screen Replacement, Screen: paso 1, imagen 1 de 2 Sony Vaio Tap 21 SVT212A11L Screen Replacement, Screen: paso 1, imagen 2 de 2
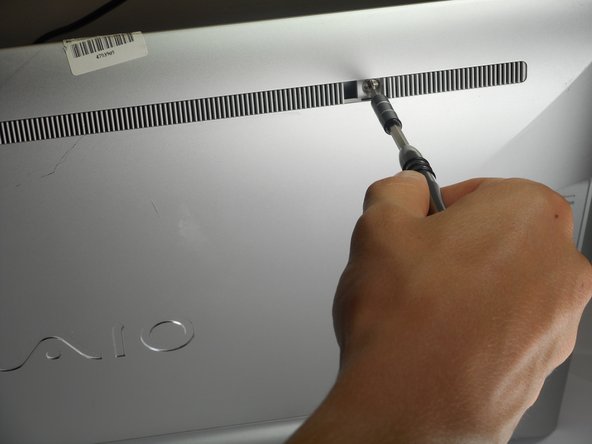
    • Insert the plastic opening tool at an angle into the grill and lift the tab by applying force down and to the left as you are lifting it out of place.

    • Use your plastic opening tool to remove the right plastic tab blocking the screw mounts behind the device.

    • The plastic tab is located on a plastic stretch of grill running along the upper half of the back of the device.

    • You can find the tab looking for a solid fill within the grill. The tab is solid within the slits.

  2. Sony Vaio Tap 21 SVT212A11L Screen Replacement: paso 2, imagen 1 de 2 Sony Vaio Tap 21 SVT212A11L Screen Replacement: paso 2, imagen 2 de 2
    • Insert the plastic opening tool at an angle into the grill and lift the tab by applying force down and to the left as you are lifting it out of place.

    • Use your plastic opening tool to remove the right plastic tab blocking the screw mounts behind the device.

    • The plastic tab is located on a plastic stretch of grill running along the upper half of the back of the device.

    • You can find the tab looking for a solid fill within the grill. The tab is solid within the slits.

  3. Sony Vaio Tap 21 SVT212A11L Screen Replacement: paso 3, imagen 1 de 3 Sony Vaio Tap 21 SVT212A11L Screen Replacement: paso 3, imagen 2 de 3 Sony Vaio Tap 21 SVT212A11L Screen Replacement: paso 3, imagen 3 de 3
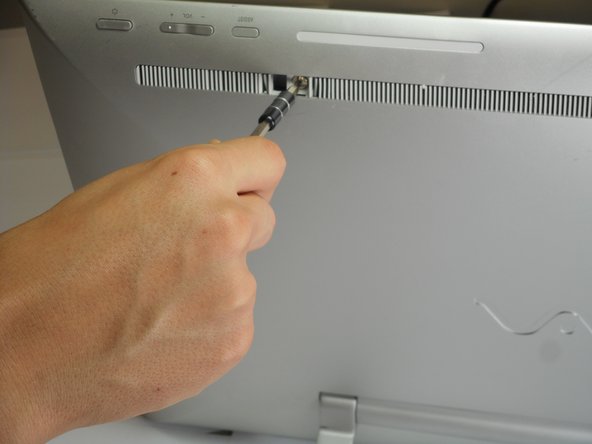
    • Remove the two 5mm screws on the back of the device using a JIS 0 screwdriver.

  4. Sony Vaio Tap 21 SVT212A11L Screen Replacement: paso 4, imagen 1 de 3 Sony Vaio Tap 21 SVT212A11L Screen Replacement: paso 4, imagen 2 de 3 Sony Vaio Tap 21 SVT212A11L Screen Replacement: paso 4, imagen 3 de 3
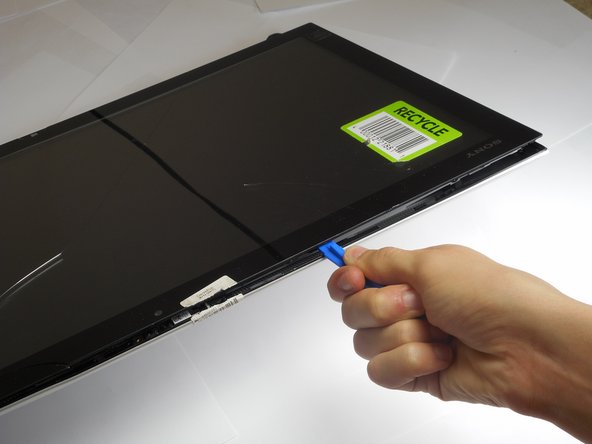
    • Face the screen of the device upwards.

    • Gently un-clip the screen around the four sides of the body with the plastic opening tool.

    • Use an up-down motion.

    • It would be easier to do this if the device is fully rested flat by pushing the device down. It should rest on the stand.

  5. Sony Vaio Tap 21 SVT212A11L Screen Replacement: paso 5, imagen 1 de 3 Sony Vaio Tap 21 SVT212A11L Screen Replacement: paso 5, imagen 2 de 3 Sony Vaio Tap 21 SVT212A11L Screen Replacement: paso 5, imagen 3 de 3
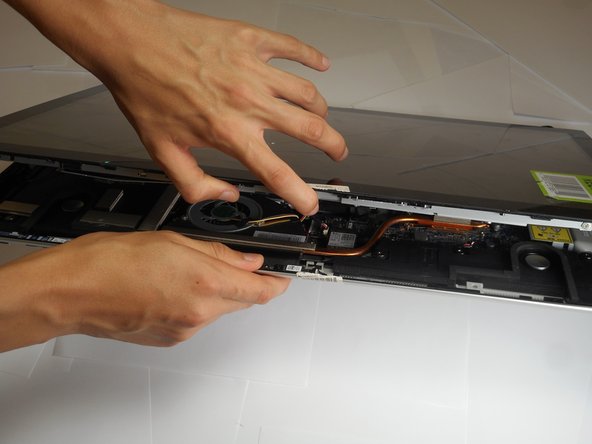
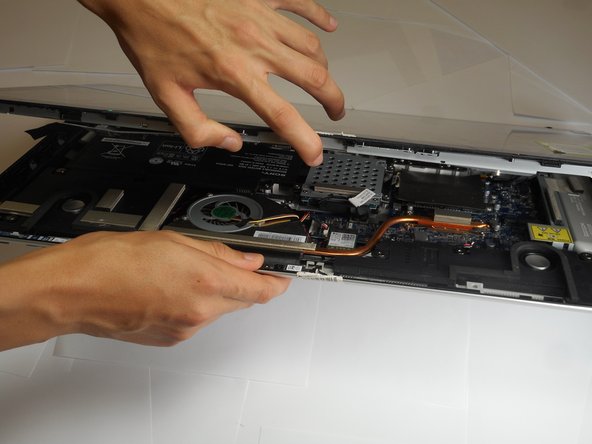
    • Lift the screen gently from the top of the device.

    • Make sure to lift the screen from the same side the screws were removed.

  6. Sony Vaio Tap 21 SVT212A11L Screen Replacement: paso 6, imagen 1 de 1
    • Slowly and gently lay the screen on its face.

    • It's important that the cables are not damaged while doing this process. Ensure as you lay the screen on its face any cables are carefully moved insuring no stress is applied on the cables.

Conclusión

To reassemble your device, follow these instructions in reverse order.

Una persona más ha completado esta guía.

Mauricio Retana

Miembro Desde 10/02/17

763 Reputación

6 Guías creadas

Equipo

Cal Poly, Team S4-G4, Livingston Fall 2017 Miembro de Cal Poly, Team S4-G4, Livingston Fall 2017

CPSU-LIVINGSTON-F17S4G4

4 Miembros

12 Guías creadas

4 comentarios

Where can I find a replacement screen for one of these Ive looked all over online

Bill Showers - Contestar

Bill have you found a replacement screen? I just cracker mine. It still works, but would like to replace. Love this computer.

WENDY SPINELLI -

The title should be how to open Sony Vaio Tap 21 SVT212A11L  and not how to replace screen

fernandez600 - Contestar

How can I get a screen for SVJ202A11L ?

VioPoss - Contestar

Agregar Comentario

Ver Estadísticas:

Ultimas 24 horas: 0

Ultimos 7 días: 7

Ultimos 30 días: 28

Todo El Tiempo: 2,971