Saltar al contenido principal

Sony Vaio Fit 13A Screen Replacement

Qué necesitas

  1. Sony Vaio Fit 13A Screen Replacement, Screen: paso 1, imagen 1 de 3 Sony Vaio Fit 13A Screen Replacement, Screen: paso 1, imagen 2 de 3 Sony Vaio Fit 13A Screen Replacement, Screen: paso 1, imagen 3 de 3
    • Unlock the screen and lift the corner. Carefully turn it over until it faces away from the keyboard. This is the same procedure as turning the screen over to use the computer in the fashion of a tablet.

  2. Sony Vaio Fit 13A Screen Replacement, Unscrew the Screen: paso 2, imagen 1 de 2 Sony Vaio Fit 13A Screen Replacement, Unscrew the Screen: paso 2, imagen 2 de 2
    • Locate and remove all ten 1 mm Phillips #0 screws.

  3. Sony Vaio Fit 13A Screen Replacement, Remove the Screen: paso 3, imagen 1 de 2 Sony Vaio Fit 13A Screen Replacement, Remove the Screen: paso 3, imagen 2 de 2
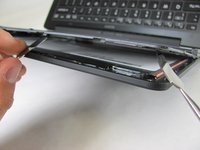
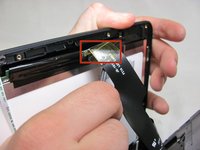
    • Use the Metal Spudger Set to carefully separate screen from backing. Be sure to keep the grey panel flush with the screen front.

  4. Sony Vaio Fit 13A Screen Replacement, Remove this Connection: paso 4, imagen 1 de 2 Sony Vaio Fit 13A Screen Replacement, Remove this Connection: paso 4, imagen 2 de 2
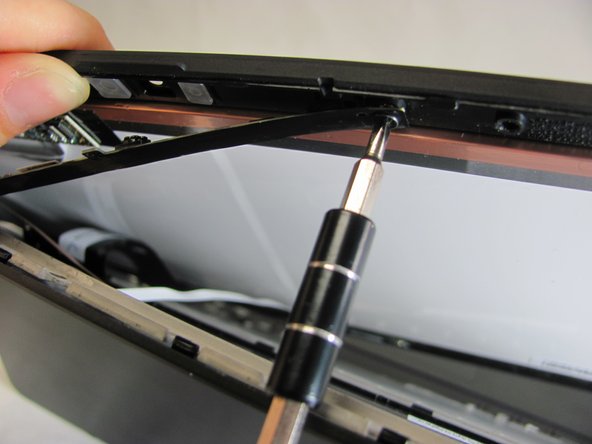
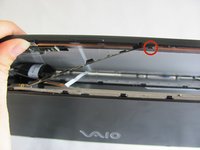
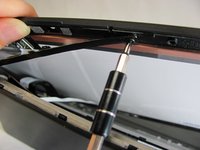
    • Remove the single 1mm Phillips #0 screw that is connecting the screen and the device.

  5. Sony Vaio Fit 13A Screen Replacement, Remove Strip: paso 5, imagen 1 de 3 Sony Vaio Fit 13A Screen Replacement, Remove Strip: paso 5, imagen 2 de 3 Sony Vaio Fit 13A Screen Replacement, Remove Strip: paso 5, imagen 3 de 3
    Herramienta utilizada en este paso:
    Tweezers
    $4.99
    Comprar
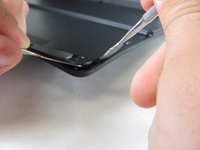
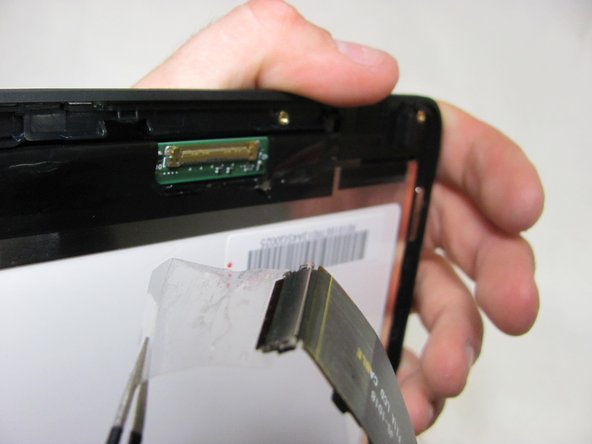
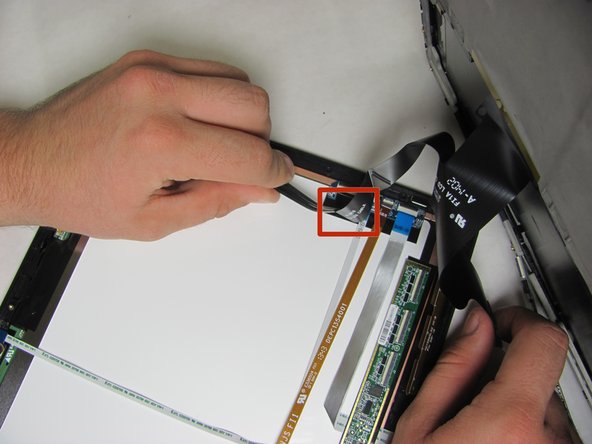
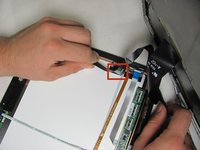
    • Use tweezers to carefully separate the two connections of the strip from screen back panel.

  6. Sony Vaio Fit 13A Screen Replacement, Screen is Now Removed: paso 6, imagen 1 de 2 Sony Vaio Fit 13A Screen Replacement, Screen is Now Removed: paso 6, imagen 2 de 2
    • Replace with the new screen.

Conclusión

To reassemble your device, follow these instructions in reverse order.

4 personas más completaron esta guía.

Marii

Miembro Desde 01/08/15

658 Reputación

3 Guías creadas

Equipo

Cal Poly, Team 21-19, Maness Winter 2015 Miembro de Cal Poly, Team 21-19, Maness Winter 2015

CPSU-MANESS-W15S21G19

4 Miembros

12 Guías creadas

2 comentarios

Bad. Do not follow this guide. The top half of the lid that has the word sony needs to be pried off the case first, it slides off. Then you remove the six or so screws from the screen, then follow the rest of these instructions, otherwise you end up with broken screw holes.

Josh - Contestar

I found the problem with my laptop Screen flicker but it is not the screen or GPU or driver there is a loose or broken connection in the screen cable that could the flickering. It cost me a new screen and had the same issue if you fiddle with the screen cable you will see when you touch or move the cable the screen starts to flicker.

Freddie Maré - Contestar

Agregar Comentario

Ver Estadísticas:

Ultimas 24 horas: 0

Ultimos 7 días: 4

Ultimos 30 días: 25

Todo El Tiempo: 6,960