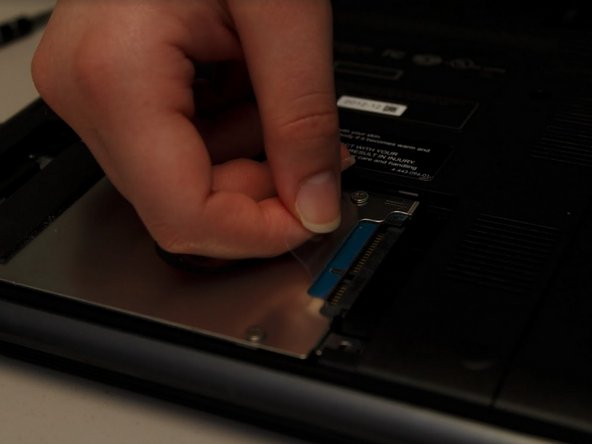
Saltar al contenido principal

Sony VAIO SVE14AJ16L Hard Drive Replacement

Qué necesitas

  1. Sony VAIO SVE14AJ16L Hard Drive Replacement, Hard Drive: paso 1, imagen 1 de 1
    • Turn off your laptop before starting.

    • Turn the closed laptop upside down so that the bottom is facing you.

  2. Sony VAIO SVE14AJ16L Hard Drive Replacement: paso 2, imagen 1 de 2 Sony VAIO SVE14AJ16L Hard Drive Replacement: paso 2, imagen 2 de 2
    • Remove the two screws on the hard drive cover with a Phillips #0 screwdriver.

    • Remove the hard drive cover.

  3. Sony VAIO SVE14AJ16L Hard Drive Replacement: paso 3, imagen 1 de 3 Sony VAIO SVE14AJ16L Hard Drive Replacement: paso 3, imagen 2 de 3 Sony VAIO SVE14AJ16L Hard Drive Replacement: paso 3, imagen 3 de 3
    • Remove the two screws holding the hard drive in place with a Phillips #0 screwdriver.

    • Using the plastic tab, slide the hard drive out away from the main portion of the laptop.

    • Lift the hard drive out of the laptop using the tab.

  4. Sony VAIO SVE14AJ16L Hard Drive Replacement: paso 4, imagen 1 de 3 Sony VAIO SVE14AJ16L Hard Drive Replacement: paso 4, imagen 2 de 3 Sony VAIO SVE14AJ16L Hard Drive Replacement: paso 4, imagen 3 de 3
    • Remove the four screws holding the hard drive bracket to the hard drive using a Phillips #0 screwdriver.

Conclusión

To reassemble your device, follow these instructions in reverse order.

Una persona más ha completado esta guía.

0 comentarios

Agregar Comentario

Ver Estadísticas:

Ultimas 24 horas: 1

Ultimos 7 días: 6

Ultimos 30 días: 16

Todo El Tiempo: 821