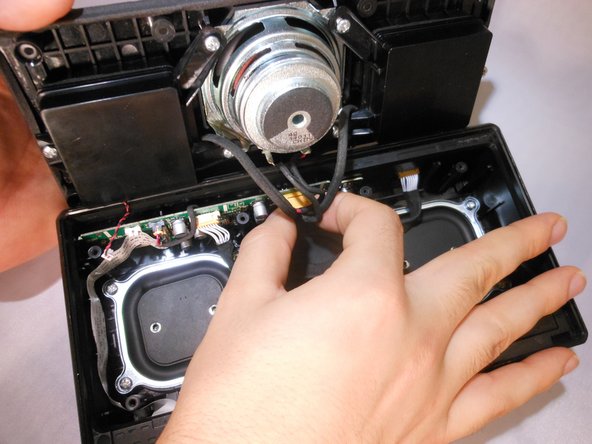
Saltar al contenido principal

Sony SRS-X5 Button Pad Replacement

Qué necesitas

  1. Sony SRS-X5 Button Pad Replacement, Battery: paso 1, imagen 1 de 1
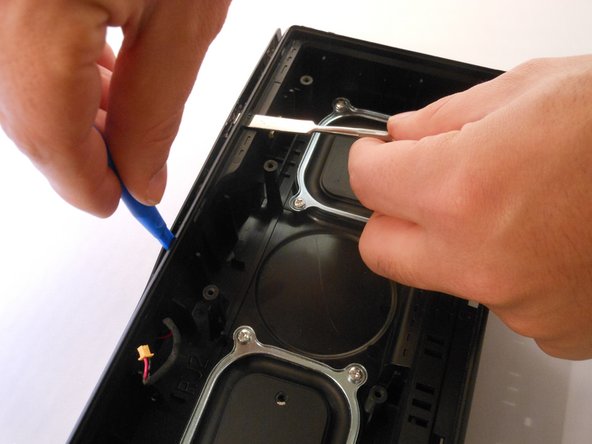
    • To gain access to the 6 bottom screws remove the following. Remove the adhered 4 corner foam pads on the bottom of the speaker using the blue plastic opening tool to reveal the screws underneath. Remove the adhered 2 center plastic squares.

    • Make sure the speaker is unplugged and powered down before doing any work on the device.

  2. Sony SRS-X5 Button Pad Replacement: paso 2, imagen 1 de 2 Sony SRS-X5 Button Pad Replacement: paso 2, imagen 2 de 2
    • Unscrew the six 6mm screws with a Phillips head #1 screwdriver.

    • Remove the bottom panel of the speaker.

  3. Sony SRS-X5 Button Pad Replacement: paso 3, imagen 1 de 1
    • Unplug the battery by gently pinching the plastic end connected to the smaller board and pull away.

    • Remove the battery.

  4. Sony SRS-X5 Button Pad Replacement, Speaker: paso 4, imagen 1 de 1
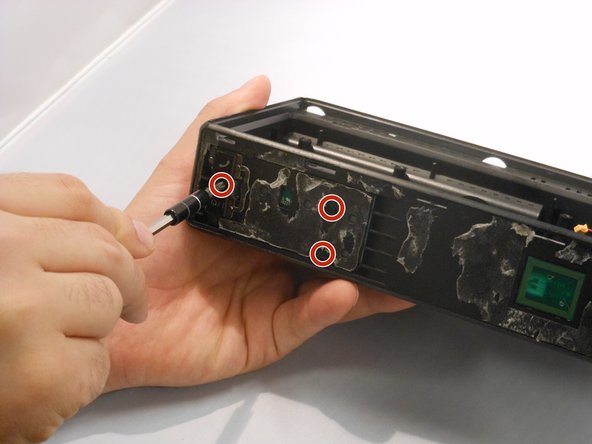
    • To remove the speaker grill, first push down slightly on the 2 plastic hook tabs to release them, then push the middle plastic screw tab out.

  5. Sony SRS-X5 Button Pad Replacement: paso 5, imagen 1 de 1
    • Remove the eight 0.5mm Phillips #1 screws from the speaker panel.

  6. Sony SRS-X5 Button Pad Replacement: paso 6, imagen 1 de 2 Sony SRS-X5 Button Pad Replacement: paso 6, imagen 2 de 2
    • Using the plastic opening tool, flip open the speaker panel.

  7. Sony SRS-X5 Button Pad Replacement: paso 7, imagen 1 de 3 Sony SRS-X5 Button Pad Replacement: paso 7, imagen 2 de 3 Sony SRS-X5 Button Pad Replacement: paso 7, imagen 3 de 3
    • Unplug the 6-pin speaker connector and 2-pin microphone connector from the motherboard by squeezing the sides of the plastic ends.

  8. Sony SRS-X5 Button Pad Replacement, Button Pad: paso 8, imagen 1 de 1
    • Unplug the electrical cord from the button pad.

  9. Sony SRS-X5 Button Pad Replacement: paso 9, imagen 1 de 2 Sony SRS-X5 Button Pad Replacement: paso 9, imagen 2 de 2
    • Using both the plastic opening tool and metal spudger gently pry open the cover from the top of the speaker.

  10. Sony SRS-X5 Button Pad Replacement: paso 10, imagen 1 de 1
    • Gently remove the cover using your hands.

    • Make sure you remove the cover gently so it doesn't break.

  11. Sony SRS-X5 Button Pad Replacement: paso 11, imagen 1 de 2 Sony SRS-X5 Button Pad Replacement: paso 11, imagen 2 de 2
    • Using the Phillips #00, unscrew the three 3.32mm screws keeping the button board in place.

  12. Sony SRS-X5 Button Pad Replacement: paso 12, imagen 1 de 1
    • Gently remove the button pad from the speaker.

Conclusión

To reassemble your device, follow these instructions in reverse order.

0 comentarios

Agregar Comentario

Ver Estadísticas:

Ultimas 24 horas: 0

Ultimos 7 días: 2

Ultimos 30 días: 9

Todo El Tiempo: 1,026