Saltar al contenido principal

Esta guía ha sufrido modificaciones. Revisa la última versión sin revisar.

Sony M-430 Microcassette-Corder Back Cover Replacement

Qué necesitas

  1. Sony M-430 Microcassette-Corder Back Cover Replacement, Battery: paso 1, imagen 1 de 1
    • Find the arrow on the battery cover on the back of the device.

    • While pressing down on the arrow, slide the cover towards the bottom of the recorder until it clicks.

  2. Sony M-430 Microcassette-Corder Back Cover Replacement: paso 2, imagen 1 de 2 Sony M-430 Microcassette-Corder Back Cover Replacement: paso 2, imagen 2 de 2
    • Lift the cover and remove the batteries.

  3. Sony M-430 Microcassette-Corder Back Cover Replacement, Back Cover: paso 3, imagen 1 de 2 Sony M-430 Microcassette-Corder Back Cover Replacement, Back Cover: paso 3, imagen 2 de 2
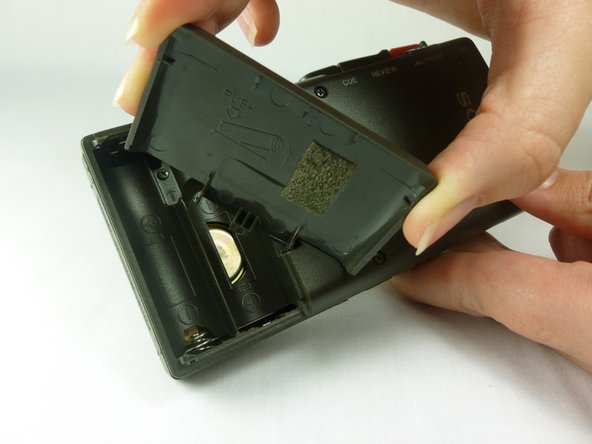
    • Remove the battery cover by first tilting it so it is at a right angle with the rest of the device.

    • Next, twist it to the side as shown in the second picture. The lid should simply snap off.

    • Be careful not to apply too much force, as the lid may break.

  4. Sony M-430 Microcassette-Corder Back Cover Replacement: paso 4, imagen 1 de 2 Sony M-430 Microcassette-Corder Back Cover Replacement: paso 4, imagen 2 de 2
    • Use a #00 Phillips head screwdriver to remove the four (1.7x16 mm) screws from the back case.

    • Next, use the same screwdriver to unscrew the (1.7X5 mm) screw, which is located inside the battery compartment.

  5. Sony M-430 Microcassette-Corder Back Cover Replacement: paso 5, imagen 1 de 1
    • Use a spudger to push in the two tabs located on the bottom of the device.

    • It works best to push the tabs at an upward angle (towards the top of the battery compartment)

    • It may take a decent amount of force in order to push in the tabs.

  6. Sony M-430 Microcassette-Corder Back Cover Replacement: paso 6, imagen 1 de 1
    • With a firm grip on the larger half, remove the back cover by lifting first on the battery area.

    • The back cover should lift cleanly off.

Conclusión

To reassemble your device, follow these instructions in reverse order.

Una persona más ha completado esta guía.

Matt Teare

Miembro Desde 01/20/12

35 Reputación

3 Guías creadas

Equipo

Cal Poly, Team 10-34, Amido Winter 2012 Miembro de Cal Poly, Team 10-34, Amido Winter 2012

CPSU-AMIDO-W12S10G34

4 Miembros

7 Guías creadas

0 comentarios

Agregar Comentario

Ver Estadísticas:

Ultimas 24 horas: 0

Ultimos 7 días: 3

Ultimos 30 días: 9

Todo El Tiempo: 2,055