Saltar al contenido principal

Sony DVP-NS325 Motherboard Replacement

Qué necesitas

  1. Sony DVP-NS325 Motherboard Replacement, Outer Case: paso 1, imagen 1 de 3 Sony DVP-NS325 Motherboard Replacement, Outer Case: paso 1, imagen 2 de 3 Sony DVP-NS325 Motherboard Replacement, Outer Case: paso 1, imagen 3 de 3
    • Use a Phillips screwdriver to unscrew the five screws.

  2. Sony DVP-NS325 Motherboard Replacement: paso 2, imagen 1 de 3 Sony DVP-NS325 Motherboard Replacement: paso 2, imagen 2 de 3 Sony DVP-NS325 Motherboard Replacement: paso 2, imagen 3 de 3
    • Use the Philips screwdriver to remove the screws located on the sides and the back.

    • Not shown are the right side screw and the middle screw.

  3. Sony DVP-NS325 Motherboard Replacement: paso 3, imagen 1 de 1
    • Use a spudger to separate the case from the chassis.

    • Remove the case.

  4. Sony DVP-NS325 Motherboard Replacement, Motherboard: paso 4, imagen 1 de 3 Sony DVP-NS325 Motherboard Replacement, Motherboard: paso 4, imagen 2 de 3 Sony DVP-NS325 Motherboard Replacement, Motherboard: paso 4, imagen 3 de 3
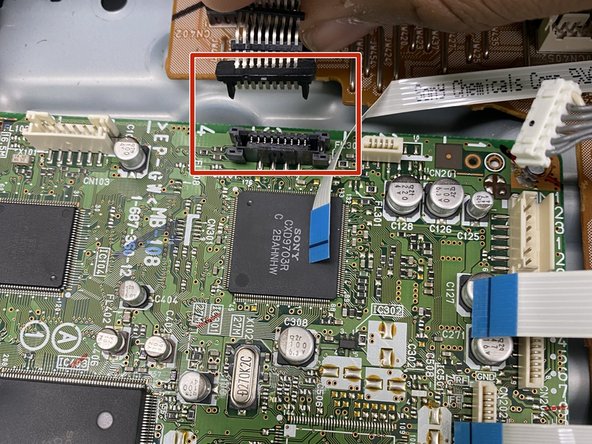
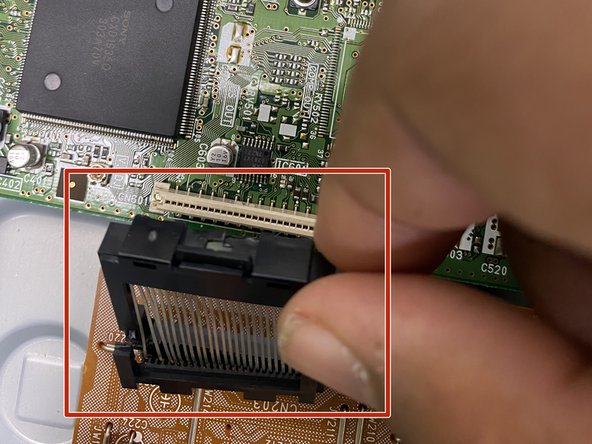
    • Remove all cables that are connected to the motherboard by pulling upwards from the motherboard.

    • Grip as close to the connectors as possible. Avoid pulling on the wires/ribbon cables.

  5. Sony DVP-NS325 Motherboard Replacement: paso 5, imagen 1 de 1
    • Use a Phillips screwdriver to remove all screws located in the 4 corners of the motherboard.

  6. Sony DVP-NS325 Motherboard Replacement: paso 6, imagen 1 de 1
    • Pull the motherboard up and out of the device.

Conclusión

To reassemble your device, follow these instructions in reverse order.

Una persona más ha completado esta guía.

0 comentarios

Agregar Comentario

Ver Estadísticas:

Ultimas 24 horas: 0

Ultimos 7 días: 1

Ultimos 30 días: 6

Todo El Tiempo: 75