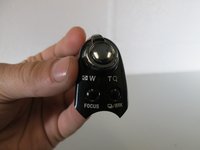
Saltar al contenido principal

Sony Cyber-shot DSC-HX1 Button Assembly Replacement

Qué necesitas

  1. Sony Cyber-shot DSC-HX1 Button Assembly Replacement, Battery: paso 1, imagen 1 de 1
    • Make sure the surface you place the screen on is clean of debris and dust. Otherwise you risk scratching your screen.

    • Place the camera with the bottom facing you and the lens facing up.

  2. Sony Cyber-shot DSC-HX1 Button Assembly Replacement: paso 2, imagen 1 de 1
    • Push down and away from the camera to the left on the indicated indentation in the battery cover. The compartment should slide open as shown.

  3. Sony Cyber-shot DSC-HX1 Button Assembly Replacement: paso 3, imagen 1 de 2 Sony Cyber-shot DSC-HX1 Button Assembly Replacement: paso 3, imagen 2 de 2
    • Push the blue tab towards the camera body to the right, while simultaneously pulling out the battery.

    • The battery is not shown here. However, normally the battery would be in the displayed compartment.

  4. Sony Cyber-shot DSC-HX1 Button Assembly Replacement, Button Assembly: paso 4, imagen 1 de 1
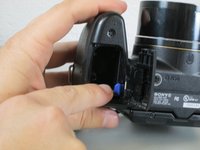
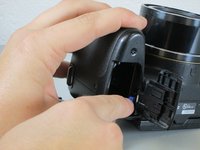
    • On the top of the inside the battery compartment, remove the #00 6.0 mm Phillips screw.

  5. Sony Cyber-shot DSC-HX1 Button Assembly Replacement: paso 5, imagen 1 de 2 Sony Cyber-shot DSC-HX1 Button Assembly Replacement: paso 5, imagen 2 de 2
    • Lift the button housing from its position on top of the camera.

Conclusión

To reassemble your device, follow these instructions in reverse order.

Una persona más ha completado esta guía.

Brianna Greenlaw

Miembro Desde 04/06/15

1,181 Reputación

5 Guías creadas

Equipo

Cal Poly, Team 17-3, Forte Spring 2015 Miembro de Cal Poly, Team 17-3, Forte Spring 2015

CPSU-FORTE-S15S17G3

4 Miembros

10 Guías creadas

0 comentarios

Agregar Comentario

Ver Estadísticas:

Ultimas 24 horas: 0

Ultimos 7 días: 1

Ultimos 30 días: 8

Todo El Tiempo: 839