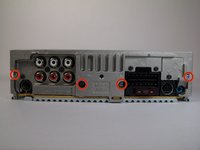
Saltar al contenido principal

Sony CDX-GT540UI Back Panel Replacement

Qué necesitas

  1. Sony CDX-GT540UI Back Panel Replacement, Wiring Harness: paso 1, imagen 1 de 1
    • Locate the clip on the wiring harness.

  2. Sony CDX-GT540UI Back Panel Replacement: paso 2, imagen 1 de 2 Sony CDX-GT540UI Back Panel Replacement: paso 2, imagen 2 de 2
    • Press down on the clip like you would an Ethernet cable.

    • Rock harness side to side, pulling gently towards you until harness detaches.

  3. Sony CDX-GT540UI Back Panel Replacement, Back Panel: paso 3, imagen 1 de 1
    • Locate back panel.

  4. Sony CDX-GT540UI Back Panel Replacement: paso 4, imagen 1 de 3 Sony CDX-GT540UI Back Panel Replacement: paso 4, imagen 2 de 3 Sony CDX-GT540UI Back Panel Replacement: paso 4, imagen 3 de 3
    • Remove four 11.5mm Phillips #00 (silver) screws from back panel.

  5. Sony CDX-GT540UI Back Panel Replacement: paso 5, imagen 1 de 1
    • Remove four 9.5mm Phillips #00 (black) screws from back panel.

    • Remove two 7.5mm Phillips #00 (black) screws from back panel.

  6. Sony CDX-GT540UI Back Panel Replacement: paso 6, imagen 1 de 1
    • Remove back panel.

    • On the back panel there will be thermal (white) paste. Do not touch.

Conclusión

To reassemble your device, follow these instructions in reverse order.

2 personas más completaron esta guía.

Odelkys Marquez

Miembro Desde 09/22/14

1,091 Reputación

7 Guías creadas

Equipo

USF Tampa, Team 10-2, Brown Fall 2014 Miembro de USF Tampa, Team 10-2, Brown Fall 2014

USFT-BROWN-F14S10G2

3 Miembros

7 Guías creadas

0 comentarios

Agregar Comentario

Ver Estadísticas:

Ultimas 24 horas: 0

Ultimos 7 días: 0

Ultimos 30 días: 2

Todo El Tiempo: 966