Saltar al contenido principal

Sony BDP-S1 Fan Replacement

Qué necesitas

  1. Sony BDP-S1 Fan Replacement, Sony BDP-S1: Getting inside the device: paso 1, imagen 1 de 2 Sony BDP-S1 Fan Replacement, Sony BDP-S1: Getting inside the device: paso 1, imagen 2 de 2
    • Remove the 12mm screws with the Philips #2 screwdriver which keep the plastic panels in place.

    • Don't forget, there are two more 12mm screws on the other side as well.

  2. Sony BDP-S1 Fan Replacement: paso 2, imagen 1 de 3 Sony BDP-S1 Fan Replacement: paso 2, imagen 2 de 3 Sony BDP-S1 Fan Replacement: paso 2, imagen 3 de 3
    • First, remove the three 12mm black screws holding the top panel on (Phillips #2).

    • Then, remove the two 12mm black screws - one on each side of the back of the device - holding the top panel on.

    • Lastly, remove the three 12mm black screws on each side of device.

  3. Sony BDP-S1 Fan Replacement: paso 3, imagen 1 de 3 Sony BDP-S1 Fan Replacement: paso 3, imagen 2 de 3 Sony BDP-S1 Fan Replacement: paso 3, imagen 3 de 3
    • Carefully lift up the top panel, because there are two blue ribbon cables that must be disconnected before removing the panel, and we do NOT want them to break.

    • After gently disconnecting the two ribbon cables (you can just pull them out with your hand), take the top off and set it to the side.

  4. Sony BDP-S1 Fan Replacement: paso 4, imagen 1 de 3 Sony BDP-S1 Fan Replacement: paso 4, imagen 2 de 3 Sony BDP-S1 Fan Replacement: paso 4, imagen 3 de 3
    • After the top is off, you'll see that there are two metal bars that go across the top of the device.

    • Remove each bar by unscrewing the two 10mm silver screws on each end.

  5. Sony BDP-S1 Fan Replacement, Fan: paso 5, imagen 1 de 3 Sony BDP-S1 Fan Replacement, Fan: paso 5, imagen 2 de 3 Sony BDP-S1 Fan Replacement, Fan: paso 5, imagen 3 de 3
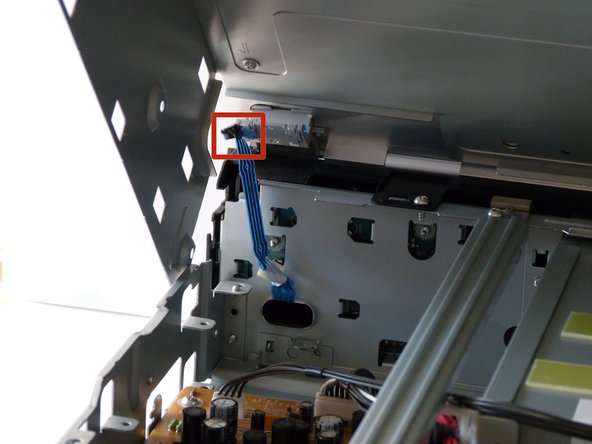
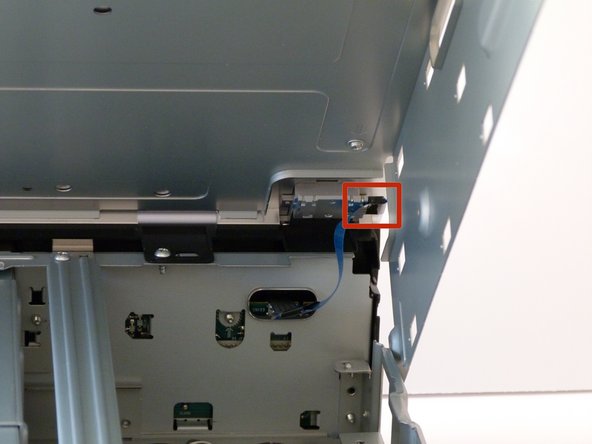
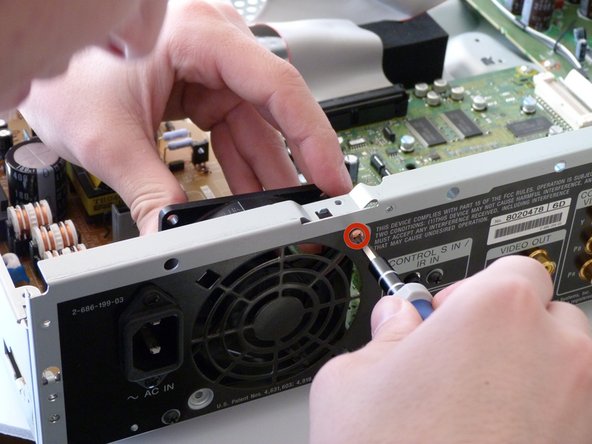
    • First we need to unscrew the fan from before we can remove it.

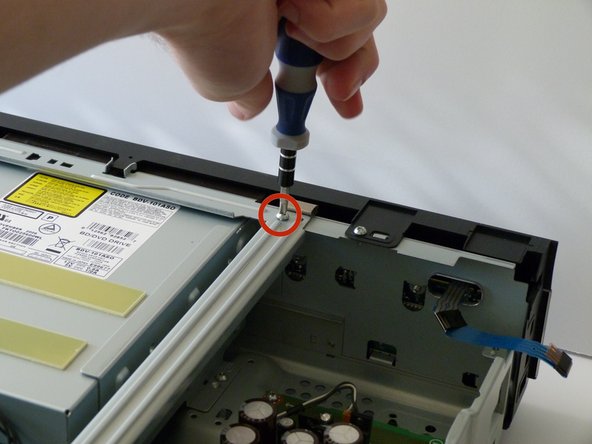
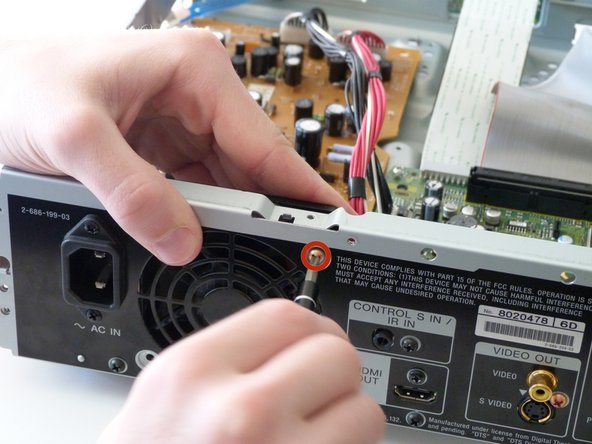
    • Remove both copper colored 10mm screws with a #2 phillips screwdriver.

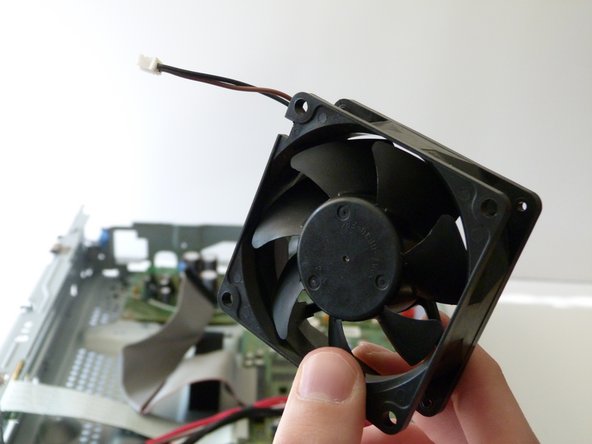
    • As you remove the second screw, pull the fan inward to remove it from the remainder of the case. It should now only be connected to the case through a cable attached to the circuit board.

    • The disk drive is removed in the pictures, however this is not necessary to replace the fan and can be ignored.

  6. Sony BDP-S1 Fan Replacement: paso 6, imagen 1 de 3 Sony BDP-S1 Fan Replacement: paso 6, imagen 2 de 3 Sony BDP-S1 Fan Replacement: paso 6, imagen 3 de 3
    • We will now completely remove the fan from the player.

    • Carefully detach the cable from the fan to the circuit board by pulling on the cable connecting the fan to the circuit board.

    • You are now ready to install the new fan!

Conclusión

To reassemble your device, follow these instructions in reverse order.

Nicolas Kennedy

Miembro Desde 01/26/14

111 Reputación

1 Guía escrita

Equipo

Cal Poly, Team 9-30, Maness Winter 2014 Miembro de Cal Poly, Team 9-30, Maness Winter 2014

CPSU-MANESS-W14S9G30

3 Miembros

5 Guías creadas

2 comentarios

We're can i get a replacement fan for my Blu- ray player model BDV-E4100. HEEEEELP PLEASE.

darren cottenham - Contestar

Where can I get a replacement fan for my blue-ray player.

Christopher Meriweather - Contestar

Agregar Comentario

Ver Estadísticas:

Ultimas 24 horas: 0

Ultimos 7 días: 3

Ultimos 30 días: 15

Todo El Tiempo: 2,524